We are a collection of Minneapolis folks cooking, preserving, and harvesting local, seasonal foods. This blog-share is meant to inspire greater culinary genius, as well as continued local food invention. What are YOU concocting in that kitchen of yours?

12.30.2020

Cranberry Orange Olive Oil Bread (GF)

I have some more days off now, and it was with great anticipation and joy for some unscheduled time that I made this bread, to have with my morning coffee and ponder the new year ahead. It felt like a lovely treat this morning after shoveling, that I ate while gazing out at the snowy world. I am calling it bread, though the original recipe from Mark's Daily Apple calls it cake. It definitely seems more (sweet) bread-like to me. And is SO GOOD, perhaps one of the best almond flour recipes I've had. It is moist and has a really nice crumb. I want to add more cranberries next time, because the tart bites are really lovely. It isn't overly sweet, and the coconut butter drizzle on top is genius. I feel really happy to have this waiting for me these coming mornings as we approach the new year! Yay!

  • 2 cups almond flour
  • ½ cup coconut sugar, Swerve or granular monk fruit sweetener
  • ¼ cup ground flaxseed
  • ¼ cup tapioca starch
  • 1 tsp. baking powder
  • ½ tsp. baking soda
  • Pinch of salt
  • ½ cup olive oil
  • ¼ cup coconut milk
  • 3 eggs
  • 1 Tbsp. orange juice
  • ½ tsp. vanilla extract
  • Zest from ½ orange
  • ½ cup fresh cranberries (or more!)
  • Drizzle (optional): melted coconut butter + coconut milk to thin
  1. Preheat your oven to 325 degrees Fahrenheit. In a large bowl, combine the almond flour, sweetener, flaxseed, tapioca starch, baking powder, baking soda and salt. In another bowl, combine the olive oil, coconut milk, eggs and vanilla extract. Combine the ingredients and whisk until well mixed. Add in the orange juice, orange zest and cranberries.
  2. Pour the batter into a parchment-lined loaf pan. Bake for 45-50 minutes or until the top is golden and a toothpick comes out clean or the internal temperature on a food thermometer reads about 190 degrees Fahrenheit. Allow the bread to cool.
  3. If you are making a glaze, combine coconut butter with a small amount of coconut milk or milk of choice until it reaches your desired thickness. You can also add a squeeze of orange juice. Drizzle the glaze on top before slicing and serving. 
My notes to self for next time I make this: walnuts might be a nice addition along with increased cranberries. Also, because I lately love cointreau, the coconut manna thinned with cointreau might be the perfect touch. 😁

12.27.2020

Hackberry milk (and more)

A friend tipped me off to hackberries earlier this fall, and once I had identified a hackberry tree, I began seeing them everywhere! They are all over Lake Hiawatha Park and the golf course, most easily identified by their warty bark, and of course the tiny berries. The only problem is that the branches tend to be high, and a step ladder, if not extension ladder, might be called for in order harvest the berries. 

Hackberries are very interesting - they are mostly seed, which is hard and crunchy and maybe a bit much for the teeth. They taste a bit like dates, or prunes, I think; sort of a spicy sweetness. I have been eating a few of them as a I pass by a tree, but it's a pretty firm crunch. The seeds are edible bits of protein and fat, and the berry is very thin. It means hackberries are a good source of energy with the seed AND fruit bit, especially because they do not dry up or freeze and are thus available throughout the winter. 

I'd been meaning to bring a ladder to the park for some weeks, but when I was out walking on Christmas, I came upon some trees that had a few reachable branches. That, and the recent blizzard knocked several little branches to the ground, so I could collect enough to do something with. They are tiny, and it took me close to half an hour to collect about a cup and a half of them, so this is not going to a be a winter staple, most likely. But!! They are so tasty and unusual and I'm quite into them. 

I ground the berries up in a mortar and pestle to break down the seeds (a high end vitamix type blender would also do the job) and had to really mash to crunch them all. The berries become a paste, most of which I used to make hackberry "milk," though I saved a little out to make a little candy hackberry ball. 

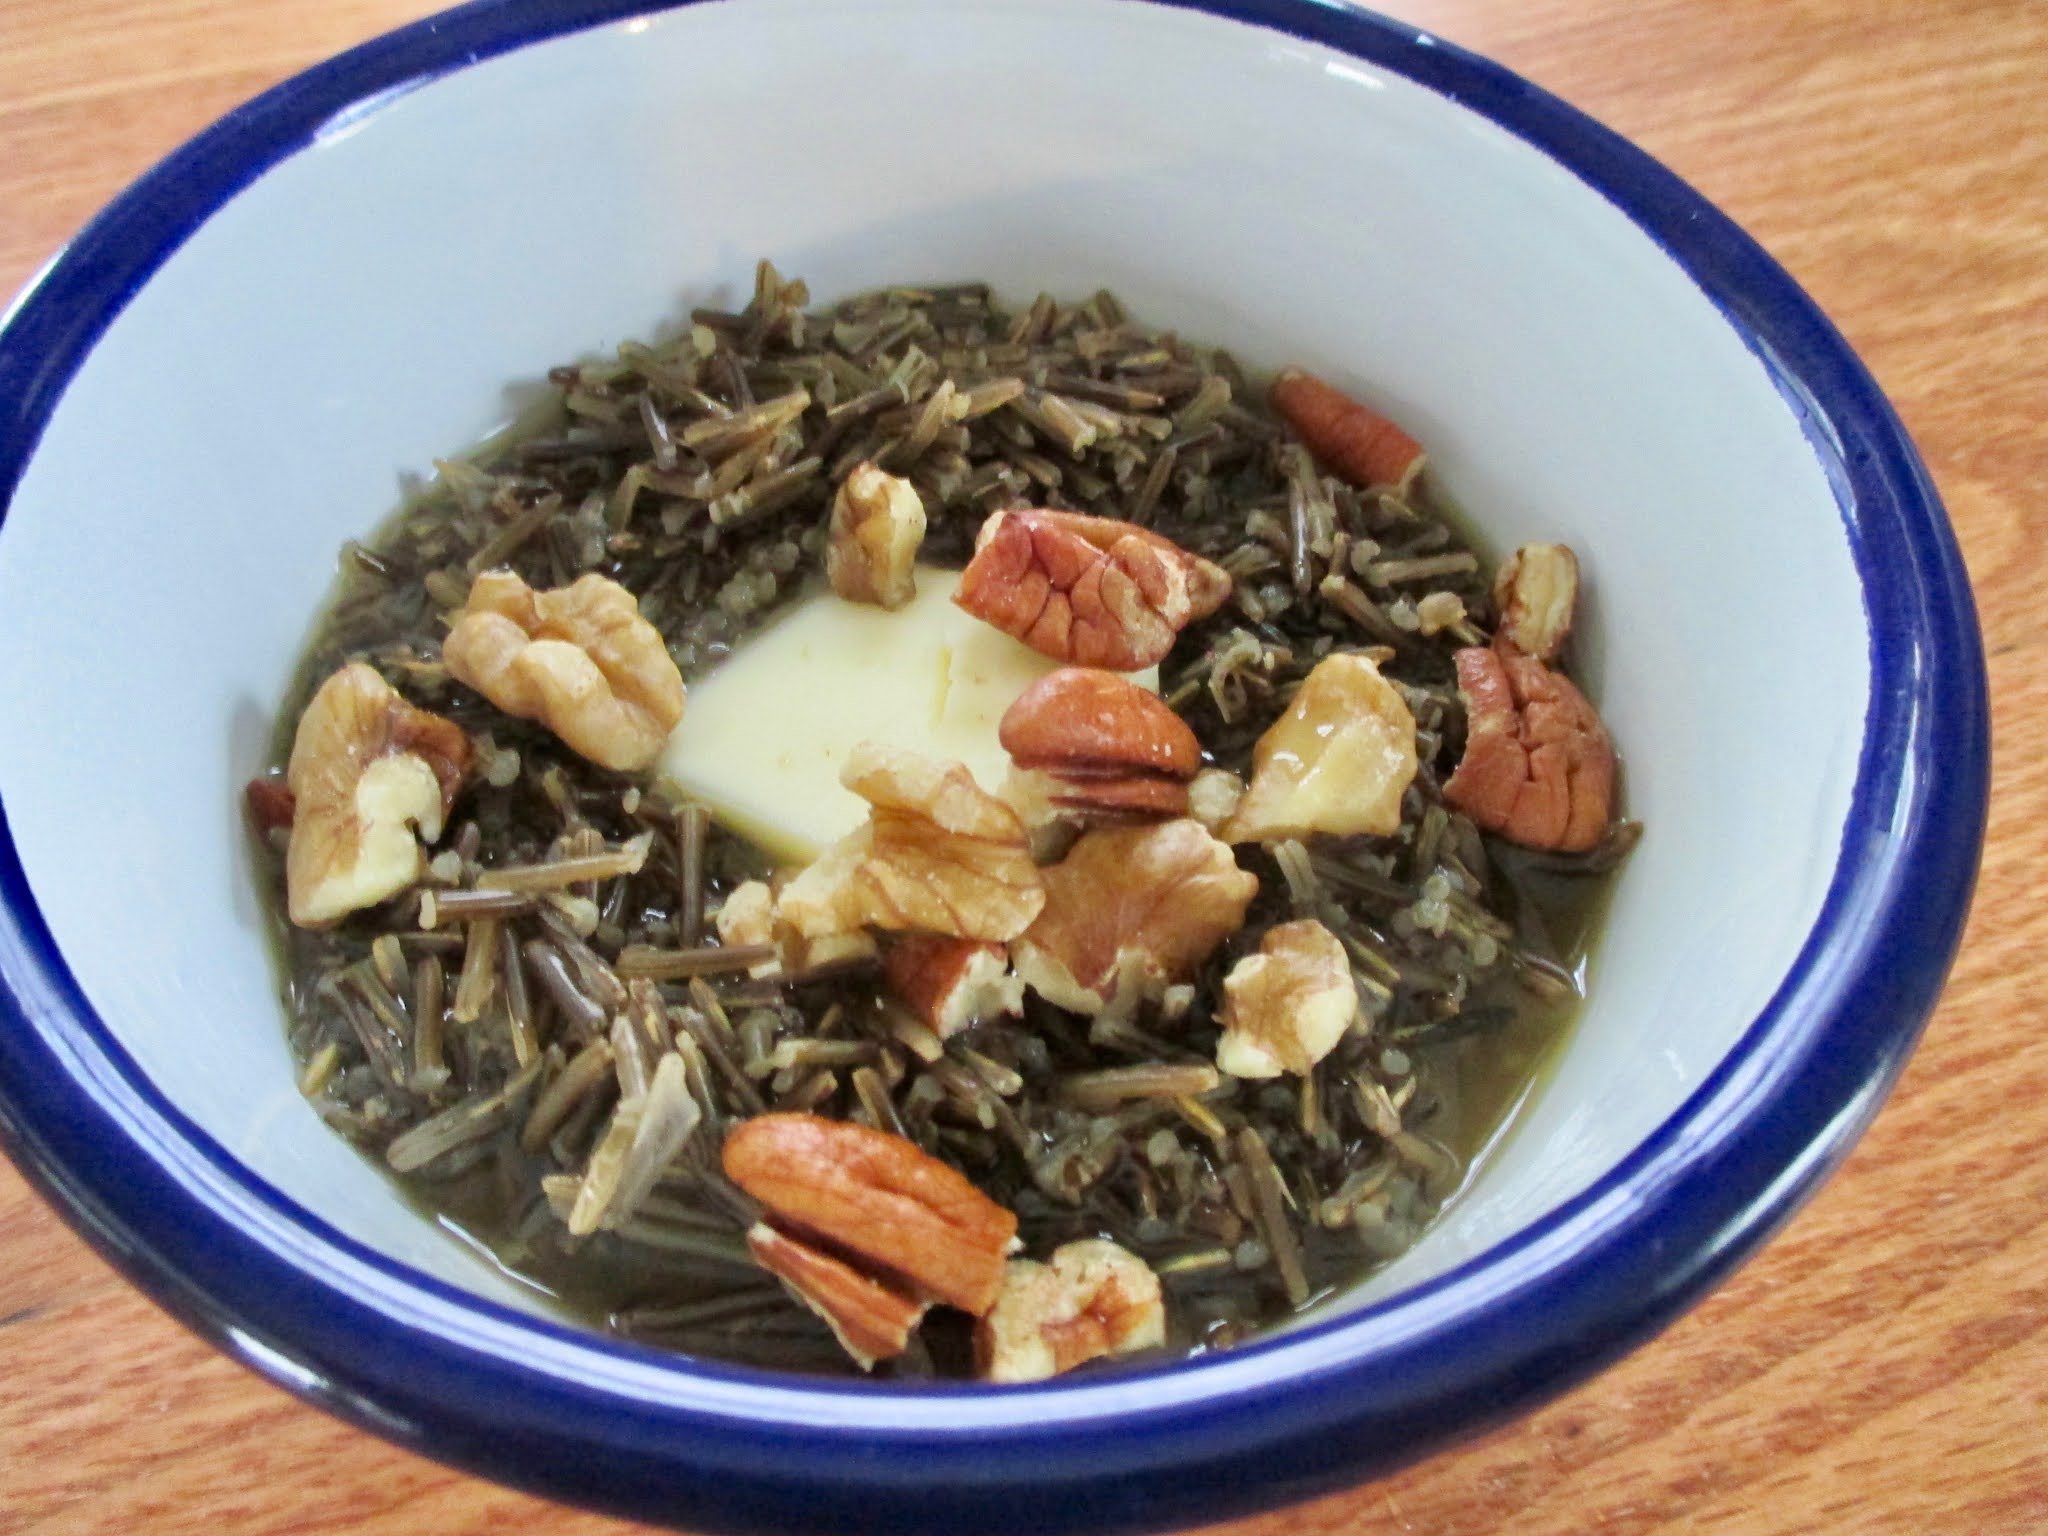
The milk was delicious (especially to drink warm), and so was the by-product remains, which I mixed with a bit of cream to make something like porridge. Crunchy, grapenut-like porridge. Yum, it was really good, and I love when you can make multiple things out of the same foraged item! You can drink the "milk" plain, or I used mine on some wild rice porridge (along with butter and some nuts). I also used some to make hot chocolate.


Hackberry milk

  • 1 c hackberries
  • 2 c water

Crush hackberries in a mortar and pestle until the seeds are all broken up and they form a paste. Combine the paste with 2 c water, and bring to a simmer in a small saucepan (not a boil, barely let the bubbles form). Stir. Turn the heat to low and just barely simmer for 20 minutes (I set mine on the low burning woodstove, which was perfect). Strain mixture through cheesecloth and consume!

*You could squeeze the mixture to capture all of the liquid and disgard the pulp, or reserve the paste with some liquid intact, mix with cream, and eat like porridge. Drink as a beverage, or use like you would coconut milk in cooking.

"Milk" will last for a week in the fridge, and is mildly sweet. Makes about 1 1/2 c.

12.25.2020

Spiced Honey Bourbon Old Fashioned

My covid Christmas Eve plans involved sharing a couple of cocktails with a few friends, and a zoom call in which to drink said cocktails and eat dinner together. We shared some stories and read a Moomin adventure of Midwinter, which seemed fitting. My contribution was an old fashioned with a  honey simple syrup spiced with rosemary, cardamom, ginger and cinnamon. I topped it off with a few bourbon cherries that I put away last summer, and a sprig of rosemary from the rosemary plant in my kitchen. It was delicious. The rosemary addition really hits the spot - more winter spiced, somehow. Afterwards I ate the ginger and chewed on the rosemary from the simple syrup making - honey coated goodness! 

The original recipe uses a bit more juice than I did and is served up; I had mine over ice and I added the cherries and a little of their liquid, hence the red hue. Mine was perhaps stronger than the original, which could be remedied with a bit more juice. I forgot to take a final drink photo, but it was the perfect thing to make in a larger batch and pour servings over ice. Imagine this concoction in a glass with a lemon peel, rosemary, and cherries.

Spiced Honey Syrup, serves 6

  • 1/2 cup honey
  • 2 sprigs fresh rosemary, plus more for serving
  • 2 cinnamon sticks (or 1 teaspoon ground cinnamon)
  • 1 tablespoon cardamom pods (or 1/2 teaspoon ground cardamom)
  • 1 inch fresh ginger, sliced
  • zest of 1 orange
Old Fashioned (for 1 - multiply by 6 to make large batch)
  • 2 ounces (1/4 cup) bourbon
  • 1/2 ounce (1 tablespoon) lemon juice
  • 1/2 ounce (1 tablespoon) orange or clementine juice
  • 1-2 dashes orange bitters
  • 1-2 ounces (2-4 tablespoons) spiced honey syrup
  • Garnish: bourbon cherries, rosemary, & orange or lemon peel 
 
To make the spiced honey syrup: In a medium pot, bring 1/2 cup water, the honey, rosemary, cinnamon, cardamom, and ginger to a boil over high heat. Boil 2-3 minutes, then remove from the heat. Stir in the orange zest and vanilla. Let cool. This syrup makes enough for about 6 drinks.
 
Mix all ingredients together (can do this in a larger batch if making en masse) in a glass with ice. Stir, and  garnish with bourbon cherries (opt), rosemary sprig, and lemon peel.

12.23.2020

Finnish Salmon Soup

Through an order mishap, I had a spare serving of salmon from my online order at Coastal Seafoods, and not a lot of time to eat it in, what with already making oyster stew, gravlax, and lamb shanks in the coming days. So tonight I made a solo (plus) portion of this salmon soup. Because it is blizzarding, and I was already drinking Austrian mulled wine, so why not carry forth with more warm deliciousness?! 

This soup was really easy and perfect tonight - buttery broth, fresh dill, creamy potatoes and tender salmon - all while the wind howls and the snow falls, what is not to love? This soup is ready in about 30 minutes, and I made the fish broth as suggested, by boiling the salmon skin in water for 10 minutes. It totally works, though it is a pretty light broth. I thought I had some shrimp shells stashed in the freezer somewhere for just this sort of need, but I couldn't locate them if I do. If you have clam broth, or fish stock around, I think that would make things even tastier. But if not, this does the job.

The recipe is from a food blogger I had forgotten about; I made her nut and fruit paleo bread some years ago, and was thinking about making it again in recent days, which is what prompted me to revisit her blog and subsequently see this recipe. The only thing I did differently was to use onion instead of leeks, (I had no leek), and I had a red potato, not a russet. I am pasting her original recipe below. (It was easy to shrink to 1/3, though this would make excellent leftovers.)

Ingredients

  • 1 lb skin-on salmon filet
  • 4 Tbsp unsalted butter
  • 1 large leek, trimmed, sliced, and well rinsed
  • 5 cups water (you can also use fish stock)
  • 1 lb russet potatoes, peeled and diced
  • 1 large carrot, sliced
  • 1 cup (10g) fresh dill for garnish, finely chopped, divided
  • 1 cup (250ml) heavy cream
  • 1/4 tsp allspice, use more to taste
  • salt and pepper to taste 
  • Remove the skin from the salmon and cut into largish chunks. Remove any small pin bones and discard. Reserve the skin.
  • Melt the butter in a soup pot and saute the leeks for 10 minutes, or until nice and soft.
  • While the leeks are cooking, put 5 cups of water and the reserved fish skin in a saucepan and bring to a boil, turn down the heat and simmer gently for 10 minutes. Note: if you are using fish stock you can skip this step.
  • Strain the broth and add to the pan with the leeks, along with the potatoes, carrots, and half of the fresh dill. Cook for another 10 minutes, or until the potatoes are just tender.
  • Add the salmon chunks to the soup along with the cream and allspice, and gently simmer on low heat until cooked through, just a few minutes. Add the remaining dill, and salt and pepper to taste.
     

12.21.2020

Gochujang meatballs and Korean potato pancakes

I am a fan of meatballs. They are easy, they are cheap, and they make good leftovers. So I was excited when I came across a Korean style-meatball recipe, primarily meaning the recipe includes gochujang (Korean chili paste), which I had never had before. In the interest of minimizing shopping trips, I checked the co-op when I was there last for gochujang, which they had and I bought. United Noodle would have many more options! I did not read the label until after I made the meatballs, upon which I saw that there is wheat flour in this particular version. I ate some meatballs anyways, and so far am not having gluten intolerant reactions. (I looked up gochujang paste ingredients, which were mostly in Korean, and seem to often include barley, sometimes wheat. So. One could make their own gochujang, at least a modified version of it, if you want gluten allergen certainty.)

I thought the meatballs turned out great - they were more moist than my usual meatballs, which made me wonder if I often overcook them, or if this particular combo of an egg and half cup of almond flour really made the difference. The original recipe from Food52 also included a gochijang/apricot glaze that I did not make, and is probably delicious, because adding a little more sweet usually is! Instead I ate the meatballs with kimchi, which was really nice.

I decided to also try making korean potato pancakes, though I used my veggie julienner rather than a grater (because I only have a very tiny or extra large grater), and I did a combo of rutabega, potato, and a carrot instead of all potato. And added coconut flour and an egg. So. It's maybe more accurate to say korean-inspired potato (and more) pancake. I did add some green onion, and made a sauce with tamari and rice wine vinegar, which is the thing that distinguishes them from my latkes. They were delicious - I mean, you can't go wrong, ever really, with fried potato/root veggie pancake things. (The sauce was also good with the meatballs.)

Gochujang Meatballs, serves 2-4

  • 2 green onions, very thinly sliced
  • 2 garlic cloves, minced
  • 1 egg, lightly beaten
  • 1 pound ground beef
  • 1/2 cup almond flour
  • 2 tablespoons gochujang (Korean chili paste)
  • 2 tsp ground ginger
  • 1 teaspoon kosher salt
  • 1/2 teaspoon ground pepper

Preheat oven to 350. Combine all of the ingredients well. Form into 1" balls and place on a cookie sheet. Bake for 12-15 minutes. I put mine under the broiler for the last few minutes to brown the tops. Serve with kimchi! (Or see original recipe linked above for apricot glaze if you want to eat more appetizer style.)

Gamjajeon-inspired Potato Pancakes, serves 2

  • 1 medium red or yellow potato, shredded
  • 1+ c shredded rutabega
  • 1 shredded carrot
  • 1/4 small onion, minced
  • 1 tsp salt (or more to taste)
  • 1 egg
  • 1 T coconut flour 
  • oil for frying (I used coconut oil)

Combine all ingredients. Mixture should be moistened, but still fairly dry. Heat oil in a skillet on med-high heat. Pile handful or large spoonful of veggie mix in pan and flatten. Fry 4-5 minutes on each side, until crisp and browned. Set aside and continue frying until all "batter" is used.

Make a dipping sauce of:

  • 1 T tamari
  • 1 tsp rice vinegar
  • 1/2 tsp honey or sweetener of choice
  • 1/2 tsp pepper
  • 1 tsp water

*I ate leftover meatballs with Okonomiyaki the next night (this time it was just cabbage, carrots and green onion - no nettles), with the sauce listed there and some mayo. Also very good. I also thought about using meatballs in egg foo young...maybe that is what will happen to the last few!

12.20.2020

Egg Fried Cabbage-Rice

I have been assisting for a training the past few days, and last night I watched several Uncle Roger videos for some comic relief. I love Nigel Ng! My favorite is Uncle Roger watching Jamie Oliver make egg fried rice, 😂 though last night I watched Uncle Roger watch Gordon Ramsey make the dish. I was also mesmerized by this korean egg fried rice video of eggs cracked into super hot oil, bubbling and puffing up before being scrambled across the wok, and then tossed in the air with the rice and vegetables. The images clearly inspired my breakfast this morning, along with the leftover sauteed cabbage/onions on the stovetop that never made it into the fridge yesterday. Uncle Roger would definitely NOT approve of my cabbage-in-lieu-of-rice maneuver. But, I thought it turned out delicious. 

I am pasting Uncle Roger's egg fried rice recipe underneath what I made - should you want to make it and use actual rice! (Note: I had leftover onions and cabbage from the day before that I chopped up fine to use in place of rice. If you do not have this, start with the onions and cabbage and fry for a couple of minutes before you add the eggs.)

Serves 1

In the wok!

  • 2 T sesame oil
  • 1 garlic clove, minced
  • 1/2" piece of ginger, peeled and minced 
  • 2 or 3 eggs
  • small carrot, diced small
  • 1+ cups (leftover) cabbage and onion, chopped fine
  • 1 T soy sauce
  • salt to taste
  • 1-2 green onions

Heat oil in a wok on high heat. Add garlic and ginger and fry for a few seconds. Crack eggs into the oil, and stir to mix and cook. Break apart. Add carrots and cooked cabbage and onions. Stir and combine. Toss in the air to give some loft!! Add soy sauce and salt, and green onion. Toss again, and serve. 

Uncle Roger’s egg fried rice recipe

  • Heat 1tbsp sesame oil in a skillet or wok. 
  • Add two chopped garlic cloves and a piece of chopped ginger and fry for a few seconds. 
  • Add a large chopped onion and 2 chopped celery stalks and saute. 
  • Stir in a cup of corn kernels, 2 chopped carrots, 2 diced green bell peppers and a shredded cabbage and saute for a couple of minutes (Don’t overcook, leave some crunch). 
  • Move the veggies to a side of the pan and pour in three eggs. Keep scrambling the eggs until cooked. 
  • Mix it all up and add 1tbsp soy sauce and salt to taste. 
  • Toss in the meat of your choice and let it cook for a couple of minutes. 
  • Stir in three cups of day-old cooked white rice, and let it cook for a few minutes before you turn off the heat. Garnish with chopped spring onion.

12.05.2020

Cocktails and Meatballs

I am having some indulgence with myself tonight and made a fancy cocktail, titled the White Lady, which I think is super funny. I am a person socialized as white, or white-bodied, and I do identify as such, and also am socialized as a "lady" or woman, though I identify as queerly gendered. So. A toast to you, White Lady, of which I have some appreciation and trepidation both. The cocktail choice really came about after I looked at my liquor cabinet (aka, the ledge at the top of the basement stairs next to the cobweb duster) and saw gin and Cointreau, and then typed those 2 words into DuckDuckGo's search engine. Behold, White Lady Cocktail. Which is strong, as straight up cocktails tend to be, and quite tasty.

White Lady and I communed while "Czech Pork Meatballs" (from Mel Joulwan) cooked in the oven, alongside reheated squash and beet soup. (Because right now, it is all squash, beets, and carrots!) The meatballs are a really easy and simple caraway/mustard affair that was tasty with aforementioned sides and some sauerkraut. I did not have parsley, but that would make things more top notch. 

White Lady

1 1/2 ounces gin 

3/4 ounce Cointreau (or another orange-flavored liqueur, though that will tinge your white-ish cocktail) 

3/4 ounce freshly squeezed lemon juice 

lemon twist, for garnish

1. Add the gin, Cointreau, and lemon juice to a cocktail shaker. Fill two-thirds with ice, cover, and shake vigorously until well-chilled, about 15 seconds.
2. Strain into a chilled coupe glass and garnish with a lemon twist.
 

Meatballs

  • 1 clove garlic, minced (about 1 teaspoon)

  • 1/2 tablespoon salt

  • 1 tablespoon caraway seeds

  • 1 teaspoon ground paprika

  • 1 tablespoon ground black pepper

  • 1 cup fresh parsley leaves, minced (about 1/4 cup)

  • 1 tablespoon grainy mustard

  • 2 pounds ground pork

    Mix everything together with your hands and form into 1" meatballs. Bake in a 400 degree oven for 20 minutes (or cook on the stovetop). Serve with kraut!

11.30.2020

Samin Nosrat's Roast Chicken (Marinated in Buttermilk)

My plans changed for Thanksgiving with Gov Walz's (kind of) stay home order, such that I did not travel to see my sister and her kids in Iowa, and instead had a solo retreat for several days at home. It was totally luxurious, particularly because I was busier with work and was ready for vacation. I had stacks of compelling books to read or page through, and had leftovers all weekend! My thanksgiving harvest dinner featured a whole roast chicken, mashed sunchokes, roasted kabocha squash with salad, and roasted savoy cabbage. I also made some cranberry/date sauce at the last minute after remembering I still had frozen cranberries in the freezer from last year. I felt happy that all the veggies were from my garden, and was very pleased with how everything turned out. Yum. 

This chicken preparation is really easy, and yielded a delicious, crispy skinned, very moist chicken. Thanks to my friend Allison for alerting me to this Samin Nosrat recipe, where all you do is salt your chicken and then marinate it in buttermilk for 24 hours before following some helpful instructions about chicken placement in the oven and cooking it. I didn't know Samin before this, but the trailer for her Netflix show Salt, Fat, Acid, Heat looks good, primarily because she seems great. It is on my list for some winter viewing in lieu of my Top Chef obsession, and I like that they list some recipes, including this one, on the website. I didn't see a note until afterwards to use plain yogurt if you have no buttermilk. (I had been wondering b/c I needed to go to three stores for buttermilk!)

Samin's Chicken

  • 3½- to 4-pound (about 1.5 kilograms) chicken
  • Salt
  • 2 cups (475 ml) buttermilk

The day before you want to cook the chicken, remove the wingtips by cutting through the first wing joint with poultry shears or a sharp knife. Reserve for stock. Season the chicken generously with salt and let it sit for 30 minutes.

Stir 2 tablespoons of kosher salt or 4 teaspoons fine sea salt into the buttermilk to dissolve. Place the chicken in a gallon-size resealable plastic bag and pour in the buttermilk. If the chicken won’t fit in a gallon-size bag, double up two plastic produce bags to prevent leakage and tie the bag with a piece of twine.

Seal it, squish the buttermilk all around the chicken, place on a rimmed plate, and refrigerate. If you’re so inclined, over the next 24 hours you can turn the bag so every part of the chicken gets marinated, but that’s not essential.

Pull the chicken from the fridge an hour before you plan to cook it. Preheat the oven to 425°F (220°C), with a rack set in the center position.

Remove the chicken from the plastic bag and scrape off as much buttermilk as you can without being obsessive. Tightly tie together the legs of the chicken with a piece of butcher’s twine. Place the chicken in a 10-inch cast iron skillet or shallow roasting pan.

Slide the pan all the way to the back of the oven on the center rack. Rotate the pan so that the legs are pointing toward the rear left corner and the breast is pointing toward the center of the oven (the back corners tend to be the hottest spots in the oven, so this orientation protects the breast from overcooking before the legs are done). Pretty soon you should hear the chicken sizzling.

After about 20 minutes, when the chicken starts to brown, reduce the heat to 400°F and continue roasting for 10 minutes and then move the pan so the legs are facing the back right corner of the oven.

Continue cooking for another 30 minutes or so, until the chicken is brown all over and the juices run clear when you insert a knife down to the bone between the leg and the thigh.

When the chicken’s done, remove it to a platter and let it rest for 10 minutes before carving and serving. 

This is the mashed sunchoke view - they were so good!

11.17.2020

Kofta

I made a stunning dinner plate last night - it was so beautiful that it felt a shame to be eating it alone! Which is funny because it was largely comprised of leftovers, and also funny because I made and ate it during my one hour dinner break before finishing the day with evening clients. I think I find it so stunning for all the bright colors and the variety, hence the value of leftovers here.

This plate! I was not, for the COVID record, feeling bereft of companionship on this particular day, having spent the weekend with a bevy of beloved people in what turned out to be a rather profound experience of secure attachment, which may also have assisted with the beauty-making here. May we all find nourishment these days, in the multitude of forms that can take, whether we be eating alone or with others. (And may we all get to experience secure attachment. Holy smokes. So much support! Who of us got this? We are all wandering around doing our best, not ever really experiencing the support we needed. Our parents or grandparents either, clearly. I mean, I knew this before, but to actually feel what it is like to have secure guidance and group leadership?! It changes everything.)

So - My dinner plate. The main feature is the kofta, nestled in tahini sauce, accompanied by (leftover) roasted beets and squash with roasted spices. The latter really upped the meal caliber, along with the remains of a simple kale salad. I added a few pickled green tomatoes, some greek yogurt with dried mint, and I roasted a small tomato because one was ripe and red on the counter. :)

If you want to accompany your kofta with some roasted veggies, the highlight of these was that I added some whole cumin and whole coriander when I reheated them in the oven. The toasted spices, plus some dried mint, salt, and fresh ground pepper on top achieved peak deliciousness. Especially dipped in the tahini or the yogurt. 

For the kofta: I did not have parsley, so omitted that and they were still delicious. I include parsley in the recipe below, which is from the cookbook Jerusalem. My version below is modified for just 1 pound of beef (instead of their recipe for half lamb half veal/beef to total 28 ounces), but otherwise sticks to their recipe.

Kofta - serves 3

  • 1 pound ground beef (or lamb)
  • 1/2 small onion, finely chopped
  • 1 clove garlic, minced/crushed
  • 3 T toasted pine nuts (I used walnuts and pecans), chopped
  • 1/4 c parsley, finely chopped
  • 1 jalapeno, finely chopped
  • 3/4 tsp cinnamon
  • 3/4 tsp allspice
  • 1/4 tsp nutmeg
  • 3/4 tsp black pepper
  • 1 tsp salt

Place all ingredients in a bowl and use your hands to mix everything together well. Shape into torpedo like fingers, about 3 inches long (mine were a bit more squat). Press the mix and compress to ensure each kofta is tight and keeps its shape. Arrange on a plate and chill until ready to cook, up to 1 day.

Preheat oven to 425 degrees and make tahini sauce (recipe follows). Heat 1-2 T avocado or olive oil in a cast iron skillet and sear the kofta, making sure they are not cramped in the pan. Sear them on all sides until brown, about 6 minutes total.  Place in the oven for 2-5 minutes if you want them medium or well done (they will be somewhat rare after the searing). 

Tahini sauce:

  • 1/3 c tahini
  • 2 T fresh squeezed lemon juice
  • 1 T olive oil
  • salt
  • 1-2 T water
  • opt garnish: melted butter, finely chopped parsley, toasted pine nuts, sweet paprika

Mix all ingredients together until smooth. Use enough water to make the consistency a bit runnier than honey. 

To serve: Spoon your tahini sauce onto a plate or serving dish, and lay each kofta on top. If you use butter for the kofta, spoon it over each kofta piece right out of the oven (this is extra tasty!), and top with any garnish. Serve immediately. 

11.12.2020

Kabocha squash and kale

I had a long, rather involved morning trying to get a jump start for my car today. I actually did get one early on, only to not let my car run long enough to recharge, then parking it face-in in the garage to not start again. Um...?! This maneuver perhaps tops last week's decision to bring my house plant, aka small tree, outside for sun last week, forgetting that the nights were pretty cool and that the tree would, of course, feel the fall chill and drop its leaves, which it is now doing quietly every hour in my living room.

So. The big need for a functional vehicle today was a grocery store trip because I was out of eggs and cream. So breakfast this morning was keto style coffee (coffee blended with butter and coconut oil) and this delicious squash and kale with breakfast sausage, rather than eggs. Which was not bad. I could eat kale and kabocha squash forever, and this pairing was particularly good. (It is slightly reminiscent of the roasted kabocha with date relish from some years ago, but less fancy and less sweet!) I am coming to the end of my garden kale - I picked a bunch this morning after brushing off snow, and I suspect my next harvest will be the last. No more daily kale bounty!

This recipe is simple, and makes a great side, or eat it for breakfast as I did, with eggs and/or sausage. The fussy part of this dish is that it requires two pans: 1 for roasting the squash, and the other for the stove top. I made my squash more like slices, but you could also cut it up into chunks. I did that with the rest of the squash, which I also cooked to save for later.

  • olive oil and coconut oil
  • half of a red onion, slivered or diced
  • 1 clove garlic, minced
  • 1 bunch kale, stem removed and chopped
  • 1 jalapeno, chopped with seeds
  • half a small kabocha squash (or butternut), seeded, peeled, and sliced about 1/2" thick
  • salt
  • few squeezes of lemon juice

Preheat oven to 400 degrees. 

Pour about 1 T olive oil onto a rimmed sheet tray; lay kabocha squash slices in a single layer, making sure to coat both sides in the olive oil. Add more olive oil as needed, and sprinkle salt over the top. Put sheet tray on the bottom oven rack for 20-25 minutes, flipping halfway through. You want the slices to brown on each side.

While squash is cooking, prep the onions and garlic and kale. Heat 1 T coconut oil in a large skillet over medium heat. Saute onions until soft. Add garlic and saute another 2 minutes. Add chopped kale and jalapeno and saute for 5-10 minutes, stirring often to coat all of the greens. If your kale is dry, add 1 T of water to help cook/steam the kale. (Mine was wet from the snow cover!) You want the greens to be soft, but still bright green. Keep heat under the skillet on low, uncovered, while you wait for the squash.

When squash is done, spoon it into the cast iron. Pour a glug of olive oil over the top, and give some generous squeezes of lemon juice before stirring everything together, gently. Add more salt to taste, and serve.

11.10.2020

Paleo Tuna/Sardine Casserole

I did not grow up eating tuna casserole, but I loved tuna melts and creamed tuna on toast. I have not thought about either of those things in a long time, but they must be in there somewhere because I felt compelled to make this casserole dish. I think the idea of a creamy pasta-y dish of sorts sounded appealing as we turn back to snow and rain. And, it totally hit the spot! It was good - in a creamed tuna on toast kinda way. And with tasty ingredients that I want to eat (as opposed to a can of cream of mushroom soup!)

I used this post for inspiration, but used spaghetti squash rather than zucchini noodles (which is way less fussy because you do not need to squeeze out excess water), and added pickles and butter, and a little parmesan and almond flour for a crunchy top. I mean, what is not to like here? Also, I used sardines because they are more sustainably fished than tuna, and are lower on the food chain so you get less of the weird chemicals hanging out in our oceans. Using the squash did mean things looked more monochromatic, but that seems in keeping with the more bland origins of this dish!

For this recipe, you need an already cooked spaghetti squash: cut squash in half lengthwise and scoop out the center seeds. Brush a tsp of olive oil on each squash half, and place open side down on a rimmed baking tray. Add 1/4 c or so of water to the pan, and bake for 30 minutes in a 350 degree oven. The squash is done when you can easily pierce a fork into the "meat" of the squash. Use a fork to scrape and pull the "noodles" from each half - they will come easily.

Sardine Casserole - 2 large servings or 4 small ones:

  • 1 medium cooked spaghetti squash - you will not use it all
  • 1/2 med red onion
  • 1-2 cloves garlic
  • 1-2 celery stalks (I did not have any, but that would be good here)
  • 3 T butter
  • 1 T coconut flour
  • 1/4 c coconut milk/cream/almond milk, etc
  • salt/papper/chili flakes to taste
  • 8 oz sardines (2 tins) or tuna
  • 2 jalapenos, finely chopped
  • 2 pickle spears, finely chopped (or olives)
  • 1/3 c Mayo (homemade)
  • 1 T prepared mustard
  • salt and pepper
  • 1 T almond flour (opt)
  • 1-2 T parmesan cheese (opt)
  • fresh parsley to garnish

1. Preheat oven to 350 degrees and grease a pie pan or cast iron skillet.

2. Prep "noodles": melt 1 T of the butter in a large skillet and add onion (and celery if using). Saute until soft, 5-8 minutes. Add garlic and saute another minute. Add coconut flour and remaining 2 T butter and stir to make a thicker onion roux mixture. Add coconut milk/cream/milk to thin the roux and stir some more. Mix the onion/milk/flour mixture with spaghetti squash "noodles" (I used just over half of my cooked squash), salt, pepper and chili flakes so that squash is coated in the roux and seasoning.

3. Make "tuna" salad: Combine sardines or tuna, jalapenos, pickle/olives, mayo, mustard, salt and pepper in a bowl until well mixed. 

4. Add tuna salad to noodle mix, and combine well. Pour the entire mixture into the pie plate/cast iron skillet. Top with parmesan cheese if using. (You will add almond flour at the end.) Bake for 15-20 minutes until everything is hot and the top is starting to brown. Sprinkle almond flour on the top, and then broil the casserole for another few minutes to brown the top. Once crispy, remove from broiler, top with fresh parsley and serve.

11.08.2020

Borscht

I've been making soup with my carrot and beet harvest to freeze for later consumption. This borscht turned out very tasty, especially with a little yogurt and kraut on top. Borscht is so easy and flexible! I should have made a double batch, but I wasn't thinking it through. I used this Ukranian recipe for inspiration, but you can really put in whatever you have. I opted to not use cabbage, but did have a bunch of beet greens that were really nice in there. I ate this soup for breakfast one morning with soft eggs and it was so warm and delicious. 

Serves 4-6

  • 2 T butter
  • 1 cup celery, diced (opt - I didn't have this so added a little more onion)
  • 1 cup onions, diced
  • 1 cup (or more) of cabbage or beet greens, chopped
  • 2 cloves of garlic, minced
  • Bay leaf
  • 6-8 cups bone broth (I used beef)
  • 1 can (or equivilant) diced tomatoes 
  • 3 medium to large sized peeled beets, half grated and half diced
  • 2 medium carrots, grated
  • 1 medium potato, turnip, or 2 sunchokes, diced
  • 1/2 cup of fresh dill weed
  • Salt and pepper to taste
  • Sauté the onions and celery in a large soup pot with the butter until soft and translucent (also saute cabbage here if using).
  • Add the diced tomatoes, bay leaf, garlic, and broth. Bring to a boil over medium high heat and add the beets, carrots, and potato/turnip/sunchokes. Once soup is boiling again, reduce to medium heat and let simmer until beets and tubers are soft, 15-20 minutes. (Add beet greens about half way through the simmer time if using.)
  • Remove soup from heat; stir in chopped fresh dill weed, salt and black pepper.
  • Serve hot with a dollop of sour cream and sauerkraut.
     

11.02.2020

Ethiopian Lamb and Collards

This weekend my friend taught me a new dish that was a common winter stew back home. My friend's mom is Gurage, the tribe or people whose specialty dishes include kitfo and kocho. Gurage folks eat kocho as their form of flat bread (versus injera), and my friend tells stories about her mom only eating kocho while the rest of the family ate the injera. This dish is also a Gurage one, and we ate it this weekend with kocho that I bought at Shabelle Grocery on Franklin Ave in Minneapolis. (For $10 for a package of what amounts to 8 kocho pieces. These come from Addis Ababa, coordinated by one of the folks at Dilla Restaurant on the west bank.) I really like kocho - it is a fermented flat bread that you can read more about here. It is also gluten free, which not all injera (at least in this country), is. 

Kocho - heated/fried in a bit of oil

This dish has pretty much everything I want in winter: lots of greens, chunks of meat, and a rich, buttery broth. The kocho is an added bonus that you also don't need.

4 large servings:

  • 2+ pounds lamb stew meat or leg, cut in 1-2" pieces. (Have the butcher do this since there will be some bone there.)
  • 1/4 c avocado oil
  • 2-3 large red onions, diced
  • 2-4 bunches collard greens, chopped - if you have small bunches, do 4! You want more greens than meat
  • 3 cloves garlic, minced
  • 5-6 jalapenos, sliced with seeds
  • Salt and black pepper
  • Ethiopian spiced butter to serve
  • Mitmita to serve

1. Heat your oil in a large pot. Add onions and garlic and saute on medium until soft, taking care not to burn and to stir often.

2. After 5-10 minutes, add the lamb meat and about a cup of hot water. Add generous amounts of salt and pepper. Bring to a boil, and decrease the heat to low. Cover and simmer for about an hour or 90 minutes total, until the lamb is tender.

3. Add the greens about 30 minutes into the simmering. *You could also add them just after the meat, but I prefer a slightly less soft green.

 4. Just before serving, adjust the seasoning to taste, and add the jalapenos. Let that simmer another few minutes and prepare your butter/mitmita, if using. *Warm your spiced butter, and stir in mitmita spice, making the butter bright red and spicy. 

5. Serve in a large bowl or rimmed plate with some of the broth. Spoon mitmita butter on the side of your bowl to dip your lamb and kocho into as you eat (it will also melt into the bit of broth). Eat with kocho if you have some!

10.27.2020

Pickle Salad

Perhaps you, like me, have some jars of fermented pickles in your fridge that will not taste as delicious soon, and are finding it time to make a move on them. Perhaps you also, like me, ate too much hollandaise and eggs benedict for lunch and needed a lighter dinner. 😂 

Here then is a good move: Pickle Salad. I though about substituting pickles for cukes in a tabouli sort of salad, but then I did a search to see if any recipes would come up - one from Bon Appetit did, which I used as inspiration for this dish. I didn't have fennel though, and instead used parsley and tomatoes, meaning I still sort of went with the tabouli salad idea! I thought it was great, and will make it again, especially since I still have tomatoes turning red on the counter and fresh parsley in the fridge. The toasted walnuts and Parmesan are especially delicious in there.

  • ½ cup walnuts
  • 4 whole pickles, halved lengthwise, sliced crosswise into 1" pieces, plus 3 Tbsp. picklebrine 
  • 3 Tbsp. red wine vinegar
  • 2 tsp. Dijon mustard
  • 1 tsp. honey or monkfruit sweetener
  • ¼ tsp. crushed red pepper flakes
  • ½ small white or red onion, thinly sliced
  • Kosher salt, freshly ground pepper 
  • 1 cup cherry tomatoes, halved  
    1 banana pepper, finely chopped
  • ½ cup parsley, shopped
  • 2 oz. Parmesan, shaved
  • Extra-virgin olive oil (for drizzling)

Directions:

Preheat oven to 350°. Toast walnuts on a rimmed baking sheet, tossing once, until golden brown, 8–10 minutes. Let cool; coarsely chop.

Meanwhile, whisk pickle brine, vinegar, mustard, honey/sweetener, and red pepper flakes in a large bowl. Add onion and season with salt and pepper. Let sit to allow onion to soften slightly, at least 5 minutes and up to 15 minutes.

Add walnuts, pickles, tomatoes, pepper, parsley and Parmesan to dressing and toss to coat. Transfer salad to a large shallow bowl or platter (or individual bowls) and drizzle with oil.

10.25.2020

Roasted Savoy Cabbage

I opted to pick my not full sized savoy cabbages before this recent snowfall and have several heads hanging out on the porch, along with the (now picked) beets and carrots and some kale. This week I did some more reading about fabric covering and hoop houses after watching a neighbor at my garden plot who very skillfully/simply employs such coverings. I am going to do that next year!! Very helpful to extend both front and back end gardening time. But, for this year we'll see how the remaining greens fare with the low night temps and snow sans cover. 

This recipe was simple - very similar to how I've cooked brussel sprouts before - and SO good. I tried this method with mini savoy heads that I thinned some weeks ago, that I halved or quartered, which was very brussel sprout like. In the high heat the outer leaves get brown and crispy and the inner leaves are soft and tender. Yum. 

Serves 1-4 depending on how much you want to eat and the size of your cabbage!

  • 1 head Savoy cabbage
  • 2 T olive oil (or other fat of choice, melted)
  • salt and pepper
  • lemon squeeze at end (opt)

Preheat oven to 400 degrees. (I actually did mine a little hotter b/c I was cooking some fish at 450, so either works.) 

My quarters, or eighths maybe, falling apart
Quarter your cabbage and take out the core. Cut in half again. The pieces will start to fall apart. You can either just toss them up, or sort of keep them together. Pour olive oil/fat over the pieces to coat. I kept mine partially together and poured the oil over the side to penetrate the layers. (You could also have melted coconut oil or ghee and just stir everything together to coat everything.) Salt generously and sprinkle with pepper. 

Bake on a cookie sheet or baking tray for 15-20 minutes, checking once or twice to turn/toss pieces. I put my tray on the lowest oven rack to get direct bottom heat, which resulted in good browning. 

Once browned to your liking, remove from oven and sprinkle with fresh lemon juice. You could also top with parmesan cheese here?! I found it so delicious it was a little hard to stop. :) 

I ate mine with some tomatoes and the last basil, and fish that turned out really weird.

10.20.2020

Beef Stew - Keto

There are so many beef stew recipes, at least a few on this blog alone. This NomNomPaleo one is lower carb & keto - no potatoes and limited carrots, and includes a good number of mushrooms. It was delicious, aided by the fact of cooking it on a wood stove amidst snow flurries up north after having hiked some miles. What would not be delicious under such circumstances?! I love something cooking on the woodstove, wafting up the house with good smells, especially after a walk or ski or whatever, requiring no other heat or energy source than what is already happening.

Here is a photo of an all important protective orange hat ("I am not a grouse!") with me underneath it. (The hunters I talked with were empty-handed. The grouse, presumably, were staying put with the snow.) This stew was SO good - lots of umami - the cremini mushrooms were a perfect texture/flavor addition, the turnips were creamy, and the meat melted in my mouth. I had two big bowls, where the broth was nice and shimmery with the fat. It was so satisfying.

This recipe is also easy. I didn't brown the meat, I didn't chop up tomatoes, or use wine. I followed the NomNomPaleo recipe, but she makes hers in an InstaPot. I used some broth in mine to compensate for the longer cooking time and need for more liquid; I also added some apple cider vinegar. With weather like today in Minneapolis (5 or 6 inches of snow!), this stew is all I want. 

*Note part of why I think this was so good is that I did use Michelle Tam's magic mushroom powder (that I also use on chicken). I highly recommend it - it adds an extra boost of mushroomy/umami goodness. 

Ingredients: serves 6-8

  • 3 pounds beef chuck roast, boneless short ribs, or beef brisket cut into 1½- to 2-inch cubes
  • Kosher salt or Magic Mushroom Powder
  • 1 tablespoon ghee, avocado oil, or fat of choice
  • 2 medium onions, thinly sliced
  • 1 pound cremini mushrooms, cleaned, stemmed, and quartered
  • 2 tablespoons tomato paste
  • 6 garlic cloves, peeled and smashed
  • 2 tablespoons tamari
  • 1 teaspoon (Red Boat) Fish Sauce (I did a long pour on this tsp!)
  • 2 tablespoons apple cider vinegar
  • 2 fresh thyme sprigs
  • 1 dried bay leaf
  • freshly ground black pepper
  • 2 c beef/venison bone broth
  • 2 turnips, diced (or daikon radish/sunchokes/any combo)
  • 2 large carrots, diced
  • ¼ cup Italian parsley, roughly chopped for serving

1. Toss beef cubes in salt (or magic mushroom powder) and set aside. 

2. Melt ghee/fat in a dutch oven or large pot. Add onions, and saute until soft, about 5 minutes. Add mushrooms and saute another 5 minutes. Stir in tomato paste and garlic, cook for several more minutes.

3. Add to the pot: the salted beef, tamari, fish sauce, apple cider vinegar, thyme, bay leaf, pepper, and bone broth. Bring to a boil, then set the heat to low and let simmer 2-3 hours, until beef is tender. You could also put it in a slow cooker, or move your pot to the wood stove, if you have one. 

4. 30 or so minutes before serving, add diced turnips and carrots to the stew. Continue simmering until they are soft. Taste for salt, and add more (or magic mushroom powder) until delicious. Ladle heaping chunks of meat and veggies into bowls, with just enough broth to sip at the end. Top with chopped parsley. Or sauerkraut. Or eat as is. 


10.11.2020

Fermented Salsa

To add to the ferments of the season: fermented salsa is now one of my favorites! How did I not know this before? I pretty much never do traditional canning, which means the bottom of my fridge is full of jars of things since I have to store the ferments there instead of a pantry. I seem to have enough room, and it means I get so much more good bacteria! (My freezer holds the remaining berries and tomatoes and sauces.)

I made my first batch of salsa about a month ago, and it is still tasting great in the fridge. The online recipe inspiring this one says that the salsa lasts a couple of months in the fridge. So, this is not a long-term ferment (like kraut that will last for 2 years), but more a shorter-term one (similar, in my experience, to cucumber pickles). 

You can use whatever combination of salsa ingredients you like - my version is below based on what was in my garden and following salt recommendation from the link above. It is a much more liquid-y ferment due to the tomatoes and lime juice, and it doesn't take long - a few days or so on the counter. *I used the food processor for my first batch for everything but the tomatoes, which resulted in a thinner/saucier salsa. The 2nd time I chopped by hand and I like the texture better because everything is more uniform in size and more chunky.

Finely chop the following for 1 quart plus another pint of salsa:

  • 2 pounds tomatoes
  • 2 jalapenos
  • 1 mild pepper
  • 3-6 cloves garlic (mine were really big so I just used 3)
  • juice of 2 limes
  • 1 T salt 
  • opt bunch of cilantro (I did not use because mine is mostly done in the garden)

I topped mine off with a horseradish leaf (or you can use an oak leaf) to increase tanin and keep things crisper, which I then use as the top to keep the ingredients submerged under the liquid. I don't know if the tanins are helpful here, but I did it anyway (you could also use a collard leaf or half pepper or whatever). In the photo you can see that for the pint jar I use a rock on top of the leaf, and for the quart jar I used this coil spring fermentation product I got at fleet farm a month or so ago. It works, and presses the ingredients down extra firmly once the lid is on (see photo above where it is just red liquid in the top 1/4 of the jar).

Let sit out 3-4 days, until the taste is to your liking, depending on temperatures. The warmer it is, the shorter fermentation time needed. Store in the fridge for up to 2 months. 

I ate some on a taco salad, and attempted to make little kale tacos another night, which were really tasty and a total mess: young kale leafs wrapped around meat, avocado and salsa filling.