We are a collection of Minneapolis folks cooking, preserving, and harvesting local, seasonal foods. This blog-share is meant to inspire greater culinary genius, as well as continued local food invention. What are YOU concocting in that kitchen of yours?

5.31.2013

Beef Liver....that I actually want to eat

Yes, I have finally found a recipe for beef liver that I enjoy eating.  I tried many versions and finally put together this easy little combo of ingredients.  I was determined to eat, and to like, beef liver because it is so healthy and full of so many wonderful vitamins and nutrients.  Here is a link to an informative page on  Chris Kressor's website about the benefits of eating organ meats.  He even goes over common misconceptions about liver, such as, the notion that it stores toxins.  I didn't think that people actually believed this until last week when I was talking with my Aunt about liver and she expressed this same concern.  It felt really good to be able to share my knowledge about this important food and maybe encourage her to try incorporating it into their diet.  It can be tricky to share food knowledge while not offending the other person, so I don't do it that often.  But when I can and the other person is receptive it is really gratifying.

Anyway, back to the beef liver.  It's a really simple recipe and only takes about 10-15 minutes to prepare.  I usually plan to cook my main dinner in the oven, and once I get it in there and going, I make the liver as a kind of appetizer.
Beef liver with green onions- it's good, I swear

Ingredients:
2-3 ounces beef liver
1 Tbsp butter or ghee
1-2 stalks of green onion
1 Tbsp coconut flour
1 tsp garlic powder
salt and pepper to taste
1 lemon wedge

Directions:
Rinse the liver under the faucet, cut into chunks, squeeze the lemon over the top to marinate for a few minutes, and set aside.  Heat a skillet on medium heat while you chop the green onion and mix the coconut flour, garlic powder, salt and pepper together on a small plate.  Melt the butter in the pan and add the green onion.  Dredge the liver in the flour mixture and add to pan.  Cook on each side for about 2 minutes.  Add butter if necessary.  The liver will get a slight golden crust on them.

The ingredients mask the livery flavor while adding a taste of spring.

Enjoy in good health!

Coconut Jello

I have been on the hunt for some snack options.  Since I eat a very strict paleo diet, snacking can be a challenge.  I usually have to cook and prepare every single thing that I eat, so when I can concoct a treat that I can just grab out of the fridge and eat, it is an exciting development in my life.  This dish is basically just coconut milk, vanilla extract and gelatin.  If you are able to eat a wider variety of foods you may want to doctor this one up a bit more, but I thought it might be a good idea to share anyhow.

Coconut gelatin on bottom, coconut cream on top
I have gelatin that I ordered through radiantlifecatalog.com.  It is very high quality and has many health benefits, such as it's anti-inflammatory properties.  It can be mixed into broth, soup, sauces, etc and it is great for creating jello out of any liquid.

Ingredients:
1 can Natural Value Coconut Milk: no guar gum and BPA free can liner.  Available at Seward Co-op.
2 Tbsps Gelatin (I like the Bernard Jensen product)
1/2 cup water
dash of vanilla extract

Directions:
Heat the coconut milk and water on the stove top until hot; not necessarily boiling.  Add the vanilla and stir in the gelatin.  Transfer the mixture to a dish and allow it to cool before putting it in the fridge to set up overnight.  The coconut milk will separate into a jello-like layer on the bottom and a thick creamy topping of coconut solids on top.  You can easily mix it back together when eating it though, so it's no big deal.

I think a few drops of stevia would be a nice addition, or some berries.  When my strawberries start coming in I will probably try putting some into this dish.  It will add some color and flavor.


5.28.2013

Slow Cooked Rhubarb and Cider Pork

Oh what a delightful long weekend filled with delicious food and gardening. I went nettle harvesting for the first time and got TONS of nettles, planted most of the rest of the garden, read a bunch (Prairie Silence, the memoir of a gay woman from North Dakota), and did some visiting. The garden is looking to be in tip top shape - especially with the rain. It makes everything so green, and the soil so rich and brown!

My Charming Companion resting in the garden aisle
Rhubarb!
There will be an upcoming nettle post to go through the steps of collection and cooking, but first I want to share this recipe for pork and rhubarb. The sauce is lovely - and ultimately could also go on a pork chop in a simplified version - it is delicious and ingenious to use the rhubarb as the tangy substance for a barbeque sort of sauce. Yum. Which of course means that there was also a healthy dose of apple cider and honey, to offset said tangy-ness. Luckily I still have some frozen pints of apple cider from a family friend's apple pressing party two years ago. I have yet to find a way to eat rhubarb without lots of sweet in there - I guess it is just too tart to eat as a savory dish.

The pork roast turned out delicious, and it was super fun to use some of the beautiful rhubarb stalks from the garden. The pork cut I was using was actually a cut from a thigh, so it was not as fatty as a pork butt or shoulder roast - those would be best, but the thigh worked fine. My cut had no skin, which her original recipe calls for. The standard pork shoulder or butt sold from local farmers in Minneapolis seems to be sold without skin, so I changed the recipe to instead utilize tin foil. The recipe is from "Odd Bits" a cookbook I wrote about earlier that I thoroughly enjoy and hope to own one day. This was my first recipe attempt, and it went swimmingly.

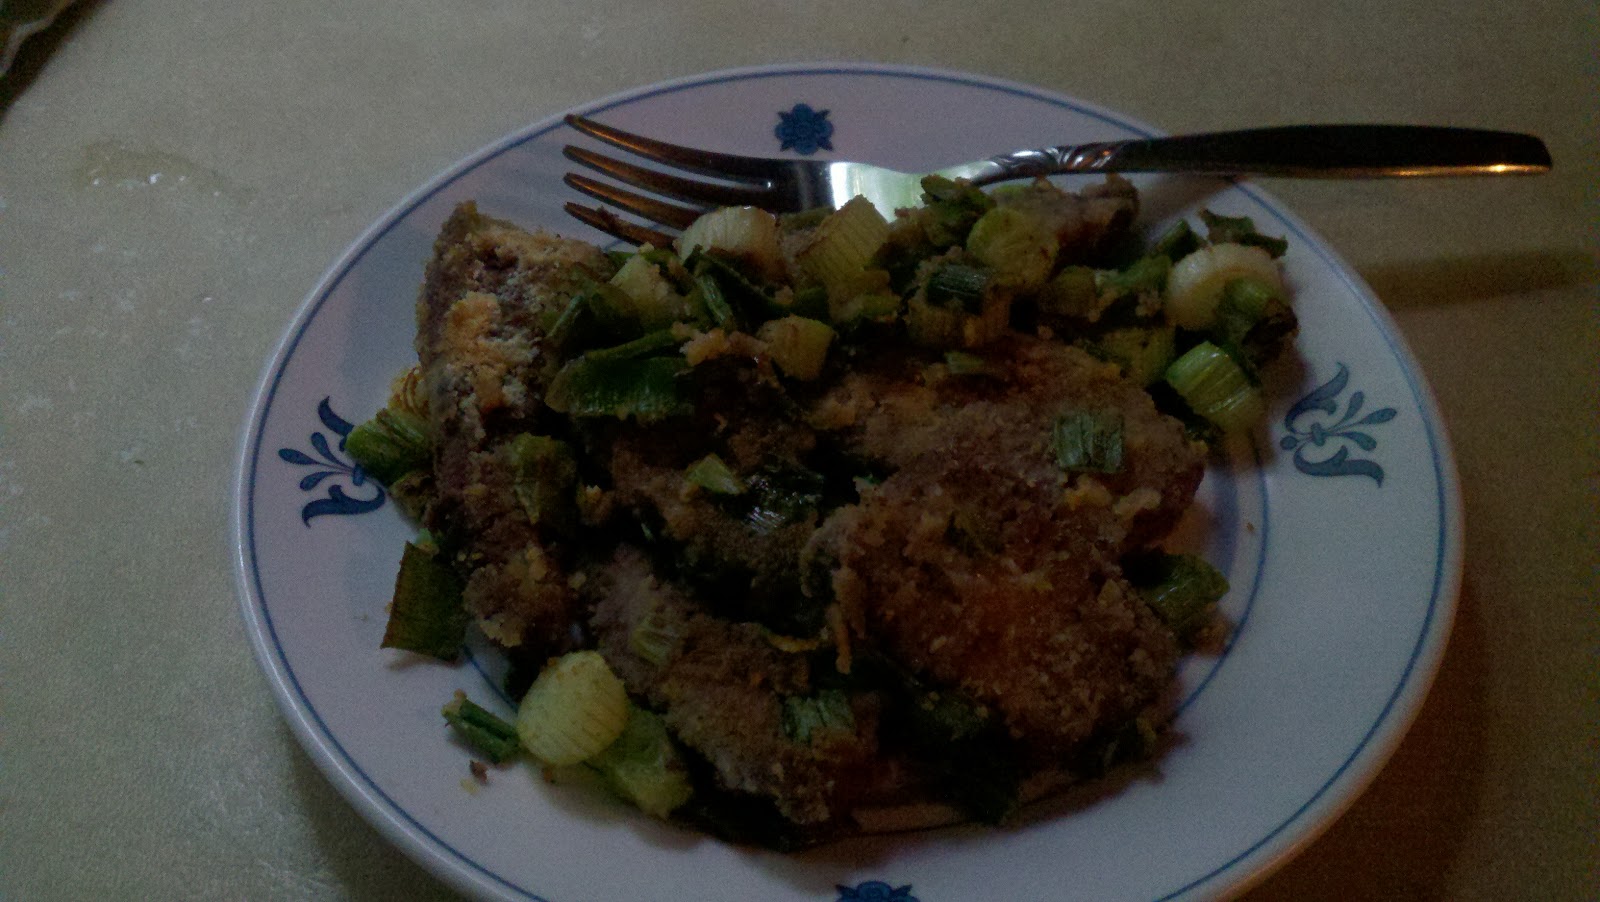
Pork and sauce, served with wild nettles!
Slow Cooked Cider and Rhubarb Pork
6 pounds, bone-in pork shoulder
Coarse sea salt and freshly ground black pepper
1-2 T lard
2 c sweet apple cider
1 sweet apple, cored, peeled and chopped
8 cardamom pods, lightly crushed
4 cloves garlic
2 dried chilis (I used 2 t chili flakes)
2 fresh bay leaves
1 pound rhubarb, trimmed
2 T honey

1. Remove shoulder from the fridge about an hour before cooking.
2. Preheat oven to 325 degrees. Pat the shoulder dry and season with salt and pepper (not too much or the drippings will be too salty). In a heavy casserole or dutch oven, heat 1 T of lard (or bacon fat) over medium heat. When the fat is hot, brown the shoulder on all sides. 1 T of lard should be enough since the shoulder will release more fat as it cooks; if not, add a bit more fat only as necessary.
3. Transfer the browned shoulder to a plate. Tip off any remaining fat, then pour the cider into the pan. Bring to a boil, and stir with a wooden spoon to deglaze the pan, scraping up all the browned bits from the bottom. Remove the pan from the heat and add the apple, cardamom, garlic, chili, and bay leaves. Return the shoulder to the pan with any juices. Cover the meat with tin foil to trap the steam within the casserole (this is what the skin would be doing if you had some skin!) Cover the dutch oven or casserole with the lid, transfer to the oven and cook for 2 hours.
4. Check the meat -it should start to soften. Remove the inner tin foil layer, but keep the pan covered and return to the oven for another hour or so, until the shoulder is very tender.
5. Meanwhile, cut the rhubarb into 1 1/2 inch pieces and set aside. Transfer the shoulder to a serving platter (cover with foil to keep warm). Strain the liquid through a sieve (this is worth it to get the spice bits out! I didn't do it and wished I had...) into a large glass measuring cup and let stand 5 minutes (presumably to skim off the fat that will layer on the top - I did not do this). You should have about 2 cups. Skim off the fat and set aside for another use. Pour the cooking liquid back into the pan and place on high heat. Bring to a boil and continue to boil until the liquid reduces by half. Stir in the honey, then lower heat to a simmer. Add the rhubarb, and cook just until tender, about 5-10 minutes.
6. Carve (or tear!) the pork into slices (or hunks) spoon over the rhubarb sauce, and serve.
Yum!

5.21.2013

Garden Asparagus!

Last year the late freeze did a number on the asparagus plants at the northside homestead. The year of rest must have really been nice for the plants because they are taking off like crazy! All this rain and intermittent sun can't hurt either. I'd eaten just a few stalks already, but Monday morning there was a lovely boquet for breakfast (see accompanying Charming Companion photo).

I also learned an asparagus tip: you know how the bottom of the stalk is fibrous and tough, and usually you snap the stalk in half and discard the bottom part? You can also peel the outer part off with a potato peeler, much as you would the tough part of a broccoli stalk. The inner part is very tender and nice. This is a handy trick when you have thicker asparagus so you don't lose so much of it. Some of my stalks were as fat as my thumb, so it was definitely worth the extra peeling.

I steamed the peeled asparagus in a steamer for just 4-5 minutes, squeezed on some lemon juice, sprinkled some salt, and savored them bite by bite. I ate them with a scramble of eggs, green onions and bacon. It was the first meal of spring where all the produce came from the garden - hurray!


Garden report: The peas, arugula and lettuces are looking bright green and lovely, and about an inch or so tall. The radishes are little sprouts peeking up above the soil. Beets, carrots, and starter beds of greens and brussel sprouts are in - though only the green are making themselves visible just yet.  I have grand plans for the weekend: zucchini, herbs, green beans, and I think I am going to take the plunge and plant my tomato and basil starts. It might be too early - but I am feeling hopeful!

5.17.2013

Scrambled eggs with chicken livers

More liver! This was a total trial of something new, and I thought it was really good. I am finally learning how not to overcook liver - they are really tender and so delicious when they are cooked on the more medium rare side so that the center is still pink. Putting them in this egg dish makes it easy because you have small pieces and you just cook them for a a few minutes with the eggs. The result is a creamy, soft egg and liver combo that is surprisingly good. I was inspired about it from a lovely article in the NY Times that made me think "that sounds super delicious!" even though it also sounded a bit strange.

The original recipe calls for vermouth - which is a dry wine that is flavored with herbs. I didn't have any, so just used a dry white wine. I made this for lunch, and also used cream in lieu of the parmesan cheese. This dish will be really nice when some fresh herbs come in: sage or fresh thyme!


Scrambled Eggs with Chicken Livers
3 tablespoons fat (I used ghee, but coconut oil, bacon fat, or olive oil would work) 
1/2 medium onion, sliced
5 eggs
1/4 c heavy cream
Salt and pepper to taste
6 fresh sage leaves, or a teaspoon minced rosemary or thyme
4 chicken livers, cut into pieces
1/4 cup dry wine (or dry vermouth)
1 T olive oil for garnish
Parsley, chopped for garnish
1. Put 3 tablespoons of the oil in a medium skillet over medium-high heat; a minute later, add the onion and cook, stirring, until it begins to brown, about 5 minutes. Meanwhile, beat the eggs with the cream and some salt and pepper.
2. Add the herbs and livers to the onion and cook, stirring occasionally, until pink, about 2-3 minutes. Pour in the eggs and vermouth and stir until the eggs set, a minute or so. Garnish with the remaining olive oil and parsley and serve hot, warm, or at room temperature.

5.16.2013

Dandelion Green Salad (with Beets and Carrots)

I tried some dandelion greens straight from the garden and yard last weekend, and they were so good! Now is a good time to eat them because they are still young, tender, and not overly bitter. Plus they are plentiful. I was walking in the park last night, enjoying the 80 degrees, and noticed tons of baby dandelion plants that could be picked.

You want to look for dandelions that have not flowered yet, and then look for ones with smooth (as opposed to furry) leaves. If you look around at a few, you can compare leaves to better understand smooth versus furry. The smooth ones are the ones you are looking for to eat in a salad, and they will be a variety of sizes. Use a dandelion picker to pick the whole root and get all the leaves (and rid your garden of the dandelion), or just pick the leaves off and deposit them right into your colander. They are pretty fragile, so it is best to pick them soon before consuming them. You can rinse and wash them, and spin them dry in a salad spinner - they will get bruised, but that is not a problem for this salad.


This salad of beets, dandelion greens and carrots perfectly complement each other: the bitter greens match the sweeter raw veggies in a really delicious combo. Fresh spring green onions are also nice for the mild flavor, the smaller ones you can find the better. My Charming Companion made this salad up, and there was not any measuring going on. Below are some close estimates, but feel free to take some liberties.

This is about 2 big handfuls of the washed greens
Dandelion, beet, carrot salad
1-2 c dandelion greens, chopped
1/2 raw beet, grated
1 carrot, grated
7-8 small green onions, chopped*
2 T fresh lemon juice
2 T olive oil
1 T mustard
salt and pepper to taste
1/4 c toasted almonds
*the smaller green onions are more mild. If you only have large ones, chop the white part very fine and use a few less.

Combine all of the ingredients but the almonds in a bowl, stir to coat all the veggies with the oil and lemon. Sprinkle almonds on top and serve!

5.14.2013

Kitfo

I am not sure how to best convey the amazing-ness of this dish, except that it is perhaps the best thing I have eaten lately - right up there with those raw oysters, but better?! (And at home versus out at a fancy restaurant!) It combines warm, browned butter with onions and red pepper, incredible spices, and really nice raw meat. I nearly swooned while eating it, and have been plotting about when I can have it again. If you have been hesitant about raw meat before, this might be the gateway recipe!

Kitfo is a traditional ethiopian dish that is eaten at room temperature, which I enjoy SO much more than a cooler steak tartare (I had no idea until I'd had it this way). The spices and the browning butter smell incredible and waft through the kitchen: ginger and cardamom, chili and fenugreek.

I will confess that my only role in this meal was to discover Kitfo and pass along a few recipes. My Charming Companion actually cooked it, along with a really good (and super simple) cabbage side dish while I took a nap on the couch! The recipe here is a blend of several variations found from a search for kitfo recipes. Certainly any of them will be good, but below is the recipe as I ate it. Mine actually used the steak from a deer that was a really young fawn, so it was probably as tender as possibly available, which made this melt in my mouth. My Charming Companion's turmeric cabbage dish is also below. It used a bunch of green onions from the garden and went perfectly with the kitfo for a very ethiopian style dinner, sans the injera.

Kitfo
1 lb round steak
10 T (or one stick + 2 T) butter
1/3-1/2 c onions, chopped small
1/4 c red pepper, chopped small
1 tsp ginger
1 tsp cardamom
1 tsp chili flakes (or cayenne)
1/2 tsp fenugreek
pinch cloves
1/4 tsp cinnamon
1/2 tsp fresh ground black pepper
1 T+ fresh lemon juice
2 T fresh chives, chopped
salt to taste

1. You want to serve your meat at room temperature, but it is easier to chop the meat when it is still a bit frozen. Ideally, you will chop the meat an hour or so before dinner: use a sharp knife and mince just as it is defrosting and still a little frozen. Let it sit out on the counter to fully defrost and get to room temp for dinner. If you don't have that kind of time, you can mince it at room temp and just have it be a little wily, or you can try to warm it very very slowly in a pan over low heat being careful not to cook it at all. (Some people do eat this slightly cooked, so you could do that if you prefer.)
Chopped raw steak!
2. Melt better on medium heat in a small saucepan. Once it is melted, add onion, red pepper and spices and let simmer 10-15 minutes. You want the butter to brown, basically as if you were making ghee with lots of stuff in it! Be sure to stir every so often.
Simmering spiced butter - smells SO good!
3. Add lemon juice and chives for the last couple of minutes. Stir butter mixture into your now room temp meat and serve!

Turmeric Cabbage
3 T coconut oil
1/3 head green cabbage, sliced/chopped thin
bunch of green onions, chopped
1 T turmeric
salt to taste

Melt coconut oil in large skillet. Once it is melted, add cabbage and sautee for 10 minutes on low heat. Add green onions and saute another few minutes before adding turmeric and salt. Stir to coat, and continue cooking another couple of minutes before serving.

5.08.2013

Raw Beet Salad

I tried to get scale here!
I am home with the windows open, listening to my neighbor's bluegrass band - they are all crammed on the porch, upright bass, fiddle and all - thankfully they are good. The warm weather makes me want cold salads of things other than lettuce. Today's recipe (last night's dinner) features Lutz beets. Which, btw, are STILL local at the Seward. They are these ginormous beets (the photo is of a relatively small one) that are really sweet tasting and a beautiful red with some pink inside (the other beets are from CA). I buy one at the co-op each week to become beet kvass, breakfast, and now beet salad. This is totally refreshing, simple, and good. It's a Mark Bittman recipe, and I kept it as is except to add some toasted walnuts. As is his usual, there are many variations on it, so you can use half carrots plus ginger, or put in cabbage and orange (see his link above) for a different, but same, sort of salad. I love that about Mark Bittman's recipes, although I don't own any of his cookbooks to really make use of it!

Speaking of cookbooks, I just got a cookbook from the library (after seeing it at Moon Palace Books) that turned out to be excellent: Odd Bits by Jennifer McLagan. It's all about using animal parts (brains, kidneys, feet, udders, etc) with lots of recipes and really nice directions about how to prepare these odd bits, as well as some helpful information about what it might taste like and why much of Europe still considers these pieces delicacies. It's straight forward and made me feel less squeamish about getting a whole pig head, for example. The fact that it makes me want to try pig head at all is pretty great. So. I recommend her book - I'm even thinking about buying it, and I have not bought a cookbook in over 5 years or something crazy. For sure not since I was a wheat eating vegetarian!

Anyway - back to beet salad.

1 to 11/2 pounds beets, peeled
2 large shallots, minced
1 sprig tarragon, minced (opt)
1/4 c chopped parsley leaves
Salt and freshly ground black pepper
2 tsp Dijon mustard, or to taste
1 T extra virgin olive oil
2 T sherry or other good strong vinegar
1/4 c toasted walnuts

1. Shred/julienne beets in a food processor or with a mandoline. Mix with shallots, parsley, and tarragon (mine was dried).
2. Toast walnuts on a dry cast iron skillet on medium heat for 5 minutes, stirring often.
3. Mix remaining ingredients for a dressing. I was out of mustard so used mustard powder, and it was still good. Pour dressing over beets, and toss walnuts on top.

This salad was even better for lunch the next day.

5.06.2013

Fennel Apple Salad

This weather! Hurray! I left for Mayday yesterday morning thinking it would be cool and cloudy, and it turned out it was sunny and warm and the clouds just disappeared from the sky. I brought a nice Mayday picnic for the parade of tea, roasted chicken, and a really tasty salad which was a jumble of fresh veggies: avocado, fennel, tomato, parsley and cabbage. I am experimenting with fennel more often - it is so good chopped up and added to a salad.

Today I wanted something that was mostly fennel, so after perusing a few recipes I decided to try one of fennel and apples. I modified it some (hers is more lettuce-y), and it turned out delicious. The fresh lemon juice and zest are especially nice, and the walnuts. I added in fresh green onions from my garden and a few chives for a little savory zing.

Fennel Apple Salad   
(serves 2 large or 4 small salads) 
1 large/2 medium fennel bulbs
1 apple (a tart one is nice)
1/2 c chopped parsley
1/4 c toasted walnuts, chopped
1-2 green onion, chopped fine 
1 T fresh chives, chopped fine
Freshly ground pepper 
sea salt 
1/2 lemon, juice and zest 
3 tbsp extra virgin olive oil
 

1. Trim the fennel (so you have just the bulb) and slice super thin. I used my mandoline for this, but you can also use your fancy knife skills. Slice the apple the same way.
2. Toast walnuts for several minutes on a dry cast iron skillet for 5 minutes, stirring regularly. Chop.
3. Toss the fennel, apple, parsley, green onion and chives in a medium size bowl. Top with lemon zest and lots of freshly ground pepper and a sprinkling of salt. Mix the lemon juice and olive oil together, and pour over the top of the veggies. Stir again.
4. Sprinkle walnuts over the salad and serve. This is also really tasty the next day when the fennel and apple have absorbed the dressing. Yum!

Happy Mayday!

5.03.2013

Steak Tartare

My second "real job" (not including baby-sitting or cleaning my neighbor's house, but after being a "sandwich artist" at the local Subway) was busing tables at the Hotel Sofitel in Bloomington. I filled in at two of the three restaurants, and piled plates high on my tray and occasionally dropped them all. I learned about all kinds of french food while working there, including bouillabaise and coq au vin. I also learned about steak tartare, which I assumed was extremely fancy because it was one of the priciest items on the menu. I was fascinated by how it was served - all the ingredients looked so pretty, but also so strange to think of eating raw meat with raw egg yolk.

I have eaten raw beef before - sliced thinly and dipped in butter, but up until last weekend had not tried, or even thought much about steak tartare. But then I had some, and it was really good, and now I can't wait to try a bunch of different raw beef dishes from different cuisine traditions. Sally Fallon's Nourishing Traditions includes several, and she also writes a bunch in the margins about the possible health benefits of raw versus cooked meat.

Anyhow - it's a fun way to eat something familiar and have it taste totally different. Tartare is almost pate like, but more fresh and less creamy. I used Sally Fallon's recipe (which I am writing below, though I didn't have everything so mine was modified a bit). The big thing with raw meat is that it needs to be frozen for at least 14 days so that you can safely eat it. Any bacteria will be killed in that amount of time. So - if you buy some fresh meat, make sure it is grass fed and finished and from a farm you know, and freeze it for 2 weeks before you eat it! I used some of the venison burger I helped grind last fall, but you could also use nicer cuts of meat. Hilltop Family Farms at the Midtown Farmer's Market (starts tomorrow!) sells a "Gourmet burger" that uses the whole animal for the burger, not just left over bits - it would be a good tartare option. I read something that said the flavor of raw beef in tartare is superior when you mince the meat by hand (use a sharp knife on slightly still frozen meat) as opposed to grind/food process, so that might be worth an experiment!

Steak Tartare
1 pound ground sirloin or filet, frozen 14 days and thawed, ground or minced
1 medium onion, finely minced
1/4 cup parsley, finely chopped (I used fresh chives from the garden instead)
3 tablespoons Dijon-type mustard
2 egg yolks
sea salt, pepper and cayenne pepper (to taste)
1 cup small capers, drained, rinsed and dried (I didn't have those)

If you want to go the fancy Hotel Sofitel way, you can serve everything as is, without being mixed yet but in divided portions (I'd just go with extra egg yolks in that case - it will only make it more creamy). Otherwise, mix everything together and divide to serve. This stuff is on the rich side, so a pound of meat will likely yield 4 servings.

I ate mine with hard boiled eggs and sauerkraut, but it would be good with salad greens, almond crackers, fried taro (the Sofitel served it with a big side of pommes frites), or pretty much anything!

5.01.2013

Beet Kvass

Beet Kvass in a "juice" glass - what a color!
I had some store-bought, "Angelica's Garden" beet kvass a few weeks ago - it was served a la red wine while preparing a sort of date-night dinner, and it was REALLY good. (It costs a little more than wine, but you get some good gut flora out of the deal!) It also inspired me to try making my own. It looks like the Angelica's Garden folks add some apple cider/juice and fresh ginger juice right before bottling to give it a little sweetness, which I think would be an amazing next experiment. So far, I have only had this straight up, and I give it two thumbs up. It's just a little fizzy, rich and savory/sweet like wine, with a taste of earthy beets that is not too strong. I so far can't drink a whole glass - this is more of a 4 oz. sort of deal. But it's good. And WAY easier than kombucha, with perhaps more nutrition.

I followed Sally Fallon's beet kvass recipe. When I went to look up kvass in Salvador Katz's fermentation book, his kvass was made from bread?! Apparently both bread and beet versions are traditional - I had no idea.

Getting the whey!
I am going to try making kvass some more (maybe sometime without added whey) - but decided to go with using whey to get the culture started. I have not really had much dairy other than heavy cream for the last long while, so it was a bit of an adventure picking out which cultured dairy product to use to get my whey from. I thought about a coconut yogurt, but even the plain ones had cane sugar and weird stuff in there, so I went with some goat milk kefir. I had a swig of it too, and it was really delicious. You could also use juice from homemade/live cultured sauerkraut or any other fermented something you have around.

To get whey, use any yogurt or kefir that has live cultures in it. Put the cultured yogurt/cream/kefir in cheese cloth, or in a coffee melita thing over a cup to separate the "curds" and "whey" - though really you will be having whey and what ends up being like cream cheese. You only need 1/4 c whey, but it does last 6 months in the fridge, so you decide how much whey you want to make. (After you make beet kvass once, you can use leftover kvass as the starter culture.) I ate my "leftover" cream cheese stuff with some frozen blueberries and it was amazing.

Beet Kvass
2 large beets or 3 medium sized ones, peeled and roughly chopped
1/4 c. whey (see above)
2-3 tsp salt
filtered water
2 quart jars or a 1/2 gallon jar

Put all ingredients in jar/s and stir well (I shook them up with their lids on). Set sealed jars on counter for 2-8* days. The Kvass is ready to drink as soon as it is chilled, or right away if you don't mind it at room temp.

*My kvass took 8 days to get the full flavor, though the recipe says 2 days. It's been pretty cool in my house, so I would guess 2-3 days is great for full on August heat, whereas 8 days fits for this cool/cold springtime. I tasted mine every couple of days: early on, it was a light pink and tasted like salty water with some whey. It started to lose the salty taste after about 5 days, and finally started to get a little fizz going on right at day 7 or 8. You can certainly call yours done at any phase, but I was really happy waiting for the bit of fizziness without any sort of salt taste. By then it was a nice rich red color.

Note - reuse the beets another 1-2 times for more kvass. Instead of using whey, you can use some of the kvass you just made as the "starter culture." I have not tried it yet, but you can than eat the beets on salad or however you like. Nothing goes to waste!