We are a collection of Minneapolis folks cooking, preserving, and harvesting local, seasonal foods. This blog-share is meant to inspire greater culinary genius, as well as continued local food invention. What are YOU concocting in that kitchen of yours?

12.30.2012

Grain-Free Dark Chocolate Cherry Scones

I have not made anything remotely resembling a scone in a long time, but was inspired by Nom Nom Paleo's recipe for these scones this week (see the link for her lovely photos). Also I have next week off, so why not celebrate with Sunday morning scones!? I made them this morning and they were very tasty, and a bit unlike any other grain-free bread product I have made. Perhaps this was due to the chocolate involved, but they were a bit more dessert-like. Not overly sweet, but chocolatey, with a nice texture.

Scones and Tea! Next time I will shape the scone more...
Grain Free Scones - makes 8
3 cups blanched almond flour
1½ teaspoons baking soda
½ teaspoon fine sea salt
4 tablespoons butter, as cold as possible (preferably frozen)
2 large pastured eggs
2 tablespoons apple cider vinegar
2 tablespoons honey
1 teaspoon vanilla extract
3 ounces of 80+% cacao dark chocolate, cut into bite-size chunks
⅓ cup dried cherries

1. Preheat oven to 350. Get out a baking sheet and piece of parchment paper (to be ready when things are sticky!)
2. Mix almond flour, baking soda, and salt in a large bowl. Grate chilled butter into the flour mixture with a cheese grater, and then cut the butter pieces in with a pastry cutter (or fork). You want the mixture to end up crumbly.
3. Whisk eggs, vinegar, honey, and vanilla in a small bowl. (If you need to heat your honey up to get it liquid, do that, and then put the whole mix in the fridge for 5-10 minutes to cool it down again.)
4. Make a well in the dry ingredients and pour in the liquids. Use a spatula to mix everything together to get a wet, chunky dough. Add the cherries and chocolate chunks and stir to blend.
5. My dough was very sticky here, so I put it in the fridge for 20 minutes. The Nom Nom Paleo photos do not appear to have sticky dough, so I am not sure if it was due to my warm honey or what. In any case, form the dough into two balls (I wet my hands a bit to help with the stickiness) and move to parchment. Press the tops of the balls down to form flattened circles, about 3/4" thick. Cut each circle into 4 wedges and arrange on the parchment (which is on the baking sheet). My dough was so sticky I just left it in the circular shape and separated the wedges midway through baking. It's not as aesthetic, but still delicious.
6. Bake for 20-25 minutes, turning tray halfway through. They will get brown - check for doneness with a toothpick. Eat!

12.27.2012

Oyster Stew!

This recipe is so simple, and so incredibly delicious. Really, how can you go wrong with oysters, butter, and cream - which comprise the bulk of this recipe. The original recipe (from an internet search seeking something flour-free) was modified just a bit - primarily by trading half and half for chicken stock and heavy cream. The oysters I got were huge, and this soup was pretty much to. die. for. Swoon.


Oyster Stew serves 4 and takes about 20 minutes total!
1 stick of butter
1 c minced celery
1/4 c minced shallots (onions worked great for me, I added a bit extra)
1 pint chicken stock
1 pint heavy cream (I ended up not using all of it - a little less was plenty)
24 oz or 1 1/2 lbs fresh, shucked oysters with the juice
Sea salt and fresh ground pepper to taste
Pinch of cayenne pepper to taste

1. Melt the butter in a large heavy pot. Add onions/shallots and celery, and cook until onions are tender (about 5 minutes).
2. Add broth to pot and let heat a minute or two over medium high heat. Add cream and stir continuously to heat. Just before boiling (you will see lots of little bubbles start to rise), pour the oysters and their liquid into the pot. Season with salt, pepper, and cayenne. Stir continuously until the "oysters curl at the ends." My Charming Companion and I determined this to be after just a few minutes or so, maybe 4. When the ends are "curled" the stew is done and you can turn off the heat. Taste the soup to check your salt and pepper, adjust if needed.
3. Serve immediately! You could garnish with parsley if you had some.
*This was also very tasty when I reheated leftovers the following day. OMG. so good. It was also nice with the crackers from my previous post...you can break them up like oyster crackers!

12.26.2012

Paleo Crackers and Escargots

I had a lovely dinner last night that included oyster stew (post forthcoming), herring roe, crackers, and escargots. I had not made any of these things before (or eaten roe, except one time at my uncle's sprinkled on a bit of deviled egg.) The herring roe was from lake superior, and was $10, and was really fishy and lovely and pink! It felt like such a treat (though really the whole meal did).

Some time recently I became curious about making escargots. Do you buy live snails I wondered? I remembered the escargots from the french restaurant I used to work at, and how they were served in a bubbling garlic, parsely butter that smelled amazing. Upon looking it up, I learned that you actually buy snails in cans (though you can cook them in their shell too - this is just the way most snails are sold). I also learned that all snails with shells are edible - just not the slug like things without a shell. So if you live somewhere where snails are plentiful, you can just go harvest your own after a rain storm (they will be much smaller and do require a "cleansing" step and some longer pre-cooking).

Anyway, I bought some snails at Coastal Seafoods - they were $5 for 2 dozen, though there was another kind that were $15 for 2 dozen (I have been trying to learn about escargots farming, and it seems that the practices are pretty sustainable just by nature of how snails live). I am not sure the difference between the two prices - I will ask next time. In any case, the cheaper ones were delicious. Having no fancy escargots dish, I made them in a muffin tin. I will totally make them again because they tasted so good.


Snails in an escargots dish - not muffin tin
Escargots
2 dozen snails
6 T butter
1 T minced onion
(garlic is de rigueur, but I skipped it)
1 T minced parsley
1 t lemon rind
1 t sea salt
fresh pepper

1. Mix everything but the snails together to form a buttery-paste. I used a large wooden spoon to spread the butter and get the herbs mixed in evenly.
2. Preheat oven to 400 degrees.
3. Put 4 snails in each muffin cup, then divide the butter mix evenly between the 6 cups to top the snails. You want the snails to sort of marinate under the butter as it melts.
4. Put in oven until butter is bubbling - about 5 minutes.
5. Serve with rosemary almond crackers out of the tin, or you can pile them all in a bowl for a slightly more aesthetic experience. : )

*I was sad to leave any of the buttery goodness at the bottom of each muffin cup (usually french bread would dip this up), so I moved all remaining butter to 4 muffin cups and the next morning I cracked an egg into each one. I topped each egg with a splash of cream, and then baked them at 350 degrees until the yolk set. I didn't time them (and mine got a bit overdone) - but remove them when just set and still a little jiggly. Eat with any remaining crackers or a bit of ham or bacon. Yum!

Almond Rosemary Crackers (from Elena's Pantry)
1 3/4 c almond flour
1/2 t sea salt
2 T fresh rosemary, finely chopped
1 T olive oil
1 egg

1. Mix flour, salt and rosemary together - make sure almond flour is nut clumped up. (My rosemary is miraculously still doing just fine in its garden bed outside - it is a little green tree surrounded by snow!)
2. Whisk oil and egg in a small bowl, then add to almond flour mix and stir until combined. The mixture will be wet and quite thick.
3. Roll the dough into a ball and press it between two sheets of parchment paper (this is very useful - I am not sure you can get the crackers thin enough without the parchment without tearing things up). Roll to about 1/8" thick.
4. Remove top parchment layer and cut crackers with a pizza roller or knife into desired size. Transfer the bottom piece of parchment (with cracker dough) to a baking sheet, and bake 12-15 minutes at 350. Let cool for about 30 minutes before serving.
*These are relatively unsalty. You may want to up the salt a bit, or sprinkle salt on before baking. I splurged and got a bit of Herring Roe to eat on these along with the snails - so they were perfect with the low salt crackers.

12.20.2012

Deer Offal

I have been meaning to write for some time about my appreciation for roadkill deer (and also for My Charming Companion who it seems cannot leave the twin cities metro without coming across one). Now seems to be a nice time - stemming from an amazing dinner last weekend that came to being entirely because there was very little defrosted meat, but there was a fresh deer.  Though the deer still needed to be butchered, the organs were out and ready to go - hence an amazing meal of offal (organ meat) plus a wee bit of kebab.

Offal seems to be pretty popular among foodies and paleo folk (at least according to my internet perusing), but I am still in the experimental phase of offal-eating. Other than occasional chicken liver (in the form of pate), I've only tried a bit of venison brain and eaten heart ground up with burger meat.


Last weekend, though, I had offal trifecta: deer brain, liver, and lung. It felt really fancy - like I should also have been having some bone marrow or something served at some expensive restaurant in a city larger than Minneapolis. The whole meal was delicious, beginning with fried brain and fried liver and bacon, and then a creamy soup of lung and mushrooms, followed by the mini kebabs. (It felt a little like Fogo de Chao gone wild...haha!)

Brain is super delicate - and it is pretty difficult to remove (so I hear, I have not attempted this yet). To prepare it, poach the brain first. Dry it off, then dust it in flour before frying it in coconut oil. It turns out coconut flour does not crisp up in this scenario. It certainly isn't bad, but a GF flour mix, or rice flour will give you the crispy texture on the outside, whereas the coconut flour is more of a "coating" of browned flour. The brain is really tasty - it has a very soft texture, and tastes creamy.

The liver was sliced and tossed in a bit of coconut flour, which worked great here. The slices were fried and then served with bacon pieces - and this was DELICIOUS, probably due to the young tender fawn that the liver came from. Really. I may have shied away from deer liver before, but no more.

Finally the lung. I had never really thought of lung as edible before, but nothing surprises me much anymore. (My Charming Companion is anxiously awaiting enough deer testicles to comprise a serving portion. If testicles, why not lung?!) The lung was much more reddish and red-meat looking than I thought. I imagined it to be pale for some reason. The lungs need to get pounded to remove all the air pockets, and also require some trimming of the trachea and some bigger air vessels. Once that is done, the lung gets poached, and then it is ready to add to whatever dish. We had it in a soup that was chicken stock, portobella mushrooms, some wine, and cream. And a little lemon and salt and pepper. The lung tastes remarkably like a denser mushroom, and it was nice in the soup.

And I guess that doesn't leave much else for deer offal. Kidneys (I have not tried them yet), and the aforementioned testicles...hmmm.

*I realize that I don't give you enough information here to actually make these dishes (or about how to extract them, etc), so if you want to know that, you will have to call My Charming Companion to walk you through it.

12.18.2012

Eggnog (paleo-ish)

I love eggnog - especially in my (decaf) coffee. I made some for the first time this week, and it is SO easy. I found several recipes online, but settled on this conglomeration of a few. I went ahead and used raw egg yolks, but there are plenty of recipes out there that heat the nog if you prefer.

For 2 servings:
4 egg yolks
1 c. coconut milk
1 c. heavy cream
1-2 T. honey (depending on your taste)
1 t. vanilla
1/4 t. cinnamon
1/4 t. nutmeg

Blend egg yolks in blender. Add coconut milk and honey (my honey is the raw kind, so I have to heat it up with a little water so it is liquid!) and blend. Add vanilla, spices and heavy cream and blend for a couple of pulses (you don't want to whip the cream - it gets too fluffy).

Sprinkle a little nutmeg on top, and serve! You can chill it for up to a few days as well (probably longer, but I always drink it by day 2).

12.09.2012

Paleo/GF gravy!

My Charming Companion got a surprise free turkey from the church next to his house on Thanksgiving. So, now, here it is a few weeks later and time to eat that turkey. With copious amounts of gravy. I am quite pleased because I enjoy eating leftover turkey, and not having made one this year, did not get to. Until now! (A nice turkey tarragon salad recipe coming soon...)

This gravy tasted really nice, and was very easy. The amount below is for a 10-12 pound turkey - adjust as needed for your size bird. The same recipe would also work well for chicken, and other herbs would also work great.

Turkey, mashed cauliflower, gravy, and cranberries!
Paleo Gravy
 
  • Drippings from pan
  • 2 c chicken broth
  • 4 T coconut flour
  • 1 T fresh sage, minced
  • 1 T fresh thyme, chopped
  • Salt and pepper to taste (depending on the saltiness of your bird and broth)
Heat the pan drippings in a heavy saucepan along with broth. Whisk in coconut flour (whisk brusquely so you don't get lumps). Add in herbs and taste for saltiness. Add salt and pepper to your preference. Simmer the gravy a bit so that it thickens/reduces. Serve!

12.03.2012

Roasted Veggies

The local veggies that seem to be brimming over at the co-op right now include about 8-10 squash varieties (I am really all about the kabocha right now), lots of mushrooms, and tons of root veggies - particularly parsnips, carrots, and beets. So I made up a big batch that I mostly have been eating for breakfast with some eggs - with fresh parsley over everything. I definitely did not follow this recipe exactly (also pasted below), but it had basically all the root veggies I happened to have in my fridge plus some brussel sprouts. The whole thing is creamy and delicious and carmelized tasting. And so easy!

Ingredients - feel free to swap or change amounts:
3 parsnips
6 carrots
1 onion
1 large sweet potato
1 lb brussel sprouts
olive oil
salt and pepper
fresh chopped parsley

Directions:
Preheat oven to 400 degrees. Scrub carrots and parsnips (cut into 2-inch pieces if large). Slice onion in wedged slices.  Peel and slice sweet potato into wedges. Trim Brussels sprouts and cut in half. Toss all vegetables in generous amount of olive oil. Add salt and fresh ground pepper to taste.
Spread onto a large baking sheet and roast, turning occasionally until cooked and browned, about 45 minutes. Sprinkle with fresh chopped parsley.

11.28.2012

Sauteed kale with craisins

I've been indulging myself a bit since Thanksgiving with a bit of extra sweet stuff - most recently in the form of craisins added to my breakfast greens. Yum. I am still finishing up my garden kale - it is down to some of the small pieces that are also a bit tender from the repeated freezing. It tastes so good!

This is one of those recipes that you don't really measure, but I'll give some estimates to serve 2. It is sort of a hybrid of a kale recipe KP always used to make me with kale, onions and raisins, along with a raw kale craisin salad that was at a recent potluck I was at.

Sauteed Kale with Craisins
small onion, sliced thin
Kale bunch, stalks removed and chopped
2+ T fat (coconut oil is always amazing with kale, so I recommend that)
1/4 c craisins
1 T cider vinegar
salt to taste

Heat a large cast iron pot on medium heat and add fat/oil. Add onions and saute for a few minutes until they begin to soften. Add kale - pile it up - pour on the vinegar and then put a lid on the pan. Keep the heat low and stir often to soften up all the kale/make the onions translucent. The coconut oil should coat the leaves and help moisten things, but you can add a few teaspoons of water if it seem a little dry. After 5 minutes or so, add the craisins and some salt. Continue cooking another 5-10 minutes until kale, onions, and craisins are soft.  Serve! 

*Note that some toasted nuts (almonds, walnuts, pecans) would all be tasty on here as well.

11.26.2012

Creamed Spinach with Bacon (and fried fish)

I love to not drive whenever possible, and the long holiday weekend was a perfect time to just walk places and be very slow paced. One such walkable visit included my friends' new bookstore, Moon Palace Books (I did some shelving - check out the alphabetized fantasy section!) behind Peace Coffee on Minnehaha. The creamed spinach recipe I made is from the Smitten Kitchen blog - and she actually just published a cookbook. They have it at Moon Palace Books if you want to take a peak - it looks really good.

Another local visit for the weekend was Everett's grocery store (38th and Cedar) for some fish. Everett's sells frozen Pike filets (and walleye) - as well as lots of other sort of Scandinavian fish varieties that are just not all that common elsewhere. The Pike is pretty cheap at $6 a pound, and the walleye is about twice that. Both are caught in Canada.

So, those two adventures lead us to today's post of fried Pike and Creamed Spinach! I have never had creamed spinach before, and I am not sure what quite possessed me to suddenly want some, except that I had a package of frozen spinach in the freezer and the cold weather usually makes me want more cream whenever possible. My Charming Companion made the Pike exactly as if the pike were fresh and we were camping as outlined here. Meanwhile, I was sauteing onions in butter and stirring in creamy substances to make this tasty side dish. I modified the Smitten Kitchen recipe below:

Creamed Spinach (serves 2 large portions or 4 very small ones!)
1 10 oz package frozen spinach
1/4 + c heavy cream
1/4 c coconut cream (the thick part of the coconut milk when it is separated - regular coconut milk would work too)
1/2 small onion, finely chopped
1 1/2 T butter
1 t coconut flour
Pinch of freshly grated nutmeg
Salt and Pepper

1. Cook your spinach as instructed: mine was to add the spinach to a cup of boiling water and simmer, covered, for 8 minutes. Drain the cooked spinach when finished, pressing it through a sieve to get as much liquid out as you can.
My very poor quality photo of lunch!
2. In a medium saucepan, melt butter, then add onion and saute on med-low heat until translucent (about 5 minutes). Whisk in the coconut flour, stirring constantly to thicken the butter/onion mix just a bit. Add cream and coconut milk/cream slowly, whisking while you go. Add spinach, nutmeg, and salt and pepper. Stir while the mixture thickens and cooks down a bit - just a few minutes. Serve right away, or reheat when ready. It's very tasty topped with some chopped bacon!

*For a VEGAN version of this dish, just use all coconut milk, omit the coconut flour, and instead of nutmeg, use 1/2 t ginger, and  a dash of cumin. It tastes delicious.

11.24.2012

Roasted Squash with Date Relish and Pumpkin Seeds

I made a new recipe for Thanksgiving this year, and I have to say it is my favorite squash recipe ever. OMG this was so good. It comes from Bon Appetit, and it turned out totally gorgeous. I never got a photo, but I perused some online pictures to try to find one that might hint at the color and flavor combo of this dish. It was stunning and delicious.

This is the first time I have ever cooked kabocha, and I love it. It is really rich and almost dry because it is so dense. It is almost like a sweet potato in dark orange color and texture. It would probably make excellent pumpkin pie filling because there is such little moisture.

The prep for this dish is a bit lengthy - mostly because you have to peel the squash before baking it. The recipe recommends that you remove the peel after halving the squash (as shown), which is what I did.

Roasted Squash with Date Relish and Pumpkin Seeds (serves 8)
Final servings looked a little like this...
1/3 c. shelled raw pumpkin seeds/pepitas
1 tsp + 3/4 c Extra Virgin Olive Oil, divided
1 4 lb kabocha squash, halved through the root end and seeded
kosher salt
1 T fresh thyme leaves
freshly ground pepper
1/4 c (or more) fresh lemon juice
1/4 c chopped fresh flat leaf parsley
1 bunch/4oz. dandelion greens/arugula - rough ends removed (I recommend arugula)
1 c deglet dates (*deglet is very important! other dates are too sticky), pitted and thinly sliced lengthwise
2 oz parmesan cut into 1/4" pieces (optional)

1. Preheat oven to 375. Arrange racks in upper and lower 1/3 of oven. Spread pepitas on a baking sheet in a single layer. Stir them once or twice while browning on the top oven rack - about 7 minutes total, until lightly browned, puffed, and aromatic. Toss seeds on cookie sheet with 1 t olive oil and a pinch of salt. Let cool on the tray. When cool, chop as garnish for salad. (I used them whole!)
like this only with no peel!
2. Increase oven temp to 425. Place squash half cut side down on a cutting board. Carefully remove the peel with a sharp knife. Cut squash lengthwise into 3/4" thick wedges. (Again, you could reverse those steps and try removing the peel after making wedges.) Put squash wedges, 1/4 c olive oil, and thyme in a large bowl and toss to coat. Season with salt and pepper to taste. Arrange squash wedges on two large rimmed baking sheets in a single layer. Bake until soft when pierced with a fork, rotating sheets one time midway through, about 25-30 minutes.
3. Mix remaining 1/2 c oil, 1/4 c lemon juice, and parsley in a medium bowl. Season with salt, pepper, and any additional lemon juice to taste. Place greens in a large bowl, drizzle 1 T of dressing over the top and toss to coat. Season with more salt and pepper to taste. Add dates and parmesan (if using) to remaining dressing for date relish.
4. Arrange greens on a large platter, top with warm squash, and then spoon the date relish over it all. Top with pumpkin seeds as the garnish.

*Note: I have made a version of this dish sans greens - with only the squash (I mixed in delicata too), the dressing, pumpkin seeds, and the dates. It makes a great potluck item.

11.22.2012

Thanksgiving Day Turkey and Veggies

I made my very first turkey!  It was definitely a proud moment when I pulled that beautiful golden brown turkey out of the oven.  I asked around to get advice from others about how to make the best turkey.  Many people mentioned a roasting bag.  Normally I would be against using a plastic bag in cooking; I'm frankly worried about ingesting toxins from the plastic.  But, people told me it was the best turkey they ever made when they used the roasting bag, so I figured I would give it a try.  It was brilliant.  I put herbs and garlic inside the turkey and covered it with coconut oil (might use butter next time), then put it in the bag inside a roasting pan and away it went.  The end result was beautiful, flavorful and perfectly done.  I even have lots of wonderful leftovers, and extra pan drippings, to heat up all week.


I also made a few sides to go with my turkey.  I am doing a pretty strict version of paleo, so I couldn't get very fancy with anything.  I did do an extra twist on butternut squash that I found on theclothesmakethegirl.com.  Instead of just roasting the squash I also pureed it in the food processor with coconut oil, salt, nutmeg, cinnamon, and one egg.  Then, I put it into a casserole dish and baked it at 350 for 30 minutes.  I think I was suppose to have the oven hotter than that, but it turned out really well.  The recipe called for pecans, which I would've loved to have added, but I can't eat nuts.  I highly recommend adding them if you make this version.  It was very good, but the pecans would really add a lot to the dish.  The butternut squash was so sweet, rich and creamy.  I really felt like I was having a dessert instead of a vegetable. Yum!


My other veggie was carrots.  I got the most beautiful and delicious carrots at the Midtown Winter Farmer's Market a couple weekends ago.  They are literally the best carrots I have ever had.  I pretty much couldn't screw up cooking them.  I decided to do them two ways.  I roasted some of the carrots with a little coconut oil, salt, and pepper in the oven for an hour.  I selected the most delicate of the carrots to cook on the stovetop in a little water and butter.  The recipe calls for honey, which of course I can't have, but these carrots were so sweet and tender, the honey would've been too much sweetness I think.  They were spectacular.  What a way to celebrate the harvest.

I was so proud of my turkey and all of the food I was able to make today.  It was a small gathering, just me and my parents, but we had a nice time sharing a meal and spending time together.

I have loved exploring different foods and recipes this fall.  Thank you Megan for inviting me to this blog and for sharing all of your food adventures.  You continue to inspire me.  Everything you post I want to try.  Pressing apple cider sounds pretty exciting.  I've got that on my list for next fall.

Happy Thanksgiving!

11.19.2012

Glazed Delicata Squash

It seems that this month is the one to eat copious quantities of squash. I have some kind of squash pretty much everyday, sometimes more. Yum. Last night I went to my friend and neighbor's Harvest Dinner, which is a lovely gathering to celebrate the harvest, friends, and gratitude. This year I used some of the delicata and herbs from the garden, and also some cider from apples I helped pick and press last year. It turned out pretty delicious - sweet and tangy, with some savory herb bites.

I stayed fairly true to the original recipe, but did not peel the squash. I find it so novel that you can eat delicata peel that I just can't imagine why I would go to the trouble. I also baked it all in the oven instead of cooking it on the stove top, which worked nicely for a larger batch (I made extra), and it turns out I needed less cider that way.

Serves 6-8
2 medium delicata squash (about 2 pounds total)
3 tablespoons butter
1/4 cup coarsely chopped fresh sage
1 tablespoon coarsely chopped fresh rosemary
1 1/4 cups apple cider
2 teaspoons cider vinegar
Salt and pepper
 
1. Cut squash in half lengthwise and scrape out the seeds with a spoon. Cut each piece in half lengthwise again, and then crosswise into 1/4-inch-thick slices. Heat oven to 375.
2.  Melt butter in a heavy large skillet over low heat (or in the oven in a large baking pan). Add the herbs. Cook, stirring, until the butter just starts to turn golden brown, about 3 to 5 minutes (don’t brown the herbs). Add the squash to the skillet/pan. Toss to coat. Add cider, vinegar and salt to taste. Bake in the oven, stirring occasionally, at 375, until the liquid has boiled down to a glaze and the sauce is tender, about 20 to 30 minutes, adding a few tablespoons of water if the glaze gets too thick (I did not need to do this, and this happens quickly. The pan goes from cider-y to glazed in a few minutes!)
3. Season with pepper and additional salt, if necessary.

11.18.2012

Pumpkin pancakes (paleo)

My friend Mary started a small farm venture last summer, including lots of amazing squash. She gave me a huge one - i don't even know the name of it - and I finally cooked it up in preparation for my future pumpkin dessert making plans. I had plenty of puree, so I've been seeking out a couple of recipes to use it in. This morning I made pumpkin pancakes and they turned out delicious!  They are basically just pumpkin puree, eggs, a little coconut flour, and butter/coconut oil. The texture was really nice, a little more thin than fluffy, with a hint of pumpkin taste.


Here is my slightly modified version that made 6-8 pancakes:
4 eggs, beaten
1/2 cup pumpkin puree
1-2 Tbsp coconut flour (not necessary if using canned pumpkin, which is thicker)
2 tablespoons butter or coconut oil, melted
1 teaspoon vanilla
1 Tbsp honey (optional)
1/4 teaspoon baking soda
1 1/2 teaspoon cinnamon
1/4 teaspoon cloves
1/4 teaspoon nutmeg
pinch salt

1. Whisk the eggs, canned pumpkin, pure vanilla extract, and honey together. Mix the coconut flour, spices, and baking soda in a small bowl, and then whisk into the wet ingredients.
2. Mix the melted butter into the batter.
3. Grease a skillet and spoon the batter into the skillet to make pancakes of your desired size. When a few bubbles appear, flip the pancakes once to finish cooking.
4. Serve! I had mine with some blueberries heated up with a little coconut cream. Sauteed apples would also be good, or just butter and cinnamon.

11.13.2012

Coconut chips!

I came across this little snack chip on The Clothes Make the Girl blog, and tried it this morning to bring as a treat with my lunch. It's like a salty/sweet coconut flavor that is really good and so easy. (I could just make these and the seaweed chips non-stop, eating them as they are ready!)

From Clothes Make the Girl blog
All you need is large coconut flakes/chips (they sell them in bulk at the Seward), salt, and cinnamon. I also added in a little chipotle to mine, and that was tasty too. There are lots of variation options: some vanilla for something more sweet, some slivered nuts, paprika for a savory snack, etc.

1 c. coconut chips
1/4 t salt
1/4 t cinnamon
pinch chipotle

Mix salt and spices together in a small bowl. Put a dry cast iron skillet (or non-stick pan) on medium heat. Lay coconut flakes evenly across the pan, stir frequently. It just takes a few minutes for the flakes to brown, so stay nearby. Remove from heat when browned, transfer to a bowl. Sprinkle/shake with the spicy salt. Let cool, then store in an airtight container. Or just eat em all up!

11.08.2012

Sweet Potato, Carrot, Fruit Casserole

I finally got around to making this casserole recipe that is similar to my fave camping breakfast (dried sweet potato and carrots with cream and cinnamon). It tasted so good and oatmeal like! It does not seem to have been originally conceived as a breakfast dish, I just highly recommend it that way.

I edited the original recipe a bit, primarily to include less sugar/fruit, and it still was plenty sweet and delicious. You could still remove the prunes and it would be good too. I ate it this morning with some cream and coconut flakes on top. Mmm. Though the original recipe calls for peeling everything and cutting it small, I went the less fussy way and just cut everything up. Still good! I could see the high maintenance way being nice if you were hosting a fancy party or something. I mean, the photo is quite lovely with hose perfectly diced and peeled things. This makes a lot - I halved it and had enough for several meals. The recipe here serves 8.


2+ tablespoon butter 
6 medium carrots (about 1 1/2 pounds), cut in 3/4-inch dice
3 medium sweet potatoes (about 2 1/4 pounds), cut in 3/4-inch dice
2 Granny Smith (or other tart) apples, cored and cut in medium dice
1/4 cup pitted prunes, quartered
2 tablespoons mild honey
1/2 teaspoon freshly grated nutmeg
1 teaspoon ground cinnamon
Salt to taste (about 1/2 teaspoon)
2/3 cup water
lemon (or orange) zest (of half a fruit or so)

1. Preheat the oven to 375 degrees. Melt butter in a 3-quart baking dish in the oven while it preheats.
2. Place the carrots and sweet potatoes in a steamer set above 1 inch of boiling water, and steam for five to 10 minutes, until just tender. Drain and toss with the remaining ingredients in the buttery baking dish. Place in the oven, and bake 40 to 50 minutes, stirring every 15 minutes, until the sweet potatoes and carrots are thoroughly tender. Dot the top with a little more butter, and bake another 10 minutes until the top is lightly browned. Remove from the heat, and serve hot or warm.
Advance preparation: You can assemble this dish several hours before baking. You can bake it a day or two ahead of serving; reheat it in a medium oven.

11.05.2012

Kimchi Jjigae

Early this fall I got several Korean cookbooks out of the library and copied out a few tasty looking recipes. One of my favorite cookbooks is called The Kimchi Chronicles, which it turns out is also a show on PBS! I am particularly excited because I made a (double) batch of kimchi last month, and I have 4 jars to use in some new recipes.

The show and the food look amazing, as you can see in the clip below. This clip includes the kimchi jjigae, as well as another kimchi soup with seaweed in it (I happened to copy that recipe out before returning the library book too). I love PBS. There are several recipes on the site, including the Kimchi Jjigae that I modified slightly, below, as well as a Grilled Steak with Kimchi Butter that I want to make soon.


This soup tasted AMAZING, and it is super simple. The seaweed "garnish" is really good - I ended up using twice as much because it was such a nice taste combo. My soup ended up being a bit too salty due to my lack of salt calculation for bacon vs. pork belly + my extra salty kimchi, so I added in some chicken broth. That was great too and made a slightly thinner soup.


From the Kimchi Chronicles

Kimchi Jjiage:

  • 2 tablespoons toasted sesame oil
  • 1 pound bacon, cut into 1/4" pieces
  • Freshly ground black pepper
  • 1/2 large yellow onion, coarsely chopped
  • 3 cups coarsely chopped kimchi with a bit of its liquid (use the most pungent, sour kimchi available)
  • 1 t. anchovy paste due to my gluten intolerance
  • 5 scallions, thinly sliced
  • About 1/2 cup thinly sliced nori for garnish
Heat the sesame oil in a large soup pot over medium heat. Add the pork belly/bacon, season with pepper, and cook, stirring now and then, until rendered, browned, and crispy, about 10 minutes.

Add the onion and kimchi and stir to combine. Add enough water to nearly cover the pork mixture (5 or 6 cups), cover, and bring to a boil. Immediately reduce the heat and simmer until the onion and kimchi are softened and the soup is quite thick, about 20 minutes.

Stir in the anchovy paste and scallions. If it’s too thick for your liking, thin the stew with water or broth. Cover the pot and simmer for 10 minutes to combine the flavors. Serve steaming hot sprinkled with gim/nori.

10.30.2012

Julia Child's Boeuf Bourguignon (gone paleo)

Have you seen the most delightful auto-tunes ever? It is of Julia Child, and I watch it regularly because it makes me feel very happy.


I recently happened across a Julia Child cookbook at the library that listed all of the recipes from her PBS series. Rather than be organized by meal or category, the whole cookbook is organized by show. Boeuf Bourguignon was show # 96, and I made it last week. It is actually my first Julia Child recipe ever, and I found it easy, although lengthy, and absolutely delicious. This is a recipe you need to be around for - so make it on a day when you want to feel toasty with the oven on and putzy around the house. (Incidentally,  I thought about making Coq Au Vin, and after reading that recipe, realized it is basically the SAME as Boeuf Bourguignon, but with chicken.) I actually didn't totally know what either of these recipes were, even though I spent three years working at a French restaurant where we served both (my past vegetarianism kept me from actually eating them). But essentially, Boeuf Bourguignon combines slow cooked beef (or venison in my case), lots of red wine, onions, broth and mushrooms. It sounds so simple and not too exquisite, but how these simple things come together = totally delicious.

Part 1: Beef
6 oz bacon (not smoked)
olive oil
3 lbs. lean stewing beef cut into 2-3" chunks
3 c. "full bodied, young red wine such as Macon, Burgandy, or Mountain Red" (I used what I had, which was not any of those and it still was good!)
2 c. beef broth
1 T tomato paste
2-3 cloves mashed garlic
1/2 t thyme
1 bay leaf
salt

1. Preheat oven to 325.
2. Cut the bacon into sticks 1 x 1/4". Brown the sticks in a large skillet with a little oil and render out the fat. When browned, remove the bacon.
3. Set heat moderately high under skillet with oil/fat. When almost smoking, brown the beef a few pieces at a time - turning frequently to brown all sides. Place the beef, as it is browned, in a casserole or baking dish.
4. Pour browning fat out of skillet (I had used up all mine), pour in the red wine, and scrape up all the flavorful brown bits, then pour wine into casserole. Add the bacon and enough beef broth to almost cover the meat; stir in the rest of the ingredients and bring casserole to a simmer on top of the stove. Cover the casserole and set it in the lower third of the oven. Regulate heat (I had to turn mine down to 275) so the liquid simmers slowly for 2 1/2 to 3 hours or longer, until beef is tender when pierced with a fork.

Part 2: Onion and Mushrooms
1 lb. fresh mushrooms
1/2 T olive oil
1 1/2 T butter
1/4 t salt
18-24 small white onions 1" in diameter (I just used two large onions, chopped)
1 T butter
1/2 t salt
water

1. Trim mushroom stems. Cut the caps into quarters and the stems on the bias. Heat oil and butter in a skillet until butter foam begins to subside, add the mushrooms and toss over high heat for 3-4 minutes to brown the mushrooms very lightly. Remove to a side dish until needed, then toss with the salt.
2. Because I used chopped onions instead of whole ones I skipped some steps. She has you boil and peel the onions. For chopped onions: place chopped onions in a heavy saucepan; add the butter and salt and enough water to come halfway up the onions. Cover and simmer very slowly for 20-30 minutes, or until onions are tender. Set aside, saving cooking liquid.

Part 3: Sauce
3 T Butter
1 Onion, diced and boiled in water/butter*

*This onion is functioning as the thickener here instead of flour.
1. Boil a diced onion in a little bit of water and the butter so that the onion becomes translucent and the water boils off. It will take about 15 minutes. Blend it in the food processor until smooth.
2. When the beef is done, set the cover "askew" and drain the cooking liquid in a saucepan. You should have about 2 1/2 cups (I did not- way less for me!); if liquid has boiled down, add more beef broth. Skim off any fat and bring liquid to a simmer. Taste for seasoning, adding salt and pepper as necessary. Add pureed onion and butter to broth, as well as onion water from earlier. This is the sauce!
3. Add onions and mushrooms to the beef, pour on the sauce, cover and simmer slowly for 5 minutes to blend flavors. The dish is now done! (If you are not serving immediately, let cool and refrigerate to reheat later.)
4. Serve the boeuf bourguignon in its casserole, or, if you wish, arrange on a hot platter surrounded by roasted cauliflower, on top of mashed cauliflower, or decorated with parsely.

10.28.2012

Shrimp and Pesto Zucchini Pasta

I am obsessed with zucchini noodles.  My little julienne peeler is the best kitchen gadget I have purchased this year.  Besides a giant crock pot I guess:) I am constantly dreaming up ways to use my peeler to make fun vegetable dishes.  Ever since basil harvesting time I have been making an easy pesto sauce and adding it to my veggie noodles.  If you make a batch of pesto ahead of time and either freeze it or store it in the refrigerator, this is a fast and easy dinner option.  Today I decided to add a few shrimp to the dish, but I have used chicken before, which was also good.

I think the green color of the noodles and the pesto really compliment each other.  The little pink shrimp are a yummy and visually appealing addition to the dish.  After all, we eat with ours eyes first.

Pesto Ingredients
fresh basil leaves
pine nuts
olive oil
sea salt

Honestly,  I eyeball the ingredients. Add however much you like.  I like to roast the pine nuts on the stovetop for a few minutes to get their oils going and bring out the flavor.  Add the basil, pine nuts, and salt to the food processor.  Slowly drizzle in the olive oil as it is mixing.  I use Megan's earlier advice about picking an olive oil.  Try not to use extra virgin olive oil, it has a strong flavor that over powers the rest of the ingredients.  I use light olive oil instead.

Pasta Time!

Thaw the shrimp.  Cook them over medium heat in a little olive oil until tender.  While the shrimp are cooking, cut your zucchini noodles.  Once the shrimp are cooked remove them from the pan and add the noodles to the sauté pan with some olive oil.  Then, add a couple tablespoons of the pesto.  Cook a couple minutes until the noodles start to get tender.  Add the shrimp back in for the last minute of cooking time.


Bon Appétit!

SCD/Paleo Pumpkin Pie

When fall rolls around I always find myself craving pumpkin pie.  Naturally, the pie pumpkins have been plentiful at the market lately, and they have been calling my name.  I bought one a couple weeks ago and whipped up with this tasty pumpkin recipe that is remarkably similar to pumpkin pie.  I didn't make a crust, but you could easily add the mixture to any sort of crust.  You could probably use canned pumpkin, too, but there's just something so cozy about pulling a roasted pumpkin out of the oven.  Plus, you can roast the seeds for a great snack.

How to roast a pumpkin

Cut pumpkin into large pieces- around 4 pieces.  Put them flesh side down on a baking sheet and roast in a 350 degree oven for about an hour.  Once you can easily stick a fork in the shell and the pieces start to flatten out, you know it's ready.  Let the pumpkin cool until it's easier to handle.  Then, scoop out the flesh using a metal spoon.


SCD Pumpkin Pie

3 large eggs
1 can pumpkin puree (about a cup and a half)
1 cup coconut milk
1/2 cup honey
1 tsp vanilla extract
1 tsp salt
2 tsp pumpkin pie spice
Preheat oven to 350 F. Generously grease a 9″ pie pan with coconut oil or butter. In a medium bowl, beat eggs. Add pumpkin and coconut milk. Stir to combine. Add honey, vanilla, salt and spice. Mix well. Pour into greased pie pan and bake for 1 hour until the top is nicely browned and the custard filling has set. Let cool and then refrigerate overnight. It’s very important to refrigerate and thoroughly chill the pie before serving as it helps the filling to set. If cut when still warm out of the oven, the filling is way too soft and more of a pudding than a pie.

I eliminated the honey and made my own coconut milk.  The natural sweetness of the coconut and pumpkin made up for the loss of the honey.  Over all, this is a super tasty fall dessert.


Happy Halloween!

10.24.2012

Mish Mash and Paleo Meatloaf

Well, I seem to not be posting my meals lately, though I am eating lots of delicious recipes from last year, including coconut kale, bohemian brussels sprouts, lots of roasted delicata squash from my garden, and various venison steaks.

I did make this crock pot meatloaf last week...mostly because I had one of those weeks where I was not home long enough to cook but needed many meals, and why not let it all cook while I am away?! I love crock pots. It tasted great - it looked slightly strange because you get some excess liquid - but no problem.

The recipe I followed/modified is here from a blog called PaleoPot. All of the recipes are for a crock pot - so clever! And I thought the tomato topping was one of my fave paleo ketchup sort of substitutes. It was super easy and really good.

Meatloaf:
2 pounds of lean ground meat
2 eggs, beaten.
4 ounces of bacon, crisped and chopped.
1/2 of a med white onion, small dice.
2 stacks of celery, sliced thinly or chopped
1/2 small green pepper, small dice
2 tsp of dried oregano
1 tsp of black pepper
1 tsp of thyme
2 tsp of smoked paprika
1 tsp salt

Sauce:
1 small can of tomato paste (can also use 1/4 cup of tomato sauce)
2 to 3 tbsp of dijon mustard
2 tsp of smoked paprika
1 tsp of apple cider vinegar
salt to taste

1. Chop up your bacon and cook until brown and crispy.
2. In a large bowl combine your ground meat, beaten eggs, bacon, veggies and seasonings. Mix everything together by hand, forming a loaf. Place your loaf in your slow cooker and press it down so that the top is flat and you have about of inch of space between the loaf and the sides of the slow cooker. (this is where all that liquid fills in later.)
3. Mix your tomato sauce ingredients together and spoon them over the loaf. Use a spoon or a knife to frost the loaf’s top as evenly as possible. (I did this later after the loaf was done because I ran out of time in the morning - still was great!)
4. Cook on low for 4 to 6 hours.

*This also reheats super well and was good cold.

9.19.2012

Roasted Chicken Thighs/Roasted Beets & Sweet Potatoes

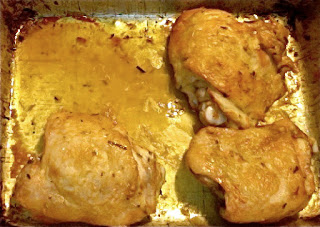
Well, as fall descends, my work schedule shifts to later hours. Which means I want dinner to be pretty speedy and/or easy, along with tomorrow's lunch prep. Last night I ate steak and some roasted broccoli (20 minutes total, but only 5 of that involved any action on my part). This morning I put 4 chicken thighs in the oven, along with 2 small sweet potatoes (cut into wedges), and 2 beets. They all roasted in under an hour, and I got 2 lunches and a dinner out of it, plus some extra sweet potatoes for breakfast tomorrow. And all I have to do is reheat it for dinner. I love fall and roasting things!

Roasted Chicken Thighs
4 bone-in, skin-on thighs
Olive oil
Spiced salt (I like Sel de Cuisine from Mississippi Market)

Preheat oven to 400 degrees. Rub olive oil and salt rub over thighs (all sides). Place them skin side down in a cake pan. Bake for 40-50 minutes, flipping over halfway through.

Roasted Beets and Sweet Potatoes

While the chicken cooks, throw in some beets wrapped in foil to roast, and/or sweet potato wedges. I coated the sweet potatoes in coconut oil and sprinkled on a bunch of the Sel de Cuisine. They only take about 20-30 minutes, depending on the wedge size, and can be flipped part way through. You could do giant wedges, which would finish up about the same time as the chicken. The beets take the longest: about an hour. Once they are cool enough to handle, peel off the skin (I just waited til I got home later that day.) I made a simple salad a la An Everlasting Meal from a couple of posts ago: slice or chop the cooled beets and top with olive oil, vinegar, a nice salt, and roasted nuts. Mmmm.
Chicken thighs sans 1 (it was in my lunch already)

For the fast dinner: reheat the thighs under the broiler for a few minutes on each side. They get piping hot, and can be served with the chilled beets, or along with the sweet potato wedges (reheated or not) making dinner cook time about 10 minutes.

9.06.2012

Paleo Energy Bars

I am going camping again - including some expected canoeing and portaging and traveling, so I have been on the hunt for a good granola/energy bar recipe to fuel my travel.

I settled on a slightly modified recipe from Paleo magazine that includes macadamia nuts, dates, coconut and dried fruit.  Really, it seems as though dates are THE ingredient for paleo energy bars - they bind the nuts and whatever else together. My second fave recipe was for chocolate date nut balls. Yum. These bars turned out super tasty - very granola-bar-ish. They do fall apart more easily than baked granola bars, but that seems minor compared to the tastiness!

Paleo Energy Bars
  • 8 Medjool dates, sliced in half, pits removed
  • 1/2 cup finely shredded coconut
  • 1/2 cup organic currants
  • 3/4 cup macadamia nuts
  • 3/4 cup other nuts (I used almonds and brazil nuts)
  • 1/2 cup dried cherries
  • 1/4 tsp cinnamon
  • 1/2 tsp pure vanilla extract
  • 1 tsp honey
  • pinch of salt
  1. Add all ingredients to a food processor and blend for about 1 minute or until everything is chopped into small pieces and starts to stick together.
  2. Place mixture on a large piece of wax paper.  With your hands, shape into a rectangle, pressing and patting it until very dense and it sticks together nicely. I actually pressed mine into a wax-paper lined rectangular tupperware - whatever works.
  3. Refrigerate for a few hours, until very firm.  Slice into bars and enjoy!
  4. Store at room temperature for up to 1 week; in the fridge for up to 2 weeks; or wrap bars individually and freeze until needed.  To thaw, simply set on counter for about 30 minutes to bring to room temperature before eating.
*I wrapped these in wax paper and packed them in a ziplock baggie for my canoe trip. They are currently in the freezer until I leave!

9.02.2012

Roasted tomatoes

I recently read An Everlasting Meal, and oh I could just read this book endlessly. I learned about it from my cousin Jenny, who does food writing/photos in DC - often about Slavic food, like this one for Georgian Eggplant Rolls with Walnut-Garlic Filling.  She also has a lovely blog called Eat with Pleasure that I find captivating.

The book is not really a cookbook, except that it also is. Author and chef Tamar Adler really is just writing about all the glorious ways to enjoy food - and while reading it, one's confidence is bolstered to do so while cooking without recipes, with joy and ease. The chapters are titled things like: How to Boil Water, How to Teach an Egg to Fly, and How to be Tender. Throughout it all she talks about how to make the most out of every ingredient (save parsley stems, salvage herbs, etc), while also doing things like baking a surplus of root veggies on Sunday to then make all kinds of delicious things with them throughout the week. It's really beautifully written and I found it so fun and creative. For example, in How to Season a Salad:

Because a salad can be made of anything, make one of an ingredient about which you get excited, or of whatever looks most lively, or of whatever you have around already...Cold, roasted beets, sliced or cubed, drizzled with vinegar, and mixed with toasted nuts and olive oil are a wonderful salad. So is roasted broccoli, tossed with vinegared onions and a light smattering of dried chile. So are green beans, boiled until just cooked, cold and sliced thinly, tossed with peanuts and crisp scallions and rice wine vinegar and sesame oil. So is boiled cauliflower or potatoes already salted, drizzled with vinegar and oil, with a big handful of chopped olives and capers mixed in. Anything, cooked or raw, cut up a little, mixed firmly with acid, salt, and a little fat, laid carefully on a plate, or spooned nicely in a bowl, is a "salad." 

This recipe/post is not really anything from her book, but it is inspired by her writing. I have had a surplus of cherry tomatoes this season - which really, I love cherry tomatoes and can eat them on pretty much anything. Lately my favorite is a salad of cucumber, blanched green beans, cherry tomatoes and tuna salad. But still, there are only so many a person can physically consume each day. So some go in the freezer (do you know you can just freeze tomatoes? it means when you go to cook them later they will have the peel on, but I hardly notice that for the ease that is just popping them in a freezer bag), and some get cut in half and roasted.

These roasted tomatoes can then just live in a jar covered in olive oil in the fridge for many weeks, or put in the freezer too. These are absolutely delicious with buttery eggs in the morning - they cause me to swoon they are so good. They would also be great on pizza, in salad, pasta, with sauteed veggies, etc. And after the tomatoes are gone, the left over olive oil is herb and tomato infused, which makes it tasty for putting on any other veggies or salad.

Oven roasted cherry tomatoes
Cherry tomatoes (as many as you have) - cut in half
olive oil
herbs: basil and thyme are good
salt and pepper

Arrange your tomatoes halves on a cookie sheet and drizzle with olive oil, and sprinkle with herbs and salt and pepper. Bake at 250 degrees for 2-3 hours, depending on the done-ness you like and the size of your tomatoes. *You can do this with slices of larger tomatoes too.  I like mine to still be soft, but dehydrated and without much liquid left. Remove them from the oven when they look right to you, and let cool. Put in a jar and cover with olive oil (will last several weeks this way), or freeze the whole tray and then put the tomatoes in a freezer bag.

For the eggs: make scrambled eggs with extra butter - melt the butter in the pan first, and pour in your eggs (with a little cream added in). Cook them until they are just barely done, and then serve them with the tomatoes from the jar, gently laid on top. It is divine!


8.29.2012

Coban Salad

I recently checked out a really lovely cookbook from the library: Bought, Borrowed, Stolen. The British author has re-created recipes from 20 different countries, with stunning photos and really aesthetically nice layout. The recipes I found myself most drawn to were ones from Turkey, Burma, and Morocco. I copied a few of them out, so they will find their way to the blogosphere once I get to making them. The one I've made a couple of times already is Turkish: Coban Salad. It uses veggies and herbs that are all plentiful right now, plus some olives and a light lemon juice and olive oil dressing. I substituted some things because of what I had in the garden or fridge (cherry tomatoes, italian parsely, banana peppers, etc) and it all tasted amazing.

Coban Salad
1 lb. 2 oz. good quality, ripe tomatoes, quartered, seeded, diced small
1 lg. green pepper, diced small
1 red onion, diced small
big handful flat leaf parsley, finely chopped
medium handful mint, finely chopped
2 1/2 oz. stoned olives, roughly chopped
juice of 1 lemon
3 oz. extra virgin olive oil
salt/pepper
(feta cheeze is optional to add here too, I left it out)

Mix all of the veggies, herbs and olives in a large bowl. Squeeze lemon juice over everything and drizzle the olive oil. Season with salt and pepper to taste.

8.22.2012

Charred Eggplant, Zucchini, and Tomatoes

Lately I am really loving eggplant?! I am not sure when this transformation happened, but I think it was sometime right after the Roasted eggplant and tomato curry last spring. Now I just cook it up any old time - no reservations or worry that it will have a weird texture. And they are so beautiful right now! Long thin purple orbs, fat squat lavender ones, large bulbous plum ones...

My favorite veggie combo of late is Zucchini, Eggplant, and Tomato. I keep envisioning some kind of layered terrine of these three, with basil and olive oil drizzled over the top. But that has not yet happened - I think I am reluctant to do some major oven roasting until it is just a little bit cooler. Instead I am making a "charred" medly of the three, cut small, with some onion. This is so simple and it tastes amazing - the sweet tomato with the creamy eggplant and the savory zucchini.

Served with lamb burger and tahini sauce = woah. really good.
Charred eggplant, zucchini, and tomatoes
1 eggplant - the long narrower kind
1 zucchini - similar in size to your eggplant
1/2 onion (optional) - cut in short, fat strips
tomatoes - any kind will do, chopped large
olive oil

The whole trick to making these veggies taste so good is to really sear them. This means two things: a hot cast iron pan, and well cut veggies with multiple edges to char.

1) You want to cut your veggies so that they have multiple edges on which to sear. Cut your eggplant and zucchini into quarter-spears the long way. Work with one quarter at a time and cut with your knife at an angle, turning the spear a quarter turn each time you cut. This will miraculously result in pieces that have several flat edges. (Feel free to cut it other ways too, just get a few large flat sides)
2) Start heating your largest cast iron skillet - make sure it is dry and there is no oil in the pan. While it is heating, toss your zucchini, onion and eggplant pieces into a bowl. Pour a long glug of olive oil over the top, and sprinkle generously with salt. Stir.
Freshly cut veggies starting to sear - it's a wee bit crowded.
3) Once pan is hot, dump all the veggies in and arrange so that they are in one layer on medium-high heat. Let them sit! Don't touch them for 3-4 minutes!
 4) Cut cherry tomatoes in half, or chop up any other kind. Put these in a bowl and pour on olive oil and a good bit of salt, and give a stir. Spread them in a single layer on a pan, and put under the broiler. They will get done right about the time of the other veggies.
5) After the zucchini and eggplant have sat still, flip the pieces over - making sure to give them all some chances to char on each side. Repeat as needed - making sure you let them sit and sear on the pan. Less turning is better!
6) Remove everything once the zucchini and eggplant are blackened, and the tomatoes are browning. Pile up on a plate and serve. These are excellent as is, or chop up some basil to go on top, or toss in pesto. I made a really nice dressing/dip for mine: tahini, lemon juice, salt and water. Mint might be nice too.

8.20.2012

Zucchini Pasta

Vegetables are abundant right now and it is so fun to walk through the market and pick up all kinds of colorful veggies.  Once I get them home I have to come up with a multitude of ways of using them before they go bad.  Enter zucchini pasta.  Summer squash are my favorite food right now and with the help of a julienne slicer you can turn zucchini, or any summer squash, into pasta noodles.  I haven't eaten actual pasta in a long time, so I don't even notice the difference.  The sauce mixes with the noodles and it is just a plate of veggie deliciousness.


Zucchini Noodles: I always peel the zucchini, but I don't think this is totally necessary.  I think it makes the noodles softer and closer to a pasta type consistency.  Then use the julienne slicer to create beautiful long noodles.  Sautee them in a pan with a little butter/oil for about 2 minutes to soften them just a bit.

Sauce:  The options here are endless.  I like to use ground pork, but ground beef would be good as well.  Brown the meat in a sauté pan with a little oil.  You can add some garlic and onions if you want.  Next comes the veggies.  Since fresh tomatoes are so abundant right now I use fresh garden tomatoes, but canned tomatoes would work, too.  I also like to add red peppers and green onions for some extra flavor and veggie goodness.  Chop and toss the veggies in with the meat and let is cook together for about five minutes.  Toward the end of the cooking process add some sweet basil.  This is the do not miss ingredient.  It is such a wonderfully fresh and fragrant addition to the pasta. Right now fresh basil is cheap and all over the place.   I keep buying it and then need ways to use it up throughout the week.  This pasta pile up is a great solution.  It is so sad to throw past it's prime basil into the compost heap.

Have fun with all those beautiful summer vegetables.


8.19.2012

Roasted Seaweed snack

I just re-watched Terri Wahl's "Mind your Mitochondria" Ted Talk - she is the doctor who basically "cured" her MS with a diet of tons of veggies, especially greens. Tons as in 10 cups a day or three dinner plates piled high. Woah. She also talks about the health benefits of seaweed. I have not eaten it much except in nori form: in sushi and in those little snack packages of Roasted Seaweed that are overly-pricey.  I want to explore some other options, but in the meantime, I stumbled across a way to make those little roasted snack sheets! I think they are so tasty and chip-like.

I have not tried storing these yet - my guess is you would have to keep them in a zip lock or tupperware type item to keep the crispness.

Make as many as you want, but for each sheet you need:
1 sheet of nori seaweed paper
1/2 tsp olive oil (or sesame or coconut oil)
sprinkle of salt

1. Brush olive oil on one side of the nori.
2. Sprinkle salt on the olive oil.
3. Turn your gas stove on medium heat and wave the nori over the flame. You will do several passes over the flame - each time you do the nori sheet will crinkle up a bit. It is done when the whole sheet is toasted and crispy - it only takes 20 seconds or so. You can toast either side this way - I did the oil side down, but it seems like either way works.
4. Eat as is in big bite-fulls, or cut them into squares with a scissors if you want a more refined experience.

After doing a quick search, it looks like you can also bake sheets of oiled nori and get a similar result. They just take 2 minutes, so this might yield higher quantities!

8.16.2012

Paleo Bibimbap

You know that really tasty cucumber noodle recipe I posted last month? I've been making it fairly non-stop ever since, especially eating it with bibimbap.  Bibimbap is a korean dish that is traditionally rice with a variety of vegetable dishes and meat all together in a bowl, with an egg on top. I have been having a version of that dish pretty much every week - sometimes twice. It's a meal that can use whatever you've got around, which makes it an easy weeknight dinner...or breakfast. Or lunch.


Though you can use whatever veggies you want, I recommend that for the paleo version you DO use the sesame cucumber noodles, since it provides a sort of base/extra flavor for all the other veggies. It sort of takes the place of the rice in that way - tying everything else together.

Here are some recommended veggies for my version of Paleo Bibimbap (serves 2) - primarily selected because they grow in my garden. But see other options and inspirations here (includes more precise measurements than I use) and here.
  • Cold Sesame (cucumber) noodles
  • Sliced Zucchini - Use a mandoline or sharp knife to thinly slice 1 smallish zucchini. Salt with 1 tsp salt and let sit in a colander over a bowl for 30 minutes. Squeeze and pat slices dry. Splash with olive oil and stir to mix.
  • Julienne carrots - Cut 2 smallish carrots to matchsticks. Flash cook them in a pot of bowling water for about a minute. Remove from hot water, rinse briefly to cool. Season with salt.
  • Sauteed greens (or red cabbage) - Grab a handful of kale or collards or mustard greens, roll up and thinly slice. Saute in coconut/olive oil with a little water for several minutes, until greens are wilted and bright. Season with tamari, olive oil, sesame oil, and vinegar.
  • Seared green beans: Saute green beans in oil/fat for a few minutes, letting them brown on the pan over high heat before stirring. Sprinkle with some pepper flakes and sesame oil.
  • Kimchi
  • Meat (optional): Any thinly sliced leftover steak/pork would be great, or bacon is good too.
  • 2 Fried or poached eggs
  • Toasted sesame seeds and sliced green onion or chives (optional)
  • Sriracha (is my cop out - the sauce can be made from the above inspiration links)
To assemble your dish: Each ingredient is dished between two large bowls. I generally put the big pile of cucumber noodles (which will be the largest quantity ingredient) in the center, with all of the other veggies/meat piled around it. Top the whole thing with the egg, and then sprinkle on the toasted sesame seeds and sliced green onion or chives. Serve with sriracha. YUM!