We are a collection of Minneapolis folks cooking, preserving, and harvesting local, seasonal foods. This blog-share is meant to inspire greater culinary genius, as well as continued local food invention. What are YOU concocting in that kitchen of yours?

8.13.2012

Babaganoush

I don't remember ever making babaganoush before, though I remember the first time I had it as a kid - I thought it was SO delicious. Way better than hummus. I got a big eggplant from my friend's CSA (thanks KT) last week, and decided to roast it and make a batch of babaganoush. It's pretty easy - just roast the eggplant and blend it up with a few other things. It turns out it tastes a little weird warm, so make sure you chill it after you are done! I had it with roasted tomatoes, zucchini, lamb and peppers tonight and it was really good.

Babaganoush
1 large eggplant, or 2 medium small ones
1/4 cup tahini
juice of 1 lemon (maybe a little more)
2 T olive oil
1+ tsp salt
1 tsp pepper
1/2 tsp cumin
1/2 tsp cayenne

1. Prick the eggplant all over with a fork. Roast it in a 400 degree oven for 30-35 minutes. It will look soft and deflated when it is done. (*I read that before roasting it, you can "char" the skin over a gas flame for 5-10 minutes to get a nice smoky flavor. I will try that next time!)
2. Let the eggplant cool, or put it in a cold water bath for 5 minutes. Once it is cool enough to handle, peel off the skin and chop the eggplant into big chunks - set aside.
3. In a food processor, blend the tahini with the olive oil, lemon and spices to "fluff up" the tahini. This will help make the mixture extra light. Add in the eggplant and blend again, until it is creamy with some texture. Taste and adjust seasoning as you want. I added in a little more lemon to mine because I like it a little tangy.
4. Chill in refrigerator and serve! Try it with roasted veggies, or as a dip for raw cucumber and carrots. It would also be nice with some paleo crackers, but I am not feeling so ambitious even though she says they are really easy. Tomorrow I am going to try it on a burger....
*Fresh parsley would also be good in there if you have it!

8.11.2012

Chicken Tomatillo Stew

Oh the market is filling up with tomatillos!  I actually still had some frozen ones in my freezer from last summer, so I thought I'd use them up in this stew. The recipe is from Paleo Comfort Foods, and it is pretty simple and makes a big batch - which means good freezing for lunches later. And I got to use the first green pepper out of the garden, and poblanos from the farmer's market!

The flavor in the stew is nice and spicy - not too hot, and your kitchen will smell like a good taqueria. The tomatillo sauce I had in my freezer did have some jalepeno blended in, so that added a little extra heat to mine. For the chicken, I just got some large chicken breasts, coated them in oil and a little flavored salt rub, and stuck it under the broiler for 15 minutes (flip halfway through). Then I shredded it up and added it to the pot.

Chicken Tomatillo Stew
1-2 T coconut oil
1-3 poblanos, chopped
2 yellow onions, chopped
2 garlics, minced (opt)
2-3 green or red peppers, chopped (opt)
1 cubanelle pepper, minced (opt - I used a habenero from my garden instead)
2 t chipotle pepper
2 t chili pepper
1 T cumin
2 t smoked paprika
1 1/2 lbs fresh tomatillos, husked and chopped small/crushed in food processor
1 24 oz can tomatoes (or fresh ones!)
4 c chicken broth
2 lbs cooked chicken, shredded (pulled pork would work too)

1. Heat oil in a large pot.
2. Add onions, poblanos, peppers, and garlic and saute until onions turn translucent.
3. Add spices and minced hot pepper if using. Stir to mix.
4. Add tomatillos, tomatoes, broth, and chicken. Bring to a boil, then simmer for 1-2 hours.
(I opted to move everything to the crock pot to simmer - and I left it in there for a bit longer.)

8.08.2012

Carrot Cashew Soup

I have been on the hunt for a new soup recipe that will help me use some of the chicken stock I have been accumulating lately.  I stumbled upon this carrot cashew soup recipe today and decided to give it a try.  I am huge fan of cashews because they are so creamy when pureed and make a great dairy substitute.  The recipe author says she loved this soup so much that she wanted to drink it with a straw, and I have to agree.  I haven't had very many carrot soups, but this one is really good.

I had a hard time deciding how many carrots to use.  The recipe calls for 1 lb. but when I had them peeled it just didn't look like very many carrots, so I did 2 lbs.  It turned out to be a good choice because 1 1/2 cups of cashews is a lot and I needed more carrots and stock in order to off-set them.  If you want to use 1 lb. of carrots I would recommend doing only 3/4 cup of cashews.  I think this is a good way to go because I ended up making a huge batch of soup.  Although, I put a lot of it in the freezer and will be able to pop it out for heat ups, which is super awesome.

I found the recipe here.  The recipe includes roasting the carrots, onion, and garlic, which I think is one of the main secrets to the tastiness of the recipe (that and the cashews).  It took extra time and effort, but I think it was well worth it.


Kimchi

I first had kimchi in 9th or 10th grade - I would go to my friend's house after school and we would pile the kimchi on top of rice and eat it with chopsticks (me very haphazardly). I remember having to keep my mouth wide open after bites because the combo of the hot rice with the spicy kimchi made my mouth feel like it was on fire. I liked it so much that I got my mom to drive me to the korean grocery store across town so that I could buy my own, which my family then made me eat outside on the porch because they didn't like the fermented garlic smell. (This was not a familiar scent in my German/Irish/Czech/Norwegian home!)

I didn't eat kimchi again for years and years, and only in the last 5 or so did I realize I could make it myself. I've tried it a few times now, and am still working to perfect my own favorite version. There are so many recipes and ways to salt the cabbage! This time I modified a recipe from 2 places: a blog called Eating and Living - A Korean American mom's home cooking, and Anna's Korean Kitchen Diary - both had easy directions and nice photos. The kimchi turned out really good. It was also a bit saltier than I like, so I will use Anna's salting amount and method next time. Hers is what I include in the recipe below. My recipe changes include: no garlic, a food processed onion instead of rice powder, and anchovy paste instead of salted shrimp/raw shrimp/fish sauce. I have made kimchi without any fish sauce/anchovy/shrimp before and it has still turned out good, so if that sounds better for you, just take that out.

Kimchi (makes 2 quarts)
1 large napa cabbage (6 pounds)
1/2 c. course sea salt
5 c. water

1 daikon radish, cut into matchsticks
3 scallions, cut in 1-2" pieces
1/2-1 cup (korean) chili red pepper flakes*
2 T anchovy paste
1/2 onion minced in food processor
2 t. grated ginger
1/2 c. water
 *Korean red pepper flakes are recommended, but mine turned out fine with the kind sold at the co-op. I used 1/2 c. and it turned out mildly spicy. Like a 3 on a 1-5 heat scale.

See Anna's recipe for preparing the cabbage - the napa does need to sit for about 2 1/2 hours, so allow that much time. While the cabbage is pickling, you can prepare the "sauce". Cut the daikon and scallions and put in a bowl. Mix the remaining ingredients together (you could start with the onion in the food processor, and once it is well minced, add the other ingredients - or just do that in a bowl by hand).

Once your cabbage is ready, it needs to be well rinsed (several times) to get the salt off. You will then stuff the radish mixture into the cabbage leaves (as in Anna's blog post). Notice that she keeps the entire quarter of the napa together so that the radish mixture can be stuffed inside. I found that it is really hard to pull out the cabbage (once it is all finished) and eat it this way, so at this point I would chop up the stuffed napa and fill up my quart jars. However you want to do it - just get all the stuff in the jars!

Once the jars are stuffed, make sure to press the filling down so that it is submerged in water. They will continue to "juice" water as they sit out, so you can leave extra space or be prepared for them to overflow. I just covered mine with the canning lid (without the screw on part) so that they were covered, but could still breathe.  Let them sit out 24 hours or more - taste to see when it is fermented to your liking, then refrigerate the jars. They will keep a super long time - more than a year.

8.03.2012

Tilapia

My favorite new fishy discovery is tilapia.  I can't believe it took me so long to try it.  I have never been a big fan of cod and a couple other types of white fish, so I thought it would be in that same taste category, but it's not.  It is so much tastier, at least to me.

I'm sure you can get really fancy when preparing tilapia but my favorite thing to do is pan sear it with butter and lemon juice.  It's easy, light, and flavorful.  Plus, the other bonus about fish is that it cooks very quickly, so if you are hungry, it won't take long to get this yummy meal on the table.

I like to pair my fish with a green vegetable.  In the picture I have the stems from some baby bok choy sautéing next to the tilapia.  This was a good combination.  I have also done green beans recently since I have been getting some really beautiful beans from my garden.


Ingredients:
1-2 tilapia filets
a few lemon slices
1 Tbsp butter or ghee
sea salt and pepper to taste

Directions:
Heat some of the butter or ghee in the pan.  Put the rest of the butter on the fish along with salt and pepper.  I like to slice the lemon and lay it on top of the fish as it cooks.  The lemon flavor slowly infuses, and then I squeeze the lemon on top right before eating.  It only takes 5-7 minutes for the fish to cook.  If the fish is larger I flip it over and cook both sides, but if the fish is thin this isn't necessary.  The crispy edges are especially tasty.

Enjoy!


8.02.2012

Cucumber Kimchi

A couple of months ago I ate at a new restaurant in the Global Market called The Left Handed Cook. Though not paleo, they do label/make GF versions of stuff on the menu - which I find eases my mind to trust that the food will in fact be GF. The food was amazing, and the pair of (assumed) owners exceptionally charming. I was particularly in love with their cucumber kimchi, which I set an intention to try and make when my cucumbers came in. Which is now!

I think that part of why I loved this dish is because traditionally there is a little sugar in there and it is a wee bit sweet. I did not add it, but you could definitely do that for a sweeter taste. Without, it is a crisp, light form of kimchi that is not quite as hot or meaty as the napa cabbage version. It also (apparently) tastes best shortly after the fermentation process is done. I guess the cukes lose their crunch the longer they refrigerate. The recipe I modifed is from a blog called Aeri's Kitchen. The recipe there is for a pretty large batch, so I quartered it and changed some things (like I don't eat garlic, and didn't have fish sauce). I also did not have the traditional korean red pepper spice, which apparently has a really distinct and slightly sweeter flavor than american red pepper powder/flakes. It may also be stronger, since mine was a little mild. All of the blogs recommend that you get the actual korean variety, but I had not done that. Alas. One other post with nice photos and a slightly different recipe (with radish in it) that is worth checking out: Beyond Kimchi.

Main stuff:
6 pickling cucumbers
1/4 c. sea salt
3 c. water
1 green onion

Sauce:
1/4 c. red pepper flakes
1/2 onion, minced (I did mine in the food processor to get it more liquid-like)
1 T. anchovy paste or minced anchovies
1/2 t. minced ginger
2 T. water
(2 t. honey, optional)

1. Cut off both ends of the cucumbers. Then cut an x in the cucumbers, lengthwise, all the way down to about half an inch from the bottom; you could also cut all the cukes in half to make mini ones - but still do the same x cut.

2. Bring 3 c. water to boil with salt. Pour over cukes in a large bowl and let soak for 50 minutes. (The boiling water helps the cukes stay crunchy.)
3. Rinse cukes once and drain in colander. Pat dry if you are inclined.

4. In a bowl, mix all of the sauce ingredients.
5. Chop green onion into 1/4" pieces; add to sauce and mix well.
6. Put on some latex gloves to stuff the cucumbers: gently pull apart the four pieces of the cuke and put some of the sauce in there, and rub the cuke surface with it. Eyeball your sauce amount and try to use it evenly between the 6 cucumbers.

7. Put your cucumbers in a large mouth quart jar (or lay them down in a glass dish, whatever you have) and sit out at room temp overnight to ferment and then refrigerate. Mine actually fermented almost 24 hours til they got a taste I liked, so see what works for you. These will continue fermenting a little longer in the fridge, but very slowly. *These do not get covered with brine! Every other fermentation recipe I have made requires brine to cover the mix, but I read a few recipes and none of them covered the cukes...these do continue to fill with some liquid as they sit though, so I like to set them upright so the filling does not come out.

These will last up to a month in the fridge, so say the blogs, and are best a couple of days after refrigeration. These are great as is, or I had some this morning with some other veggies (sweated zucchini and steamed greens) and topped with eggs, and it was super tasty. I think I will make them spicier next time - and actually get the right red pepper.

7.30.2012

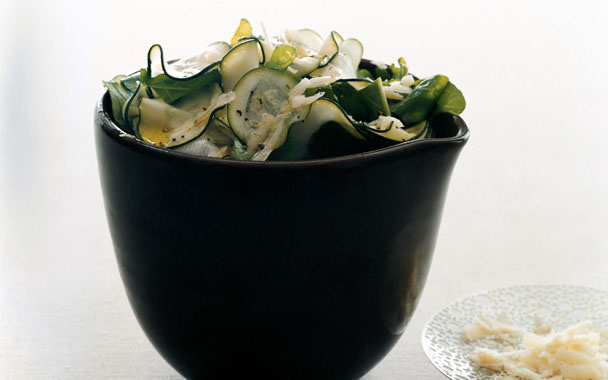
Zucchini Carpaccio Salad

The zucchini and I are hitting that very delicate stage where I have to make concerted efforts to eat them fairly often (daily?) lest they take over my fridge.  I seem to be able to consume the small ones with not so much problem, but inevitably a few grow big before I pick them and those ones are a little more challenging for me to figure out what to do with. And then I remembered a post I had come across in the Smitten Kitchen a couple of years ago for a salad that was primarily "sweated" zucchini slices. At that time I had made a (glutenous) zucchini galette that also utilized this "sweating" technique, and I remember it sort of altered the texture and flavor of the zucchini in a really nice way.

So. I had a family wedding/pot luck to go to this weekend, and three rather enormous zucchinis in the fridge. The recipe is really simple - just zucchini, arugula, lemon juice, olive oil, and Parmigiano-Reggiano, and though sweating the zucchini is a bit more labor intensive, the taste and texture make it worth it (you will need a thin slicer of some kind - I have an old mandolin that worked well). The salad turned out really amazing - simple and fresh and so perplexing in it's un-zucchini-like quality. *If you want to be dairy -free, I think this salad would also be good with nuts in place of the cheese. I also tried it again later with chicken on top (no cheese) and it was great.


Zucchini Carpaccio Salad
1 1/2 pound zucchini (about 3 large)
1 1/4 teaspoons salt
1/2 pound arugula, stems discarded and leaves cut into 1/2-inch-wide strips (6 cups)
1 ounce Parmigiano-Reggiano, coarsely grated (on large holes of a box grater; 1/2 cup)
3 tablespoons extra-virgin olive oil
Juice of one lemon
1/4 teaspoon black pepper

1. Cut zucchini crosswise into paper-thin slices with slicer. Toss zucchini slices with one teaspoon salt in a large colander set over a bowl and let drain 20 minutes. (I was making a bit extra and "gently stirred" the slices every so often to help the water drain through. I also let mine sit about 30 minutes.)
2. Drain zucchini slices, pressing gently on slices to extract any excess liquid. Pat zucchini slices dry with a kitchen towel. (This is the slightly laborious part. I laid out the slices on a towel on my cutting board, and then put another dish towel across the top and patted them dry. It took several rounds of this to get through all of the slices!)
3. Put arugula greens in a large bowl. Sprinkle with 1/4 cup Parmigiano-Reggiano and remaining 1/4 teaspoon salt. Drizzle 1 1/2 tablespoons of oil over greens and toss. Arrange zucchini slices over arugula greens, then drizzle with remaining oil, lemon juice and sprinkle with remaining 1/4 cup Parmigiano-Reggiano and pepper. (I sort of tossed this a bit more to mix the arugula and zucchini - but whatever looks best to you!)