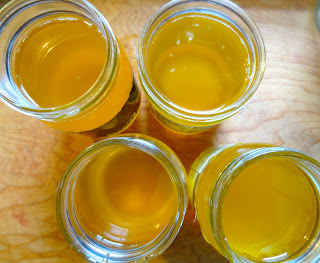
I am going forth as though some kind of trip will happen, and am doing some of the pre-trip food prep. This week I made a big batch of ghee. I use ghee a lot of the time at home, but it is perfect for camping because it is stable without refrigeration and tastes so good. It's very simple too (and WAY cheaper than buying pre-made stuff) - it just takes some time where you need to be fairly attentive. Though actually, I got sucked in to my new Nalo Hopkinson novel, and forgot about it for an hour, but it was okay due to the low heat. Whew.
 One pound of butter will yield just under 2 cups of ghee. I was making 4 pounds all at one time, and it took about an hour and a half on very low heat. If you only make a pound at a time, it will only take 20-25 minutes. I like to use pastured butter, which comes lightly salted. I would prefer to use non salted butter - but alas. The salt all condenses into the milk solids that are the bi-product of the ghee. They are actually super tasty if you can digest milk, so I like to cook with those or put them on roasted veggies. But they are salty with the salted butter!
Making Ghee:
1. Unwrap the butter sticks and put them in a heavy pot on medium heat to melt. Stay nearby for this part because it goes pretty quickly. The butter will melt and will start to foam at the top. As soon as that happens, turn the heat down to low. I always stick a wooden spoon in the pot too - it breaks up the surface so that bubbles can get out and not be trapped by the foamy layer (otherwise it can bubble up in one big bubble that can get over-excited and leave the pan - messy and dangerous).
 |
| Foamy! This is shortly after all the butter has melted. |
 |
| You can see the browned milk solids on the bottom, and a little foam left. Almost done! |
The ghee is now sit out on the counter as you make your way through it - or you can store it in the freezer or fridge. I will transfer two of these to a plastic, non-leaking nalgene bottle for the camping trip. Mmmm.

No comments:
Post a Comment