We are a collection of Minneapolis folks cooking, preserving, and harvesting local, seasonal foods. This blog-share is meant to inspire greater culinary genius, as well as continued local food invention. What are YOU concocting in that kitchen of yours?
Showing posts with label camping. Show all posts

7.28.2020

Camping Tinfoil Dinner

Lake superior at Park Point
I was camping the past several days with a few friends - we decided to not social distance and spend some days in the woods together. Or in our case, in various bodies of water, with some other time in the woods. I have not car camped in so many years, maybe in 2004? It was a luxury to have a cooler for fresh veggies, chocolate that didn't melt, and real cream. The best meal of the week was the tinfoil dinner, a relic of family camping trips and summer-camp overnights. My mom tells the story of bringing my sisters and I camping one year, and feeling exhausted from coordinating such an effort and driving up north. She says she was floored when we sent her to nap in the tent, saying that we would take care of dinner. This is the meal we made.

The tinfoil dinner allows every person to make their own packet, putting in whatever they want. On this trip, ours featured some standard fare (potatoes, sweet potatoes, carrots, celery, beef) along with some stellar add-ons: homemade mustard, cheese and spices all wrapped in collard/kohlrabi leaves before the final foil layer. Sauerkraut would have also been great on these, but we didn't think of that til after. Other options might be: steak, sausage, green beans, zucchini, zataar spice, corn, peppers...really the possibilities are endless. I sadly did not take a photo of camping foil dinner, but I just searched some images and found all kinds of inspirations. People find these dinners so good, they make them in the oven at home?! I might just do that in my fire pit some night - they really are so tasty. And it's really fun to open your very own packet - I don't know why. It's like the best version of tv dinner. In lieu of a photo of the meal - here is a picture of our smiling faces.

Reading some Tove Jansson while waiting for dinner
The number one thing with this dinner is that you need coals - meaning you need to have a fire going prior to when you want to eat. So start that first, and as the fire is going, prep your ingredients and foil packets.

Foil Dinner (for 4)
2 potatoes, diced
2 sweet potatoes, diced
2 celery stalks, diced
2 carrots, diced
1 lb beef, formed into 1/2" balls
8-12 collard/cabbage/kohlrabi leaves
mustard
Spices/herbs/salt/pepper
(opt) Cheese, mini cubes or shredded for serving
Tinfoil

Tear a large piece of tinfoil (1-2 feet length) and lay flat. Place 1-2 pieces of collard/cabbage leaves on the center, and pile your selected toppings in the middle. Sprinkle with spices/salt/pepper and mustard. Place another cabbage/collard leaf on top, and wrap the whole thing in the foil. Use a 2nd foil piece to seal in all the juices. Be sure to shape your foil packet with some character to identify your particular packet as yours - as a kid we used to love to make swans.

Once you have some coals in your fire pit, pull them aside and place your foil packet down in the ashes, then cover and surround with coals. We found our packets were done after 20 minutes, but depending on your coals and size of veggie dice, you may need a little more/less. You can pull one packet out to test things to give you some idea.

Top with more mustard, cheese, kraut or whatever else you want and eat!

This was actually from the curry dinner night - but fire making in action.

9.26.2014

Lobster Mushroom Chowder

I just returned from a week long Boundary Waters trip - one of the highlights of which included eating lots of wild mushrooms! On last year's fall trip, My Charming Companion and I regretted not bringing a mushroom guide with us because there were so many mushrooms everywhere in the north woods. This year My Charming Companion did a bunch of research and made a handy cheat sheet.

Definitely not a beanie baby
Boletes lined most of the portages we crossed, and though I didn't get any photos, they are a delicious, buttery mushroom. The lobsters were the most spectacular though. I had only just heard of their existence on a portage; a young guy doing some wolf research with the forest service was seeming quite depressed because after 2 weeks they had yet to find any wolves, and his group was down to the lackluster meal options. My Charming Companion was showing him boletes, because the only mushroom the wolfer knew of prior to that were lobster mushrooms. I had never heard of them, and didn't ask any more. Later that afternoon upon arriving at our campsite, I was visiting the latrine when I looked over and saw what appeared to be a bright red beanie baby lying in the woods. If something is called a lobster mushroom, I thought - than this must be it!

One lobster lead to several more - the easiest mushroom hunt ever because nothing else is that color in the woods. We didn't see any more of these anywhere else on the trip, so somehow this site on clearwater lake was a lobster mushroom hotbed. They were delicious! Apparently these mushrooms are actually a mold that grows over the mushroom. It's the prettiest mold I've ever seen, but is why the shapes vary A LOT. Some are like shells, others are more bulbous. And they have a slight seafood scent when raw and cooking. They taste really nice, and are quite firm. They hold their shape well. We ate them once sauteed in some ghee with eggs, and again in a chowder (while Clearwater lake was bountiful in lobster mushrooms, it was bereft of fish - so what would otherwise have been a fish chowder, was a "lobster" chowder instead - ha).


If you ever come across these, a simple butter/ghee saute would be great. They can cook awhile, and they will turn the butter an orangey color. To prep: trim away any dirt areas, and slice in nice large slices. Some of them had brown spots - or lines really - I'm guessing it was the inner mushroom, or that they were older. I cut those parts out because we had so many and I wasn't sure about it, but upon some research at home, it seems fine to eat that too.


For our chowder, we started sauteing the mushrooms (in ghee) first since we had to do it in two batches (due to limited cooking vessels). Meanwhile we chopped up a few slices of bacon and cooked them, than added dehydrated onions, peppers, celery, and a few potatoes along with a bunch of water to hydrate everything. The hydration takes a good 15 minutes or so, and we added the mushrooms once they had softened and been sauteed a bit - there were too many mushrooms to fit in our largest pot, so we had a bit of overflow! Then we added some salt, pepper, and cajun seasoning and simmered everything another 10-15 minutes. We stirred up a bit of cream powder, and mixed that in at the end. It was delicious!


9.24.2013

Paleo Camping Biscuits (a la corn bread)

My canoe trip last week turned out to include some amazing meals, including lots of fish (sometimes twice a day!) and also some very delicious biscuits. The weather was cooler up there, so I was wearing long underwear and fleece most of the time, which was cozy and nice. It was all very peaceful - there was a full moon, and it was the equinox so the sunrise and sunset were pretty near 7:00 on both ends, which meant getting to see them. Well, I slept a lot and didn't always get up with the sun, but I could see it from the tent!

My favorite BWCA portage to date: a forest of red pines
There was also some rain, and must have been more the week before because there were mushrooms everywhere! I have done little to no learning about edible mushrooms, but My Charming Companion has done some and was able to identify some Boletes (easily identified because rather than gills on the underside, they have pores and look spongy). He wasn't 100% on the precautions for bolete eating, but we looked it up upon returning and discovered that all boletes are edible EXCEPT for those that turn blue when you scratch/bruise them, and the ones that have red or orange pores. The ones we found were neither, so we could have eaten them. I think I'll bring a mushroom field book for future fall or spring trips.


Some other interesting highlights of the trip: there were no leeches to be found for fishing anywhere in the Ely/Virginia vicinity. All the bait sellers said "nope, it's not leech season" which seemed puzzling because how could it no longer be leech season? So we purchased night crawlers and that all went fine to catch our dozen fish. But upon coming out of the woods and stopping in (my now favorite) bait shop to check for a map, we learned that actually the leeches for the region are supplied by people from the White Earth reservation. And it is wild ricing season now, so they are no longer trapping the leeches because they are ricing instead. This particular store got the last shipment of leeches actually, and he said they were the healthiest ones all year. Apparently the late thaw/spring really slowed up the leech trapping. Anyway, it was all very interesting because I had sort of forgotten (or never given much thought) that leeches need to be gathered, as in trapped. And because I had just written about it being ricing season, it all feels like a nice cycle of things. But funny that it repeatedly got summed up as "It isn't leech season." The same guy at the bait store had gone on a 3 mile hike the day before, and he was lamenting that he did not learn the art of identifying wild mushrooms from his dad. He said he saw so many mushrooms on his hike, and remembers eating tons of them as a kid, but never has learned. I enjoyed the 5 minutes with this guy so much - I wish I knew the name of his shop, but it's the one that looks like a log cabin just past Zups in Ely.

So. The biscuits! They used the same paleo biscuit recipe I posted a few weeks ago, including OvaEasy eggs in lieu of actual eggs, with some added dried blueberries. Yum! It was an experiment (we had tried making the biscuits with OvaEasy before, and MCC had attempted an outdoor biscuit baking experiment before the trip, but with different pans) that turned out deliciously well.

1. Prepare a baggie of the dry ingredients (minus eggs) before the trip (see link above for recipe).
2. Make sure to also have ghee and/or coconut oil in your food pack - you'll need 5 T for the recipe and some more ghee to eat with the finished biscuits. Bring some dried blueberries to put in as well.
Pot nestled on top of skillet (and 3 stones)
3. On a day when it is perhaps rainy or cool, or misty and cool in my case, build a small fire to sit by for a bit. You need to develop some nice coals, so use some bigger bits of wood and burn them down to get a good bed of them.
4. Arrange your pots so that you create an oven of sorts. We had three total pans: two pots that nest, and a stainless steel skillet that basically nests with the larger pot too. We put the frying pan on the bottom and placed 3 stones in a triangle to set the smaller pot on. The batter for the biscuits gets spread (corn bread style) in the pan. *We spread lots of ghee in the pan first to avoid any sticking, which worked great. We covered the smaller pot with the larger pot upside down, which tucked nicely into the frying pan, creating a top surface on which to put some coals.
Coals on top and bottom.
5. Once your pots are set and the dough is in, spread out a small bed of the coals to set the pots on. using two sticks, pick up some coals and set them on top of the pots. You can put a few small twigs and sticks and blow on the coals to get a teeny tiny fire going up there, just to keep the coals hot. "Bake" in this manner for 10-12 minutes. Slice the biscuit bread, and eat with ghee and honey.

9.13.2013

Wild Rice Porridge

I've been reading some books by Jim Northrup, an Anishinaabe writer and Vietnam war veteran who lives up north near Cloquet. He writes a column called the Fond Du Lac Follies that is printed in The Circle newspaper, though I have been reading a book compilation of the Follies from the past 10 years or so. I enjoy his writing so much! He talks about tapping trees for maple syrup and going ricing in much of his writing - and ricing season is right now, so I am thinking about it. My Charming Companion has gone ricing several times - including processing it himself, so I found myself asking questions about the knocking, drying, parching, hulling and winnowing of the rice. That lead to some storytelling about ricing, and that all seems fitting for the season.

My Charming Companion still has some wild rice left from ricing a couple of years ago that he shares with me. I don't eat it often, but I have taken to bringing some "wild rice porridge" when going to the Boundary Waters. It is delicious, delicious, delicious hot cereal that is creamy and nutty tasting. It's also really light and easy cooking, so makes a nice meal to bring while camping - especially in the fall when the mornings are cool. I'm heading up to the BWCA next week and am bringing at least two meals of wild rice porridge. There are two options for canoe entry points, but I am leaning towards Crab Lake, which includes a mile long portage at the start of the trip. I don't know, maybe it's the hiking trip from a couple of weeks ago, but somehow I am not feeling daunted by the mile long portage (which will be 3 miles because of the 2 trips to get all the stuff). It'll be a nice workout on each end of the trip, and I'll get more practice carrying the canoe. We'll see!?!

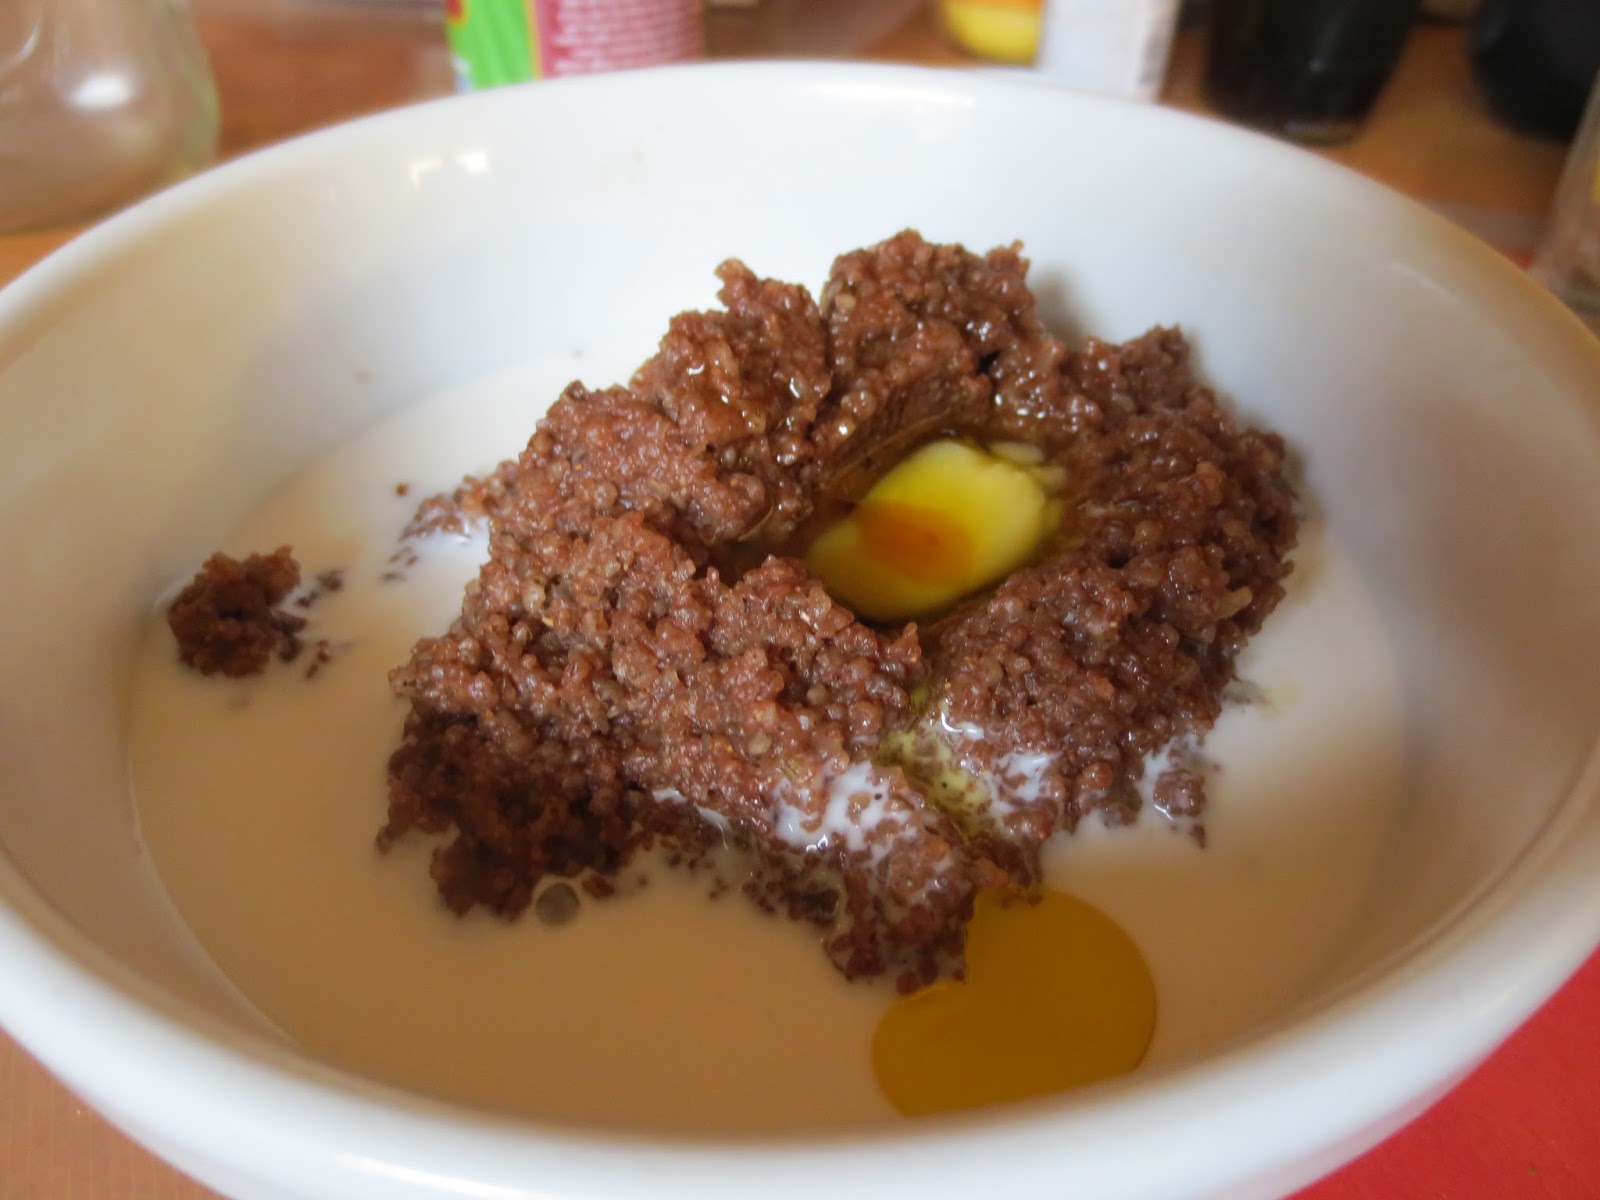
"Chocolate porridge" with coconut milk and butter - not yet mixed together!
Wild Rice Porridge
Grind wild rice in a coffee grinder. I do this in batches so that there is a more even grind. If you want to be persnickety, you could even sift the rice "flour" so as to have really consistent grains. But I usually don't do that step and just grind to have a product that will be finer than cornmeal, but not as fine as white flour. *One important note here is that this works with true wild rice and not the kind from a paddy field (at least, I've never tried it, but the cooking times vary so much that I don't think it would be the same, and certainly not as good due to less flavor in the paddy rice). True wild rice is lighter (on the right), whereas the paddy kind is dark.

The water to wild rice flour ratio is 4:1. I generally eat 1/4 cup of the flour - though on a canoe trip that is closer to 1/3 cup. For an extra treat, add in some cocoa powder to the wild rice flour - it makes it even richer and more delicious. 

Mixed up a bit. YUM!
The only tricky part to making the porridge is that the wild rice can sometimes clump up (much like my cream of wheat used to when I was a kid) - so it is helpful to have a mini-whisk to break up any globs. I boil the water first, than whisk in the wild rice because it seems to result in less lumps. The cooking does not take long because the rice starts to thicken and absorb the water right away. Stir while it cooks and keep the heat low. If it is going pretty slowly, you can also cover the pot (after your whisking) to let it finish.

Serve with cream or coconut milk, butter and a little sweetener. Maple syrup is amazing here if you want to go all out.

6.14.2013

Venison (or Beef) Jerky

Well, My Charming Companion and I postponed our canoe trip about a month to assure no ice and snow. The DNR had to add a whole new color category to account for this year's late ice outs in the northern part of the state! But the time is finally upon us, and I am super excited.

The one benefit to postponing the trip was that food prep got done in advance, and the food was all ready to go two weeks early - including the homemade jerky. It is surprisingly easy, so long as you have access to a nice food dehydrator and some time to be around to check on things. My Charming Companion and I had two batches of venison to use - all cuts were "big rounds" and one was from a deer that was packaged to eat "spicy" - which is code for "this one had a bit of stomach bursting, so really spice it up and definitely do not eat raw." The non-spicy batch got pepper, tamari, (I would have preferred coconut aminos, but at the time every co-op in town was out of them and had been for over a month!) and some ginger, whereas the spicy one got those things plus some onion powder, cayenne, paprika, and extra pepper. Garlic powder would be good too if you like garlic, and some people like to use apple cider for a little sweetness. The recipe is very forgiving, so you can be creative! Of course I forgot to write down the amounts of things, but use the following as a guide:

3 lbs of lean meat (venison is great for this), flank steak would be a nice cut
1/2 c. coconut aminos or tamari
2 tsp each: ginger, onion powder, cayenne, smoked paprika
1 T black pepper


Slice the meat thinly - this is much more successful if your meat is still a little bit frozen, so as it is defrosting, check on it often. You are going for about 1/4" slices, and even really skinny and small pieces will work just fine. As you slice, you also want to remove any fat from the pieces of meat. You can do this from the larger cut, but also be sure to double check the slices. Fat will not dehydrate or preserve, so you want to get all of it off.


Once everything is sliced, mix the pieces with your spices and flavoring. Let it sit in the "marinade" for at least a few hours or preferably overnight (it will be pretty dry, so marinade is a strong word). Stir or turn the meat around in the "mariande" (or spice mix) once or twice during the sit time to spread the spices out and better coat the meat. Then lay the pieces on your dehydrator trays, being careful to make one single layer. Put in your dehydrator (MCC has an Excalibur brand one that is really nice) and set to the meat setting of 145-155 degrees.


Now be prepared to settle in to a long time of meat smell. The jerky will take anywhere from 6-10 hours depending on the slices. It's like when I make bone broth in my slow cooker, and I wake up in the morning to the smell of broth permeating the kitchen. The smell of meat may permeate for the duration of the drying! You want to start checking the meat after 6 or 8 hours. You can remove pieces that are done - the really skinny, small, or super thin slices will go faster then pieces that got a little thick. The meat is done when you can squeeze each piece and it is no longer squishy - it doesn't have to be crisp, but firm. The meat will also start to crack a bit.


Voila! This now is easily packaged in bags to be lunch for several weeks. Yum.

4.14.2013

Ghee!

I am planning a 2 week BWCA trip in early May - although with the weather going the way it is, I am not sure that the lakes will be iced out yet. You can actually check the DNR for ice out dates for lakes in the state (and for median ice out dates too) from past years. My Charming Companion and I are planning to go to Saganaga on May 12th, which is one of the last lakes in the state to ice out because it is large and pretty far north. In the past 25 years, it looks like the ice has always been gone by then except for three times: '89, '96, and '08. I wonder what will happen?!

I am going forth as though some kind of trip will happen, and am doing some of the pre-trip food prep. This week I made a big batch of ghee. I use ghee a lot of the time at home, but it is perfect for camping because it is stable without refrigeration and tastes so good. It's very simple too (and WAY cheaper than buying pre-made stuff) - it just takes some time where you need to be fairly attentive. Though actually, I got sucked in to my new Nalo Hopkinson novel, and forgot about it for an hour, but it was okay due to the low heat. Whew.

One pound of butter will yield just under 2 cups of ghee. I was making 4 pounds all at one time, and it took about an hour and a half on very low heat. If you only make a pound at a time, it will only take 20-25 minutes. I like to use pastured butter, which comes lightly salted. I would prefer to use non salted butter - but alas. The salt all condenses into the milk solids that are the bi-product of the ghee. They are actually super tasty if you can digest milk, so I like to cook with those or put them on roasted veggies. But they are salty with the salted butter!

Making Ghee:
1. Unwrap the butter sticks and put them in a heavy pot on medium heat to melt. Stay nearby for this part because it goes pretty quickly. The butter will melt and will start to foam at the top. As soon as that happens, turn the heat down to low. I always stick a wooden spoon in the pot too - it breaks up the surface so that bubbles can get out and not be trapped by the foamy layer (otherwise it can bubble up in one big bubble that can get over-excited and leave the pan - messy and dangerous).

Foamy! This is shortly after all the butter has melted.
2. Now you are just watching and waiting for the water to cook off and the butter to clarify. There will be some crackling sounds, and the liquid under the foam will gradually become clear and golden. There will be milk solids that start to settle on the bottom and sides of the pot. At first they will be light in color, and they will gradually darken. The foam at the top will also start to disappear. You can stop cooking the ghee at any point after the liquid is clear and the milk solids at the bottom are brown. Be careful not to go too long or your ghee will have a bit of a burnt taste from the very browned/burned milk solids.
 
You can see the browned milk solids on the bottom, and a little foam left. Almost done!
3. Let the ghee cool for a bit in the pot, then pour it through a strainer and/or cheesecloth into jars. This will capture any bits of milk solids so that the ghee can be shelf stable. At this point, I stir in a little salt (2 pinches per pint jar) because I like it that way, but you can also leave it plain.


The ghee is now sit out on the counter as you make your way through it - or you can store it in the freezer or fridge. I will transfer two of these to a plastic, non-leaking nalgene bottle for the camping trip. Mmmm.

9.06.2012

Paleo Energy Bars

I am going camping again - including some expected canoeing and portaging and traveling, so I have been on the hunt for a good granola/energy bar recipe to fuel my travel.

I settled on a slightly modified recipe from Paleo magazine that includes macadamia nuts, dates, coconut and dried fruit.  Really, it seems as though dates are THE ingredient for paleo energy bars - they bind the nuts and whatever else together. My second fave recipe was for chocolate date nut balls. Yum. These bars turned out super tasty - very granola-bar-ish. They do fall apart more easily than baked granola bars, but that seems minor compared to the tastiness!

Paleo Energy Bars
  • 8 Medjool dates, sliced in half, pits removed
  • 1/2 cup finely shredded coconut
  • 1/2 cup organic currants
  • 3/4 cup macadamia nuts
  • 3/4 cup other nuts (I used almonds and brazil nuts)
  • 1/2 cup dried cherries
  • 1/4 tsp cinnamon
  • 1/2 tsp pure vanilla extract
  • 1 tsp honey
  • pinch of salt
  1. Add all ingredients to a food processor and blend for about 1 minute or until everything is chopped into small pieces and starts to stick together.
  2. Place mixture on a large piece of wax paper.  With your hands, shape into a rectangle, pressing and patting it until very dense and it sticks together nicely. I actually pressed mine into a wax-paper lined rectangular tupperware - whatever works.
  3. Refrigerate for a few hours, until very firm.  Slice into bars and enjoy!
  4. Store at room temperature for up to 1 week; in the fridge for up to 2 weeks; or wrap bars individually and freeze until needed.  To thaw, simply set on counter for about 30 minutes to bring to room temperature before eating.
*I wrapped these in wax paper and packed them in a ziplock baggie for my canoe trip. They are currently in the freezer until I leave!

7.27.2012

Paleo Camping Food 2

My light-weight camping while paleo eating was a success! And some meals were definite wins that I will make again. In addition to meals, one thing I had not realized was just how much energy I would need for portaging/paddling, particularly because of eating paleo and lower carb. I figured out early that by eating more fruit/sugar than usual, the Boink Phenomenon (feeling a sudden loss of all muscle mass and motivation to continue) can be eliminated.  So I ate more dried fruit and sugar - including beverages like Emergen-C, sun tea with sugar, dates and figs - on travel days than I thought I would.

Below are the meal hits of the trip; they utilize products listed in my earlier post: Paleo Camping Food. All of these things are shelf-stable and lighter weight for backpacking/canoeing.

My fave meal of the trip was Fish Chowder. This used the heavy cream powder, 1 slice of bacon per person, dried onions, dried peppers, dried celery, and a small bit of potatoes or sweet potatoes, along with the fish du jour (which in my case was either small mouth bass or pike). A big spoonful of ghee was added in at the end. Oh my god! This fish chowder was pretty much to die for at the end of the day. The bacon adds a smoky flavor, and the cream and ghee made this so delicious.

The cereal looked like this, minus the prunes. Yum!
Breakfast on travel days was Carrot and Sweet potato cereal (with maybe a little jerky for the road).  Soak the dried carrots and sweet potatoes overnight in plenty of water (these veggies expand, so play around with amounts and err on the low side at first) in some kind of sealed container. In the morning, add nutmeg, cinnamon, and powdered cream and it is like a sweet breakfast cereal. Coconut flakes and nuts would also be amazing on here. (Incidentally, while looking for the photo to post, I found a recipe for Sweet potato, carrot, and dried fruit casserole that sounds incredible.)

http://eatlivepaleo.files.wordpress.com/2012/03/coconut-flour-dusted-cod.png
No more flour than in this photo!
Fried fish was excellent with a very light coating of coconut flour: you need very little flour because it absorbs so much more than regular flour. I put on too much one time and it soaked up all the oil and didn't fry as well. So just toss a little bit (as in a Tablespoon for a decent size fish) in a bowl, add the fish fillets, and stir so they are all lightly dusted. Fry in coconut oil.


Of the dried veggies from Harmony House's variety pack, I recommend the cabbage, carrots, sweet potatoes, onions and celery (for flavor), tomato powder (for chili), and mixed peppers. The broccoli and sliced mushrooms were also good. The peas and corn took way too long to cook and thus were basically inedible. The potatoes were fun in chowder because I usually don't eat them, but I found I liked the sweet potatoes better. The veggies hydrated pretty fast, and though they didn't taste like large bite-fulls, they did add bulk and flavor. They also take up a lot of space, even though you don't need many because they expand a lot. So if space is an issue, be choosy! My favorite stand alone veggie was the dried cabbage (cooked) with bacon.

Dried burger, aka hamburger gravel
The other win of the food supply was homemade jerky and homemade dried venison burger. Both were made by My Charming Companion, but I plan to participate in the jerky making next time around. I will share a how-to then, but really, the taste of homemade jerky is phenomenal, and the main technique is to marinate it in braggs and a little pepper, then cut the meat with the grain while it is half frozen. The dried burger is not difficult, you just need to get all of the fat out so that it is shelf stable (venison or really lean beef work best). There is a good link here with directions - and this stuff tastes exactly like regular burger and is really light weight. I mixed it with a variety of the aforementioned veggies, bacon (for smokiness), and ghee and spices to make chili or a vegetable/meat stew-y sort of thing.

A few other notes about other meals/food: the OvaEasy eggs were amazing, I give them a 10 and ended up eating them almost every day (if not for breakfast, for dinner). The coconut manna was also good, though I ate it more as a snack than I used it in soup. I would bring it again because it made really good curry (with a curry sauce pouch from local Asian grocery: United Noodles), which was a welcome change in flavors.