We are a collection of Minneapolis folks cooking, preserving, and harvesting local, seasonal foods. This blog-share is meant to inspire greater culinary genius, as well as continued local food invention. What are YOU concocting in that kitchen of yours?

6.26.2013

Pork Belly Salad

Camp "kitchen"
I got back into town last weekend to a tree strewn city! Though I have a big tree limb just hanging across my power lines, I was relieved to find my power up and running so that freezer content moving did not need to co-occur with unpacking, hanging and drying tent and tarps, etc. There was  lots of fog on the drive back down from up north, and heavy fog = prime conditions for roadkill deer. So the return also included a small buck nestled in with the Duluth packs.

My boundary waters trip included many fish meals (hurray!) - primarily pike - mostly fried, but also an amazing chowder that I hope to recreate at home with fresh ingredients. Until then, I am currently subsisting on the bounty of the garden: Arugula, lettuce, radishes, and lamb's quarters. Yum! The arugula makes me swoon at every meal, it is so delicious.

My cousin graduated from South High earlier this month, and he celebrated with a graduation party on Sunday. The food was amazing, and one particular treat I want to recreate was prosciutto wrapped arugula bundles. The arugula was drizzled with olive oil and fresh parmesan reggiano grated over the top. It was totally delicious and stunning, though I neglected to take a photo before stuffing it in my mouth. The accompanying photo here is similar, though there is an apple slice in with the arugula as well (which sounds tasty too). The bundles I had were a bit larger, with very thin slices of prosciutto wrapped around them. It showcased the arugula perfectly, and made for such a delightful appetizer!

I came home from the party with a bag of pork bones that I am currently cooking in the slow cooker on the porch to make broth, and some pork belly that the pork roast was wrapped in. Score! I discovered the pork belly this morning and proceeded to make one of the more delicious salads of my week with it. It's similar to a cobb salad without chicken, and with this pork it tasted incredible. Thank you to my aunt Mary who was perhaps overwhelmed with pork bones and leftovers to send me home with such bounty!

Pork belly salad:
1-2 c. fresh greens (arugula, kale thinnings, and lettuce)
3 small radishes, chopped
1 hard boiled egg, chopped
1/2 avocado
3-6 cherry tomatoes, halved
sliced pork belly

Dressing: equal parts olive oil and balsamic, mixed with a teaspoon of mustard and a bit of salt.

6.14.2013

Venison (or Beef) Jerky

Well, My Charming Companion and I postponed our canoe trip about a month to assure no ice and snow. The DNR had to add a whole new color category to account for this year's late ice outs in the northern part of the state! But the time is finally upon us, and I am super excited.

The one benefit to postponing the trip was that food prep got done in advance, and the food was all ready to go two weeks early - including the homemade jerky. It is surprisingly easy, so long as you have access to a nice food dehydrator and some time to be around to check on things. My Charming Companion and I had two batches of venison to use - all cuts were "big rounds" and one was from a deer that was packaged to eat "spicy" - which is code for "this one had a bit of stomach bursting, so really spice it up and definitely do not eat raw." The non-spicy batch got pepper, tamari, (I would have preferred coconut aminos, but at the time every co-op in town was out of them and had been for over a month!) and some ginger, whereas the spicy one got those things plus some onion powder, cayenne, paprika, and extra pepper. Garlic powder would be good too if you like garlic, and some people like to use apple cider for a little sweetness. The recipe is very forgiving, so you can be creative! Of course I forgot to write down the amounts of things, but use the following as a guide:

3 lbs of lean meat (venison is great for this), flank steak would be a nice cut
1/2 c. coconut aminos or tamari
2 tsp each: ginger, onion powder, cayenne, smoked paprika
1 T black pepper


Slice the meat thinly - this is much more successful if your meat is still a little bit frozen, so as it is defrosting, check on it often. You are going for about 1/4" slices, and even really skinny and small pieces will work just fine. As you slice, you also want to remove any fat from the pieces of meat. You can do this from the larger cut, but also be sure to double check the slices. Fat will not dehydrate or preserve, so you want to get all of it off.


Once everything is sliced, mix the pieces with your spices and flavoring. Let it sit in the "marinade" for at least a few hours or preferably overnight (it will be pretty dry, so marinade is a strong word). Stir or turn the meat around in the "mariande" (or spice mix) once or twice during the sit time to spread the spices out and better coat the meat. Then lay the pieces on your dehydrator trays, being careful to make one single layer. Put in your dehydrator (MCC has an Excalibur brand one that is really nice) and set to the meat setting of 145-155 degrees.


Now be prepared to settle in to a long time of meat smell. The jerky will take anywhere from 6-10 hours depending on the slices. It's like when I make bone broth in my slow cooker, and I wake up in the morning to the smell of broth permeating the kitchen. The smell of meat may permeate for the duration of the drying! You want to start checking the meat after 6 or 8 hours. You can remove pieces that are done - the really skinny, small, or super thin slices will go faster then pieces that got a little thick. The meat is done when you can squeeze each piece and it is no longer squishy - it doesn't have to be crisp, but firm. The meat will also start to crack a bit.


Voila! This now is easily packaged in bags to be lunch for several weeks. Yum.

6.11.2013

Nettles!

I mentioned a couple of weeks ago the big nettle forage I went on. It was my first time getting nettles, though not my first time eating them. The season may be wrapping up for them soon, but I thought I'd post about it in case there are still some out there to go after. I read somewhere that you want to harvest them before they are knee high - so keep that in mind!

Nettles have more protein than any other plant, and lots and lots of iron, vitamins A and C, potassium and other good for you vitamins. My Charming Companion's friend ate them daily throughout her pregnancy, and the doctor actually told her her iron was a little too high! High?!

The trick to eating nettles is to harvest them while wearing gloves (and pants) and using a scissors. Cooking them for 30 seconds removes the sting from the nettle - so one just needs to get them cooked. My Charming Companion and I harvested a couple of buckets full to freeze. Be sure to use tongs to handle these babies until they are cooked.

Nettles basically look how they sound. They don't look particularly edible because they look like they will sting! The edges are ridged and they grow tall, and there is a little furry-ness to the stems.


Cut the top part off the nettles, stem and all. (Some people say you can't use the stem, but I did and didn't even notice!) The new growth is the upper part, so cut just below the 2nd or 3rd tier of leaves, and again, don't use nettles that are over knee high.


To wash the nettles, we set up a two bucket sort of system. Fill a bucket with water and dump all the nettles in. Use the tongs to swish the nettles around and remove layers from the top. Put them into a 2nd bucket or large pot (this was a big canning pot).


To cook: Bring your largest pot, filled about 3-5" high with water, to a boil. When it is boiling, fill it with as many nettles as you can fit. Cover and steam/boil for 5 minutes or so. You may need to swish things around/push the nettles down.

Drain the nettles (keep the water to drink for nettle tea!) and press/squeeze out the water as best you can. (You can touch them now, they will just be hot!) We spread the nettles on two big trays and set them outside to cool off.

Once they are cool, do one more squeeze and you can store the nettles in the fridge for about a week, or put in bags and freeze.


They are partially cooked now, so you can use them to make all kinds of things: soup, pesto, saute them with onions, etc. The nettles have a chewiness that is more noticeable than any other green. They were delicious in this fritata with a little red pepper and some green onions.

6.08.2013

Summer Garden Update

The garden is coming along very well, considering the cold and rainy weather we have had so far.  The big bush in the back is the enormous rhubarb.  I don't have a way to eat any of it this year, but I am hoping to give some away to friends and neighbors.  It is a shame to let it go to waste.  
June 8th- the garden is looking green
The large section with the white blossoms is the strawberry patch.  There are a few tiny green berries starting to form, much to my excitement.  It won't be long until the first picking arrives!  The green beans are in front.  They are nice and hardy.  The two raised beds are new this year.  I have zucchini, spaghetti squash, carrots and assorted herbs in them.  The carrots took a long time to sprout up, but they are coming in little by little.  It is really sweet to see their little tufts appear.
I don't have a recipe today, but I am excited about my garden and wanted to share.  I am on the hunt for a fun new recipe to use when my strawberries arrive though.  It won't be long.  

Happy Summer!  

Blackened Salmon and garden thinnings salad

Well, it's been a busy couple of weeks. My vacation is nearing, there are lots of celebrations of love happening, lots of family visits, the Lynx are playing amazingly, and the sun is coming out occasionally. Hurray! It's like the feeling of spring flowers bursting forth, only it is a little later this year in the month we call June.

One of the things I have been enjoying lately are micro-green salads from thinnings in the garden: baby kale plants, baby brussels sprouts, baby arugula and lettuces, and some baby sheep sorrel. Sheep sorrel is a nice lemony-sour wild plant that is really tasty and seems to be abundant in MN. Thankfully it sprouts up in one of the "wild" beds (that is, one that never gets weeded) at the Northside homestead. It is easy to identify because of the little tabs at the base of the leaf, and also because if you eat a bite you will know right away that it is tasty and tangy and good. Now is the time to seek it out!

Last night's dinner included the micro-greens salad, some roasted asparagus, and a new recipe to me: Blackened Salmon. It all turned out really delicious. I was making a celebratory dinner for some friends, and also wanted to try ceviche oysters. They were not so good - I don't know if its because this is not the best time for oysters, or if ceviche and oysters just aren't a good pair. So, skip the ceviche and go straight for the salmon.

Blackened Salmon
2-4 Wild Caught Salmon Filets (with skin)
Coconut Oil
Cajun Seasoning Mix:
1 Tbsp Paprika
1 Tbsp Cayenne Pepper
1 Tbsp Thyme
1 Tbsp Oregano
1 Tbsp Sea Salt
1 Tbsp Black Pepper

1. Mix spices together in a small jar. You will not need all of it, so save for another use.
2. Spread about 2 T of the cajun spice mix on a plate. Press the non-skin sides of the salmon to the spice mix to give them a nice coating.
3. Heat 2 T coconut oil in a large skillet (I used cast iron) until it is hot. Turn heat to medium and place the salmon filets spice/flesh side down and cook for 2 minutes.
4. After two minutes, turn the heat to medium low and flip the salmon over so that they are now skin side down. They will not stick and should flip nicely with a pair of tongs. The spiced side should be crisp and spicy looking!
5. Cover and cook for another 12-16 minutes. The skin should be crispy at this point. If you are unsure how long to cook your fish, it should equal about 8 minutes per 1 inch of thickness in the meat. My pieces were pretty thick, and 14 minutes seems about perfect.
6. Serve!


Bowl of "micro-greens" aka garden thinnings
For the salad:
3-4 cups plant thinnings/micro-greens/lettuce/sorrel
3 thin green onions, sliced
1/4 c. beet, grated
1/4 c. carrot, grated
2-3 T fresh lemon juice
2-3 T olive oil
sea salt
1 tsp. mustard powder
toasted almonds

Toss everything together and serve!

5.31.2013

Beef Liver....that I actually want to eat

Yes, I have finally found a recipe for beef liver that I enjoy eating.  I tried many versions and finally put together this easy little combo of ingredients.  I was determined to eat, and to like, beef liver because it is so healthy and full of so many wonderful vitamins and nutrients.  Here is a link to an informative page on  Chris Kressor's website about the benefits of eating organ meats.  He even goes over common misconceptions about liver, such as, the notion that it stores toxins.  I didn't think that people actually believed this until last week when I was talking with my Aunt about liver and she expressed this same concern.  It felt really good to be able to share my knowledge about this important food and maybe encourage her to try incorporating it into their diet.  It can be tricky to share food knowledge while not offending the other person, so I don't do it that often.  But when I can and the other person is receptive it is really gratifying.

Anyway, back to the beef liver.  It's a really simple recipe and only takes about 10-15 minutes to prepare.  I usually plan to cook my main dinner in the oven, and once I get it in there and going, I make the liver as a kind of appetizer.
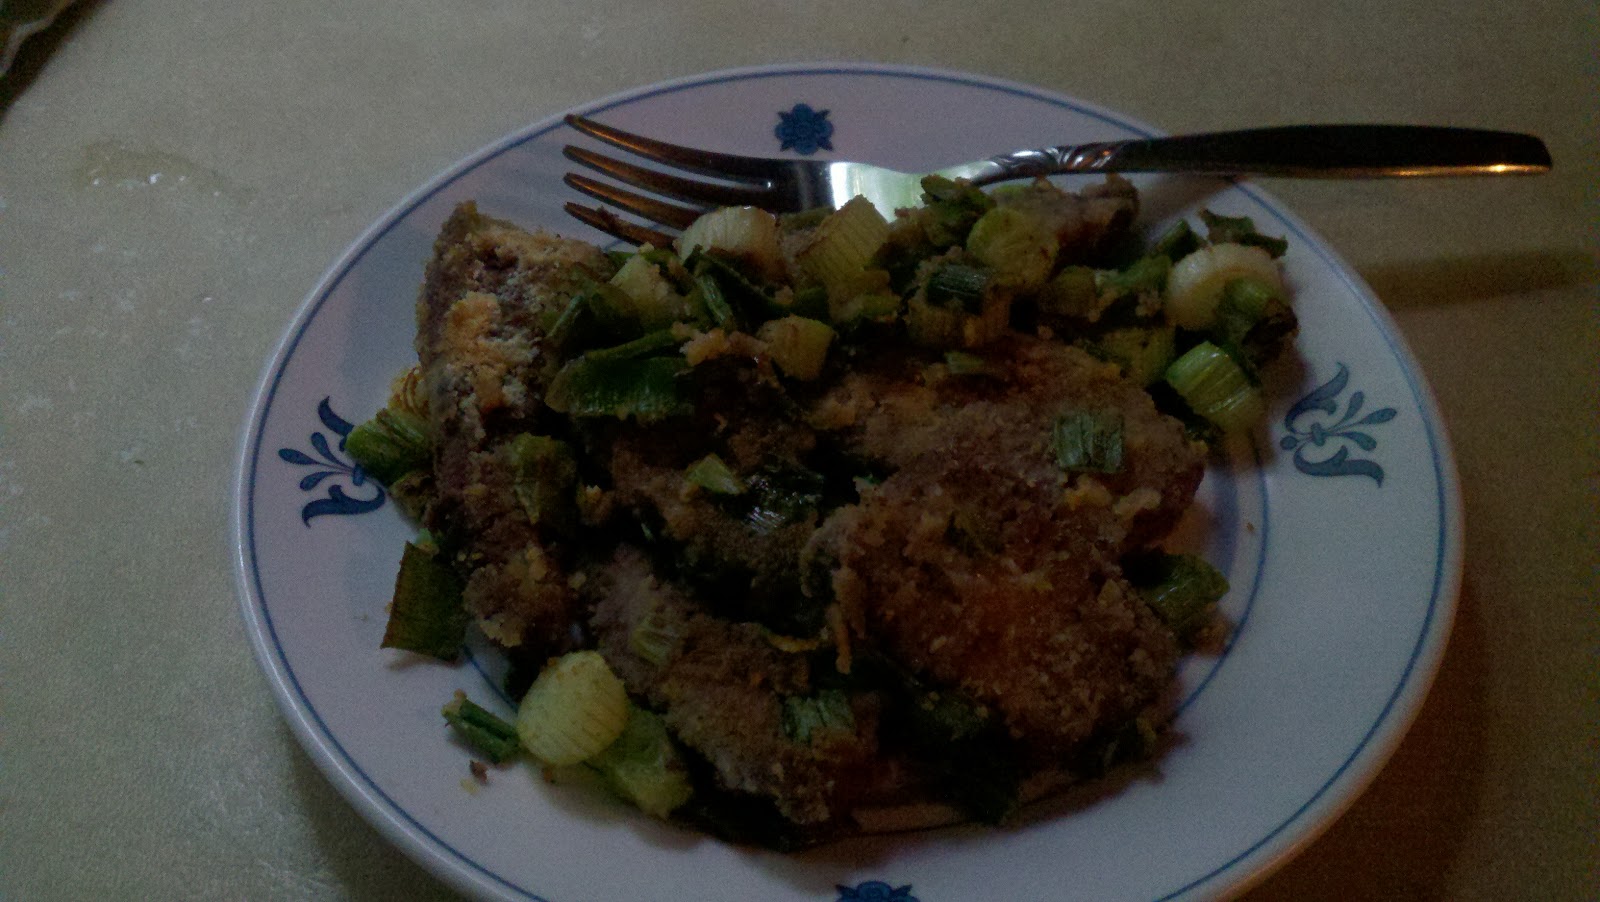
Beef liver with green onions- it's good, I swear

Ingredients:
2-3 ounces beef liver
1 Tbsp butter or ghee
1-2 stalks of green onion
1 Tbsp coconut flour
1 tsp garlic powder
salt and pepper to taste
1 lemon wedge

Directions:
Rinse the liver under the faucet, cut into chunks, squeeze the lemon over the top to marinate for a few minutes, and set aside.  Heat a skillet on medium heat while you chop the green onion and mix the coconut flour, garlic powder, salt and pepper together on a small plate.  Melt the butter in the pan and add the green onion.  Dredge the liver in the flour mixture and add to pan.  Cook on each side for about 2 minutes.  Add butter if necessary.  The liver will get a slight golden crust on them.

The ingredients mask the livery flavor while adding a taste of spring.

Enjoy in good health!

Coconut Jello

I have been on the hunt for some snack options.  Since I eat a very strict paleo diet, snacking can be a challenge.  I usually have to cook and prepare every single thing that I eat, so when I can concoct a treat that I can just grab out of the fridge and eat, it is an exciting development in my life.  This dish is basically just coconut milk, vanilla extract and gelatin.  If you are able to eat a wider variety of foods you may want to doctor this one up a bit more, but I thought it might be a good idea to share anyhow.

Coconut gelatin on bottom, coconut cream on top
I have gelatin that I ordered through radiantlifecatalog.com.  It is very high quality and has many health benefits, such as it's anti-inflammatory properties.  It can be mixed into broth, soup, sauces, etc and it is great for creating jello out of any liquid.

Ingredients:
1 can Natural Value Coconut Milk: no guar gum and BPA free can liner.  Available at Seward Co-op.
2 Tbsps Gelatin (I like the Bernard Jensen product)
1/2 cup water
dash of vanilla extract

Directions:
Heat the coconut milk and water on the stove top until hot; not necessarily boiling.  Add the vanilla and stir in the gelatin.  Transfer the mixture to a dish and allow it to cool before putting it in the fridge to set up overnight.  The coconut milk will separate into a jello-like layer on the bottom and a thick creamy topping of coconut solids on top.  You can easily mix it back together when eating it though, so it's no big deal.

I think a few drops of stevia would be a nice addition, or some berries.  When my strawberries start coming in I will probably try putting some into this dish.  It will add some color and flavor.