We are a collection of Minneapolis folks cooking, preserving, and harvesting local, seasonal foods. This blog-share is meant to inspire greater culinary genius, as well as continued local food invention. What are YOU concocting in that kitchen of yours?

9.13.2013

Wild Rice Porridge

I've been reading some books by Jim Northrup, an Anishinaabe writer and Vietnam war veteran who lives up north near Cloquet. He writes a column called the Fond Du Lac Follies that is printed in The Circle newspaper, though I have been reading a book compilation of the Follies from the past 10 years or so. I enjoy his writing so much! He talks about tapping trees for maple syrup and going ricing in much of his writing - and ricing season is right now, so I am thinking about it. My Charming Companion has gone ricing several times - including processing it himself, so I found myself asking questions about the knocking, drying, parching, hulling and winnowing of the rice. That lead to some storytelling about ricing, and that all seems fitting for the season.

My Charming Companion still has some wild rice left from ricing a couple of years ago that he shares with me. I don't eat it often, but I have taken to bringing some "wild rice porridge" when going to the Boundary Waters. It is delicious, delicious, delicious hot cereal that is creamy and nutty tasting. It's also really light and easy cooking, so makes a nice meal to bring while camping - especially in the fall when the mornings are cool. I'm heading up to the BWCA next week and am bringing at least two meals of wild rice porridge. There are two options for canoe entry points, but I am leaning towards Crab Lake, which includes a mile long portage at the start of the trip. I don't know, maybe it's the hiking trip from a couple of weeks ago, but somehow I am not feeling daunted by the mile long portage (which will be 3 miles because of the 2 trips to get all the stuff). It'll be a nice workout on each end of the trip, and I'll get more practice carrying the canoe. We'll see!?!

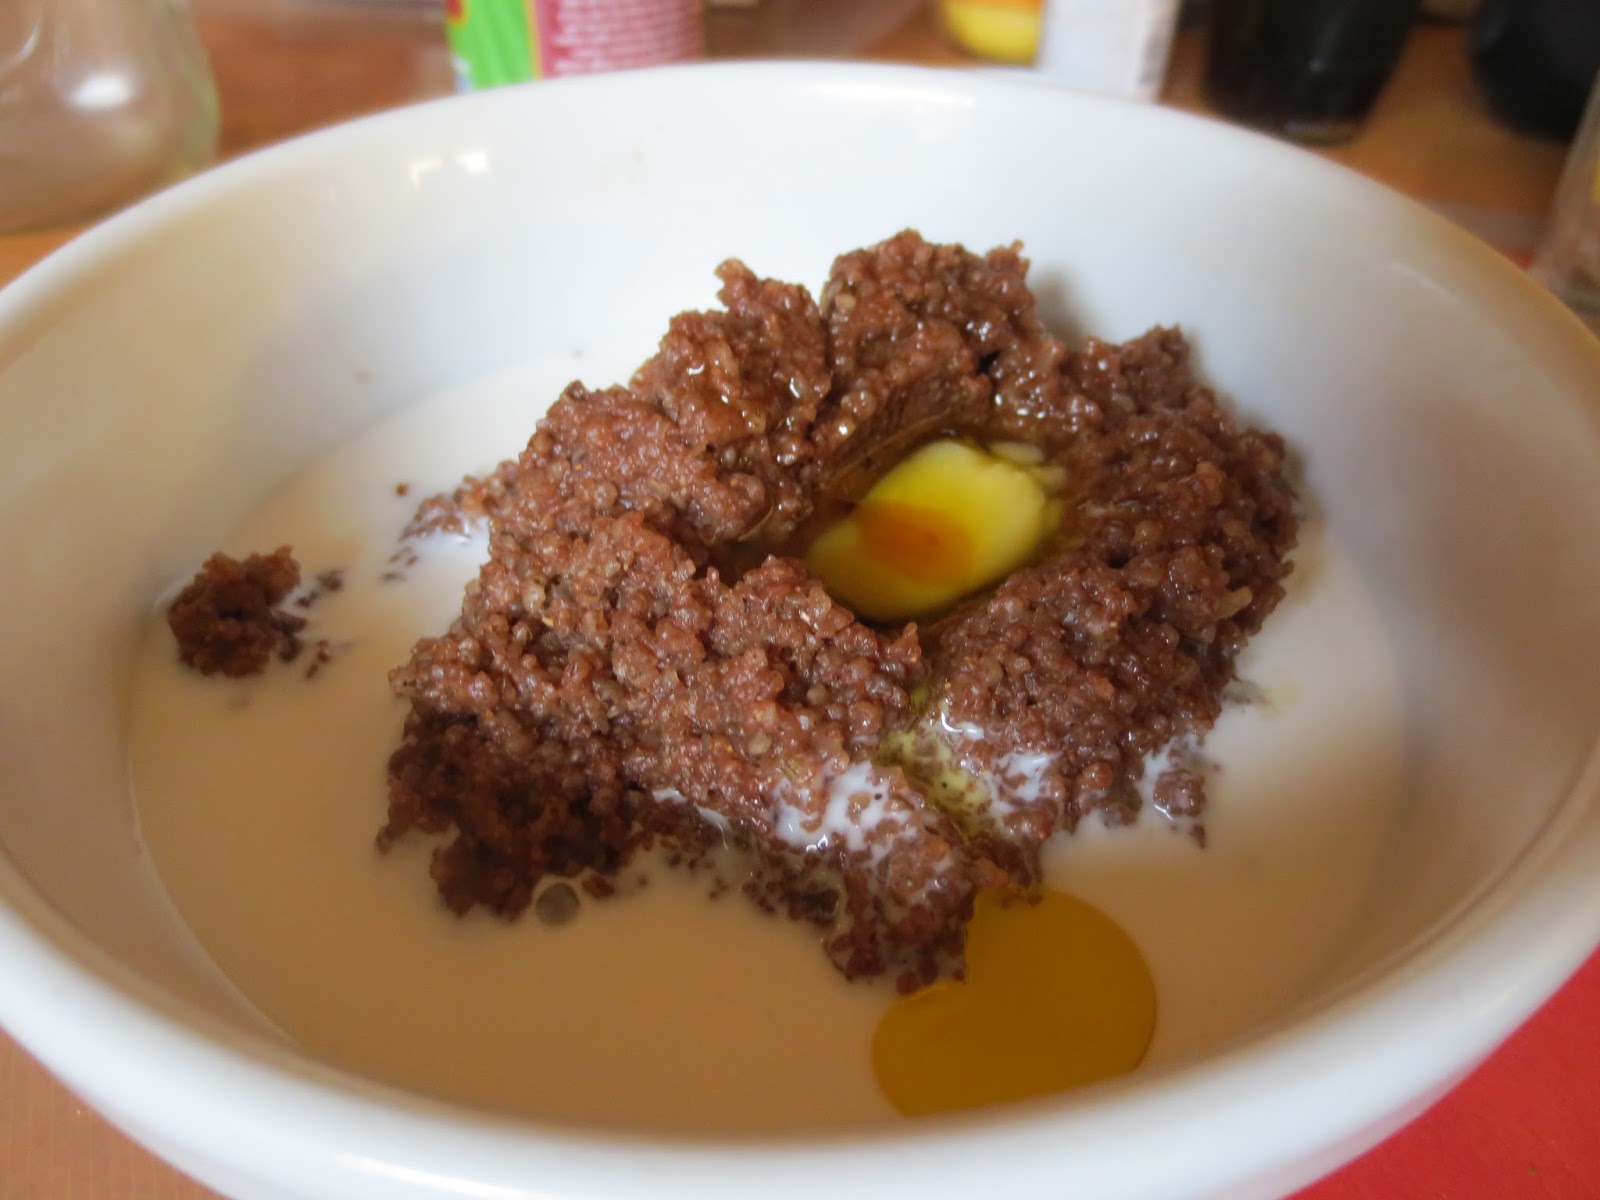
"Chocolate porridge" with coconut milk and butter - not yet mixed together!
Wild Rice Porridge
Grind wild rice in a coffee grinder. I do this in batches so that there is a more even grind. If you want to be persnickety, you could even sift the rice "flour" so as to have really consistent grains. But I usually don't do that step and just grind to have a product that will be finer than cornmeal, but not as fine as white flour. *One important note here is that this works with true wild rice and not the kind from a paddy field (at least, I've never tried it, but the cooking times vary so much that I don't think it would be the same, and certainly not as good due to less flavor in the paddy rice). True wild rice is lighter (on the right), whereas the paddy kind is dark.

The water to wild rice flour ratio is 4:1. I generally eat 1/4 cup of the flour - though on a canoe trip that is closer to 1/3 cup. For an extra treat, add in some cocoa powder to the wild rice flour - it makes it even richer and more delicious. 

Mixed up a bit. YUM!
The only tricky part to making the porridge is that the wild rice can sometimes clump up (much like my cream of wheat used to when I was a kid) - so it is helpful to have a mini-whisk to break up any globs. I boil the water first, than whisk in the wild rice because it seems to result in less lumps. The cooking does not take long because the rice starts to thicken and absorb the water right away. Stir while it cooks and keep the heat low. If it is going pretty slowly, you can also cover the pot (after your whisking) to let it finish.

Serve with cream or coconut milk, butter and a little sweetener. Maple syrup is amazing here if you want to go all out.

9.11.2013

Garden Veggie Salad with Sardines

This week has been fairly uneventful on the food front - my daily routine is to get home from work, eat dinner, go for a walk, and watch some Lynx basketball before getting into bed and reading a bit. Except sometimes eating dinner and watching basketball overlap a little, which I don't actually like doing but is tempting anyway - it's a slippery slope if I am waiting for something to cook and just want to see the start of a game or something. I've become a super Lynx fan lately - I watch all of our games of course (mostly at home via "Live Access" where you can watch every WNBA game for $15 a year or some such), but I also started watching some of the other teams - especially the good ones who "we" will likely play in the coming weeks in the play offs. I'm finding it all very exciting.

The Lynx really have nothing to do with today's salad - which has everything to do with the current garden haul. It is a new time of bounty because the beets and carrots are finally sweet and ready to eat. And they are gorgeous! The carrots especially with the multi-color variety.

Each weekend I spend a day at the northside homestead watering and harvesting and maybe pickling or freezing or pesto-ing. And then I pack up a big haul of veggies to bring home and eat throughout the week. Most all of them made an appearance in today's salad: beets, carrots, green beans, cukes, arugula, and tomatoes, plus some dill and parsley. 
Garden Veggie Salad with Sardines: Assemble whatever veggies you've got!

Handful arugula
1/2 carrot, sliced
1/2 cucumber, sliced
Cherry tomatoes, halved
1 Sliced boiled beet*
Blanched green beans**
Fresh herbs: dill, parsley
Tin sardines
Dressing: olive oil from sardines, sherry vinegar, mustard, mayo (opt), salt, pepper.

*Beets: I've been boiling my beets in one batch each week so that I can have sliced beets whenever I want. They are great in so many ways, or plain with a little vinegar, olive oil, and salt.Bring pot of water to a boil. Put in beets (skin on) and boil for 30-45 minutes, depending on size, until tender. Remove and chill in cold water; remove beet skin with thumb.
**Green Beans: Add green beans to boiling water for 1-2 minutes; remove and cool in cold water.

9.05.2013

Venison Liver with Onions, Bacon, and Sage

After a year of some concerted effort to eat more of it, I have come to enjoy and savor the flavor of liver. Eating liver makes me feel happy and nourished, like I am being good to my body. I love when I cook it just right and it tastes perfectly tender. This recipe is my current fave - using whatever kind of liver (venison, chicken, calf, lamb) - especially now when there is abundant fresh sage. I did try this with beef liver too - and it was still pretty good, but you know, liver-y. The venison livers I have are often from younger deer, so they resemble calf more than full grown beef. Beef livers are a bit full flavored. Whichever liver, I have finally learned to cook it well, which is to say, I have learned not to over-cook it. As Jennifer McLagan writes in Odd Bits, "Seared crisp on the outside and meltingly tender on the inside, enriched with butter and spread on toast or quickly grilled with a warm and creamy center - well prepared liver is sublime." Yes. Sublime. 


This recipe (originally for calf's liver) is from Odd Bits, a cookbook I am hoping to explore more this winter. It is a cookbook full of recipes to cook the "odd" parts of an animal: tongue, sweetbreads, brain and tripe - among MANY others. I am currently happy in the liver section, whose introduction asserts that every cuisine has a liver specialty. I have looked up some of the ones she mentions, plus a few others to return to for liver inspiration later:  
Dulet Photo
The last one is the one I am most intrigued by, at least at this moment. I have not found a recipe, but the link above likens the dulet to kitfo, which I may have mentioned once or 1000 times that I LOVE, and in fact the author of the link prefers the dulet. I did find that Dilla's on the west bank in Minneapolis serves Dulet (neither Fasika or Blue Nile do), so maybe it is worth venturing there. In the meanwhile, I will enjoy this liver and onions take on things (modified slightly from Odd Bits):

Venison Liver with Onions, Bacon, and Sage
Serves 2
2 thick slices bacon, double smoked if possible
1/4 c duck fat (I used butter)
3 onions, halved and thinly sliced
Coarse sea salt and freshly ground pepper
16 sage leaves, finely shredded
9 oz liver (or more!)
coconut flour
1+ T sherry vinegar

1. Cut the bacon into 1/4 inch strips. Heat half the fat in a frying pan over medium heat and add the bacon and onions. Season with salt and pepper and cook, stirring often, until the onions are softened and colored, then stir in the sage and keep warm in a 200 degree oven. *For best results and added fussiness, also put two dinner plates in the oven to warm.
2. Dust the liver slices lightly with coconut flour (you don't need much) and season with salt and pepper. In another frying pan, just big enough to hold the liver slices, heat the remaining fat over high heat. When the fat is hot, add the liver and cook until you see beads of blood on the top surface of the liver, 45 seconds to 1 minute, turn and cook on the other side for about 30 seconds, or until you again see beads of blood form. Transfer the liver to (warm) plates.
3. Add vinegar to the pan, stir to deglaze, scraping up the browned bits, and then add the pan juices to the onion mixture. Top the liver with onion mixture (or as in my photo, top onions with liver) and serve.

9.03.2013

Paleo Corned Beef with kraut, pickles, and 1000 Island

I went on a spontaneous Superior Hiking Trail adventure last weekend, which turned out to be great and also had quite the large Plan-Reality-Gap. After leaving the car at the end point and biking down 61 to the start point, My Charming Companion and I set off hiking a bit late in the day. After a couple of hours, and thinking "we must have just missed that first camp site" - we came upon said first campsite and were somewhat astonished that it had only been 2 miles. We proceeded to camp there because going another 2 miles to the originally planned spot on Bear Lake would have meant arriving after dark. I found my lack of "hiking-mile" comprehension totally amusing, because even after reading in the guidebook to plan a mile an hour, I thought for sure we were going faster than that, and also that much more time had passed than actually had. ?!

After descending into a valley that was filled with really wet wood, dinner was cooked over a fire that was kept alive by ongoing deep breathing onto the fire and lots of birch bark - which sort of extended the hilarity of the evening. Thankfully there were copious amounts of dead birch trees all around us, so there was no shortage. As I was falling asleep that night, (after washing off with my bandana and a pan of water so that my body no longer stuck to itself and anything else it touched), My Charming Companion turned to me and said, congenially, "You're crazy if you think I am going to hike 10 miles tomorrow!" which is what would have had to happen in order to get to the car at the end point, and which I was still totally considering. Again, so funny because 10 miles doesn't sound far in a whole day, but based on those 2 miles in, omg! Really far.

Instead of 10 miles, we decided to leave our packs where we were and hike a 4 mile loop to go swim at the camp spot on Bear Lake. There were lots of wild berries along the way, and the swimming was lovely. We then picked our packs up again and hiked the same 2 miles out that we had come in on the evening before. All of this took most of the day (you might think that 4 miles without packs would be pretty easy, but still no! There were steep climbs and it was hot), and was followed by a bike ride back to the car, parked at what we could call the "endpoint" but what was now just a place where the car was parked so we could bike 8 miles there and back on each end of the hike. ha! I still find it all quite funny. My Charming Companion decided that his actual hiking distance was best calculated by dividing how far he thinks he can hike by 4, whereas my calculation was to divide by 2 (I had lower mileage expectations to begin with).

Wild Blueberries! so tiny.
In the end I feel excited to go on some more weekend hiking trips (I bought the book from the Trail's main office in Two Harbors) - this time utilizing some new found tenets:
1. Consider parking at one place and do a loop. Fun!
2. Calculate actual hiking mileage according to new formula so as to at least approximate something bordering a realistic distance.
3. Pack extra food in case you "choose" to stay another night (I use "choose" quite loosely here. It seems more likely that an extra night would choose you)

This is the lake we swam in, after hiking up out of it!
One other highlight of the weekend was stopping at Northern Water Smokehaus in Duluth for lunch. We shared a delicious smoked lake trout basket with scallion cream cheese and gluten free toast (made At Sarah's Table - though to go grain free you could get cucumbers in lieu of bread), and also bought some corned beef to take home for dinner. Omg -- this dinner! I am not sure where to buy corned beef in town, but I am planning to try making my own sometime later this fall and will post it when I do. However you procure some - this pile of meat with homemade fixings is to. die. for.

Assemble your ingredients: sliced corned beef, cucumber pickles and sauerkraut (ideally with caraway), and some homemade 1000 Island Dressing - see below. You want to heat up the corned beef, but very very gently since it is so tender and already cooked. I put a little bacon fat with part water/part pickled onion juice (you could use any pickle juice, or just water) to heat in a medium saucepan. When it boils, turn it to low to simmer, and gently put the corned beef mound on top. You are essentially steaming the corned beef so that the fat becomes translucent. Cover the pot to steam, and turn meat over after 3-4 minutes to get the other side. Again: be gentle to keep the slices intact! After both "sides" have cooked for 4 minutes or so, it should be nicely heated and ready to serve with the tasty sides. I had mine with sauteed green beans. YUM!

For 1000 Island Dressing: mix together about 1/4 c. homemade mayo, 2 T tomato paste, 2 tsp mustard, some cider vinegar, and a good amount of salt. You could put diced pickles in there too, but since I was eating mine on the side, I skipped it.  I have not had 1000 Island in years - this turned out so delicious that next time I will make extra for some future salad dressing!

Pile o' meat with pickles, kraut, dressing, garden tomatoes, and green beans.

8.30.2013

Cucumber Sardine Boats

Happy over-the-hump of the heat wave! Earlier this week I looks at the temps, and seeing all those hot red sun images on the 7-day-forecast (they are gone now) inspired me to think about going up north for the weekend. There is a high of 75 along northern Lake Superior (think Beaver Bay and Grand Marais) - but still hot in Ely and inland from the Lake. So I think My Charming Companion and I are going to try a spontaneous mini Superior Hiking Trail trip for a couple of days. I have never hiked the trail, so this seems a very mild introduction to see how it goes. I haven't actually been hiking in close to 10 years, and my backpack was quite cobwebby when I pulled it out of the garage. But 2 days!? Why not.

I bought a roasted chicken so that I could just eat that (cold) all week rather than cook. And I've had smoothies and cobb salads (with cucumbers instead of cheese & avocado), lots of pickles, and sardine salad boats - aka, sardine salad in a cucumber. They are easy to eat, sort of akin to an open faced sandwich, and perfect on a 95 degree day. You could also do the filling in small cucumbers for a festive appetizer or potluck sort of item. You know - anything easily picked up and eaten makes a good candidate for a potluck.

Wild Planet sardines are on sale at the Co-ops again - only $2 each (I think only til Sept though). I bought more than a case full because it seems handy to have these on hand. I started using sardines in place of canned tuna for "tuna" salad just because sardines are more sustainable and are so good for you. Sardine salad is a little more wet - though I imagine that is partly because I get them packed in oil as opposed to the water packed tuna.

Cucumber Sardine Boat
2-4 cucumbers (depending on their size), sliced in half, seeds removed
One tin sardines
2 T Mayo
2 T Fresh herbs: I used Dill and Parsley, chopped
Either pickles or olives, chopped
2 T red onion, minced
1 tsp mustard
salt and pepper to taste
2 T Toasted pistachios, chopped

Mix everything but the pistachios (and cucumbers, obviously!) in a bowl. Spoon into hollowed/de-seeded cucumber "boats" and sprinkle with pistachios.

To-go cucumber boats!

8.29.2013

Milkweed Pods

I just learned that milkweed is a delicious edible plant, thanks to Samual Thayer's book called The Forager's Harvest. Milkweed - that I just pulled tons out of from the garden because it was taking over the raspberry bushes and gets super tall, but is so pretty with it's bright green stalks and flowery bunches and big pods. Each fall I take a client or two on a river walk and we look for milkweed pods to open up so we can feel the soft seeds inside.

Collect the tiny seed pods to eat
And it turns out milkweed is edible in lots of ways: the early small shoots, the flowers (are apparently the best), immature pods, and the seeds. I missed the previous two (though some shoots are still coming up in the garden, so maybe I'll try them), but I tried some seed pods last week. They had a nice texture and tasted almost like chewy green beans - maybe a little okra-esque, but not slimy.

While biking from the northside homestead to my house on Sunday, My Charming Companion and I gathered a bunch of mini pods along the Mississippi. They are starting to get too big already - but you want to seek out pods that are just an inch or 1 1/4" long. That is pretty small since the pods get to about 4". There are often 4-8 pods on a plant, so the collecting is pretty quick work, though you do get sticky "milk sap" on your hands from picking them.

Apparently milkweed pods get tough and hard pretty quickly once picked, so you will want to eat them within a day or two of picking them. I wanted to eat them very simply this first time, so just sauteed/steamed the pods with water and a little fat, and used only salt for seasoning. They were really good.

The seeds inside the immature pods
Here you can see the seeds from an immature pod. When the pods are bigger than 1 1/4" you can eat the seeds - apparently cooking them in water creates a cheesy sort of sauce. I haven't tried it yet, but sounds interesting.


I put the pods in a cast iron skillet with some bacon fat, and turned the burner on medium. They sucked up the fat right away (like eggplant does), so I added some water and put a cover on the pan. They sucked that up too so I added more until they seemed able to steam and saute just a bit. The total cook time was about 5 minutes. Putting them in boiling water for 5 minutes would also work.


Here are the finished, sauteed pods. Sprinkle with salt and eat!

8.27.2013

Arugula pistachio pesto

I enjoy pesto in pretty much all incarnations: basil, radish leaves, cilantro, and now arugula. My arugula bolted weeks ago, but I've still been eating it in salads and I generally don't mind the extra spice. I have a lot though, and the pesto seems a nice way to temper the pepper of the arugula, even the already bolted kind. I am not a raw garlic eater so I didn't add any, but go ahead if that is your thing. You could also add romano or pecorino cheese, though I didn't miss them here.


Arugula Pistachio Pesto
3+ cups packed arugula
1/2 c. pistachios
1 tsp salt
1/2 c olive oil

1. Toast pistachios in a 400 degree oven for 5-10 minutes until brown (or on cast iron skillet on the stove top, stirring often). Allow to cool. (You can skip toasting the pistachios, but it adds more flavor depth and is extra tasty when you do.)
2. In a food processor, blend arugula and toasted pistachios. Pulse several times to chop and mince the nuts and greens. Add salt and olive oil and pulse again until a nice paste.


I love pesto on green beans (just steam the beans for a few minutes and than stir in the pesto) and also on eggs with some cherry tomatoes. The pesto would also be good on chicken, sauteed zucchini, a tomato salad - endless possibilities!